The Complete Guide to Google AdWords Conversion Tracking
by Jacob Baadsgaard • February 20, 2018
Pop quiz: When it comes to AdWords conversion tracking, is it enough to just track how many clicks your ad is getting?
Got your answer in?
If your answer was “no,” you’re correct. Clicks only tell you how many people clicked on your ad, not how many people acted on it once they were on your site.
Clicks can tell you a lot, but there’s often a difference between the number of clicks and conversions any given ad receives. It’s like the difference between someone walking into your store, but walking out without purchasing. Even with Google AdWords, that happens more than you think, and being able to assess the difference between those two metrics is important.
You can’t track conversions accurately on Google AdWords without installing their conversion tracking code on your site. Fortunately, this is exceptionally easy to do and we’ll show you how. In this post, we’ll walk you through installing and customizing AdWord’s conversion tracking code to best measure and evaluate your campaigns.
What Can Conversion Tracking Tell Me?
Google AdWord’s conversion tracking pixel is a small snippet of code that you’ll install on the pages of your site. This pixel will fire when users click on an AdWords campaign and then visit certain pages to trigger the conversion tracker.
If you want to track sales, for example, you’d place a specific snippet of the code on the “Thank You For Your Order” page of your website, which users will only see if they’ve made a purchase. Similarly, if you want to track quote estimates or email sign-ups, you’d place trackable codes on the confirmation pages for those actions.
The conversion tracking pixel is the most effective way to see what results your AdWords campaign are driving.
How to Set Up AdWord’s Conversion Tracking
Getting the Google AdWords conversion tracking pixel up and running on your site will require two different steps: creating the conversion tracking pixel and then installing it.
Creating an AdWords Conversion Tracking Pixel
Start in your AdWords dashboard, and then navigate to the Tools tab. Choose “Conversions,” which is found under the Measurement section.

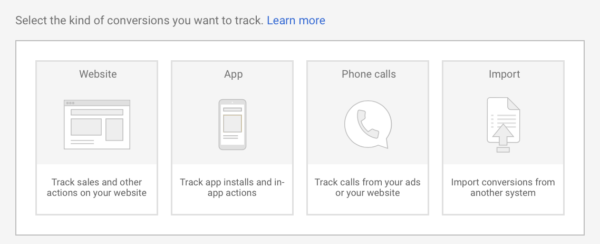
You’ll be asked to create a new conversion type, with the first step being to choose the specific kind of conversion you want to track. For this example, we’ll track sales happening on your website.
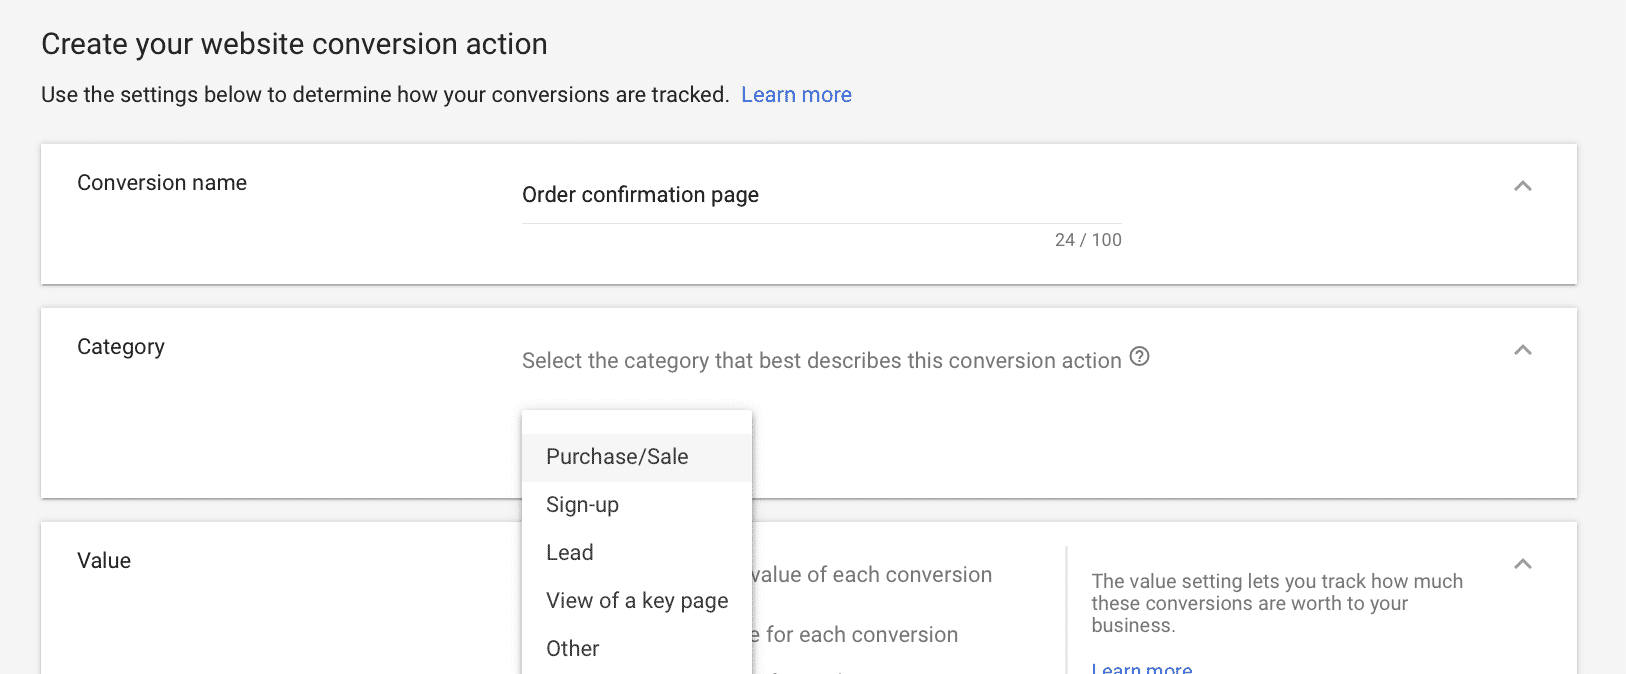
Next, name your conversion and choose the category your conversion falls under. This can include a purchase or sale, a sign-up, a new lead (like someone requesting a quote or more info), or the view of a key page.
Under this, you’ll set a value for your conversion. You can choose to enter in the same value for each conversion, or use different values for each conversion to track the ROI of your campaigns automatically.
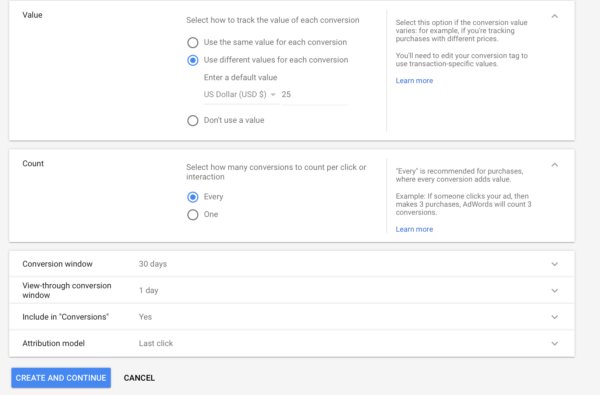
If you choose to enter in different values for each conversions (which you may do if you sell a lot of items that fall at different price points), you’ll have to edit the conversion tag to use transaction-specific values.
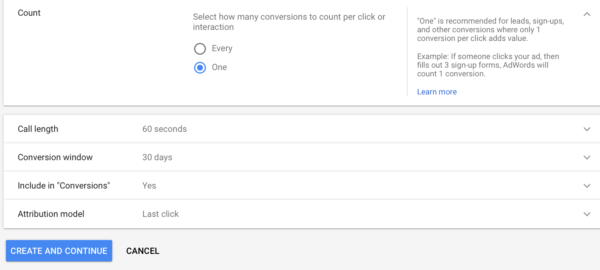
You can also choose if you want to count multiple conversions from a single click as just one, or multiples. After this, you’ll be asked to choose your conversion window so your AdWords can receive proper attribution. There are multiple attribution models you can choose from, which you can read about here.
How to Install the Conversion Tracking Pixel
When you’re ready to install your AdWords conversion tracking pixel, you’ll see two things. One will be your global snippet, which you can place on all pages of your site. This will be used for remarketing in addition to conversion tracking.
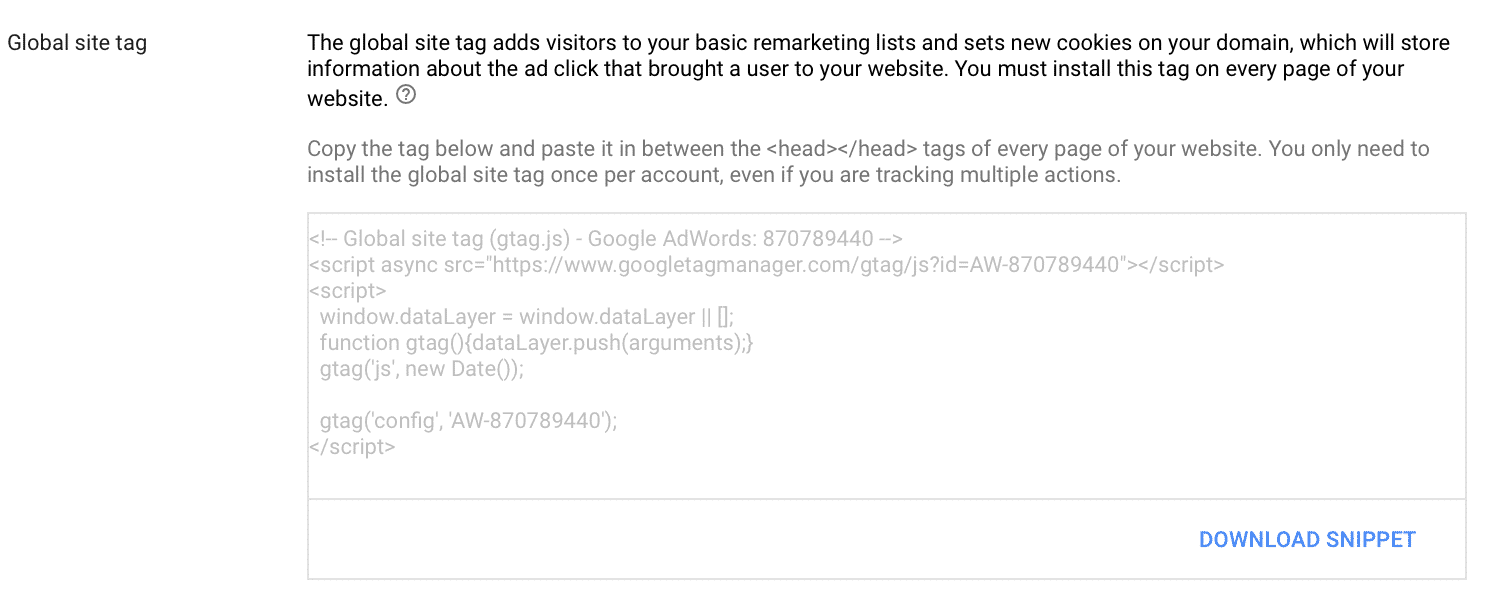
Underneath this, you’ll see the Event Code. This is the snippet that specifically tracks different types of conversions to report back to you in detail. The event snippet will be placed immediately after the global site tag on the specific pages between the <head>/<head> tags that you want to install the event code on.
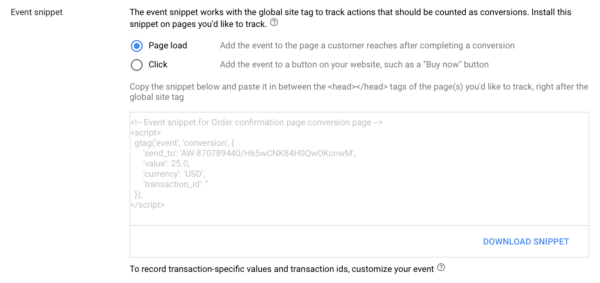
Once you have this code, I like to cheat and use WordPress plugins like Insert Headers and Footers.
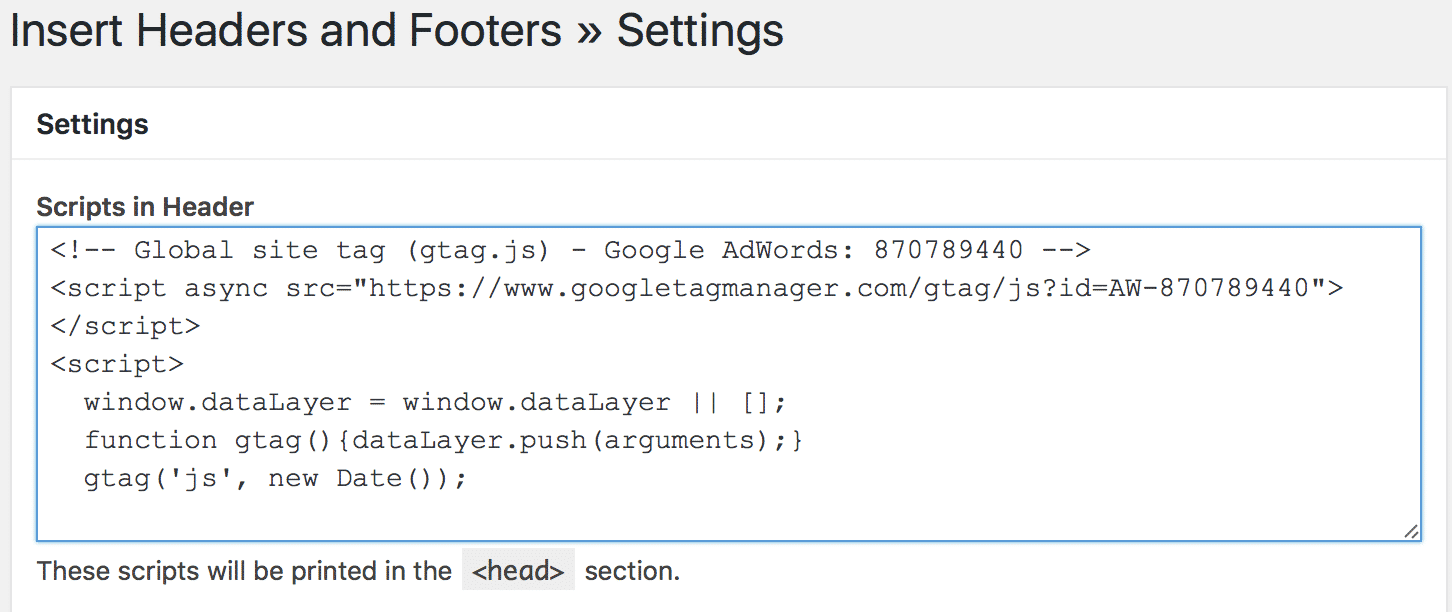
These plugins allow you to just paste the code into their designated area, and the code will be applied to the pages of your choice without you ever having to mess with the site’s backend coding or hiring someone else to do it for you.
Do I Need to Create a New Code for Each Type of Conversion?
Your global snippet will always stay the same. You can place it on every single page of your site even if those pages don’t signal conversions.
That being said, if you want to accurately track different types of conversions like sales and phone calls and leads, then you’ll want to create unique event codes to place on specific pages on your site. Only with these specified codes will you be able to get a full picture view of your AdWords campaigns’ effectiveness.
To create these new conversions, you’ll simply follow the steps above. Your choices for conversions tracked include:
- Actions taken on your site, including views of a key page, sales, purchases, sign-ups, or leads generated.
- App installs or in-app purchases.
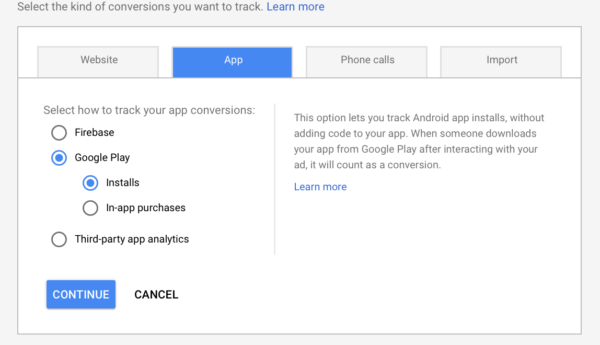
- Phone calls made, either through your app or your site. For phone calls, you can require that calls must last a set amount of time—like 60 seconds—in order to qualify as a conversion.
Final Thoughts
Google AdWords conversion tracking can only truly happen with the conversion tracking pixel. Without it, you won’t be able to get an accurate look at how your campaigns are concretely affecting your sales and bottom line.
Installing the codes—even the customized codes—only takes a few minutes, making it a time investment that’s well worth the effort. With the information the conversion tracking provides, you’ll be able to optimize all your campaigns for better results.
Need more help with your AdWords campaigns? Shoot us a message and see how we can help you.
What do you think? Do you use conversion tracking on Google AdWords? Do you have the custom codes installed to better track specific types of conversions? Share your thoughts and questions in the comments below!


