The Step-by-Step Guide to Google Analytics for Ecommerce
by Ana Gotter • May 22, 2018
Google Analytics is an undeniably powerful tool all on its own. Even its most basic, easy-to-set up functions can show you things like how much traffic is coming to your site, where they’re coming from, and how they’re interacting with your site.
All of this is so important and helps you to track problem areas on your site and what’s causing people to leave early instead of converting.
That’s all well and great and that’s all some sites need in order to benefit from the data reporting platform. For ecommerce businesses, however, that information simply is not enough on its own.
You need to look at more than just how users are generally interacting with your site. You need to know how these actions specifically affect sales on different products. You want to be able to see how much revenue is being generated, how many transactions are happening, and more.
Google Analytics for ecommerce can show you that, but it’s not a built-in report. You need to set it up to specifically accommodate ecommerce tracking, and in this post, we’ll show you how.
Google Analytics for Ecommerce
Just to be clear, you don’t need to switch to a specialized version of Google Analytics for ecommerce businesses. You just need to set up your current analytics to better track the ecommerce side of your business.
To do this, you’ll take the current usage data and see how it interacts with information like transactions, revenue, and more. You can even see which marketing efforts are most effective at helping to drive these results.
For those unfamiliar with the platform, Google Analytics is a free tracking tool that lets you evaluate what actions are being taken on site and where your traffic is coming from. Its features go a lot more in-depth than that, but that’s the basic idea. All businesses—whether they’re selling from their site—should be using it.
Glossary of Terms
Before we dive too deep into this guide, it makes sense to explain some basic terminology you need to understand to use Google Analytics for ecommerce that may be different than the terms you’re used to.
Here’s the big ones:
- Per session value: Average fiscal value of a website session.
Total revenue / total sessions = PSV - Ecommerce conversion rate: The percentage of sessions that result in transactions.
(Total ecommerce transactions / total website sessions) x 100 = ECR - Ecommerce transactions: Purchase orders
- Transaction IDs: Individual identification for each specific purchase order
- Unique purchases: Total number of times a product or product set was part of a transaction
- Average order value: The average value of individual orders.
Total revenue / total transactions = AOV - Revenue: Profit after costs + shipping.
Product revenue + tax + shipping = Revenue - Quantity: Total number of units sold.
- Average quantity: average number of units of a product or product set sold in one transaction
Quantity / unique purchases =AQ
Where Can I Find My Tracking Data?
You’ll need to set up Google Analytics ecommerce tracking before you can access this data, but let’s take a look at where to find it and what it can tell you.
In Google Analytics, ecommerce and transactional data can all be found together, packed away under one neat little subhead. On the left-side navigation bar, go to Conversions, and then locate “Ecommerce” underneath it.
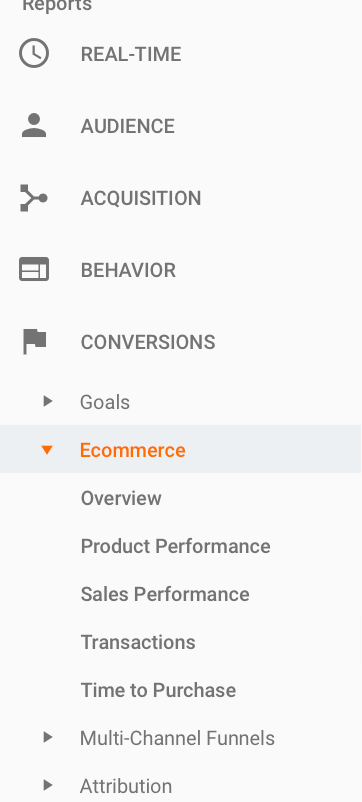
Under this subhead, you’ll be able to find product information, overall sales data, transactional information, shopping behavior, checkout behavior and how long it takes users to purchase on average.
Here’s what you can learn from the different categories:
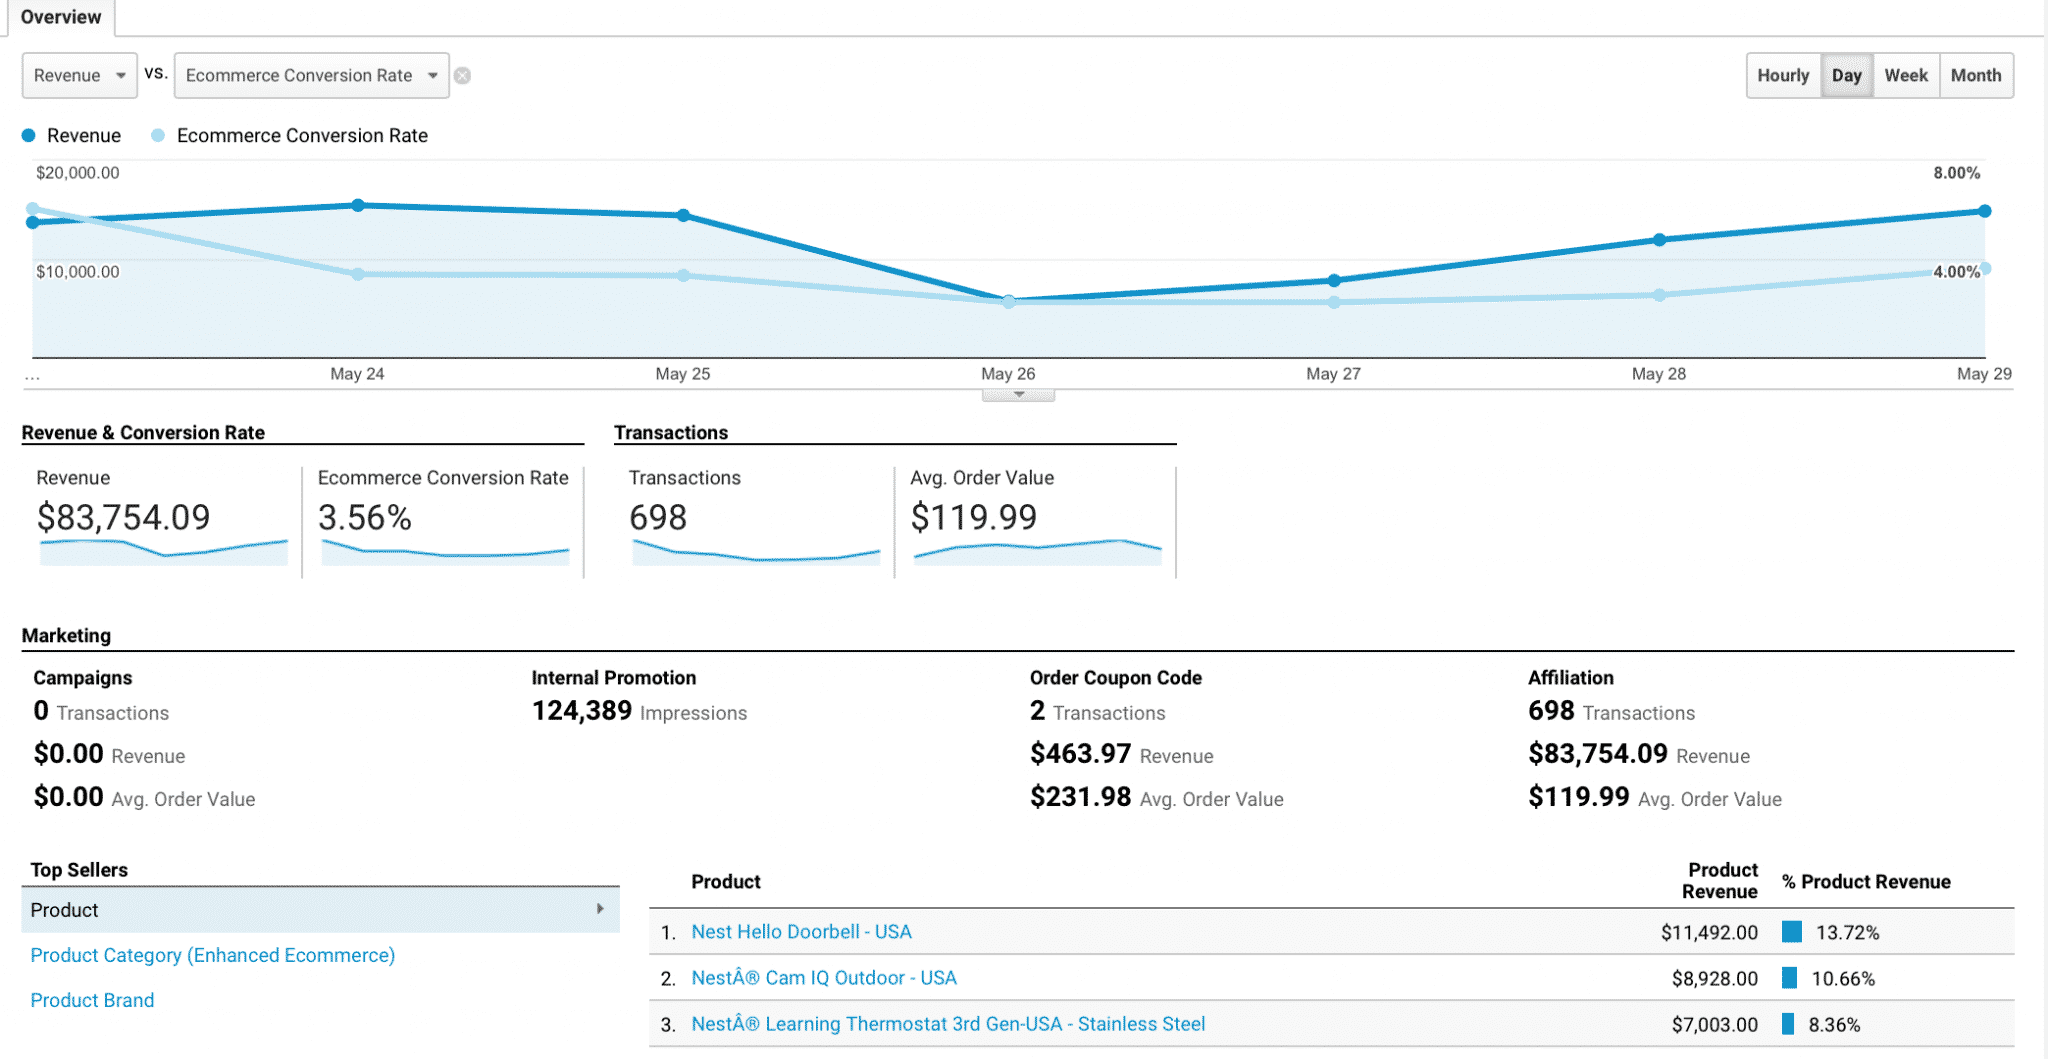
- The Overview tab gives you a quick but detailed look of everything happening with the ecommerce side of your business. This includes fast facts like transaction rates and coupon codes redeemed.
- The Shopping Behavior tab will show you how new vs. returning visitors behave when shopping on your site.
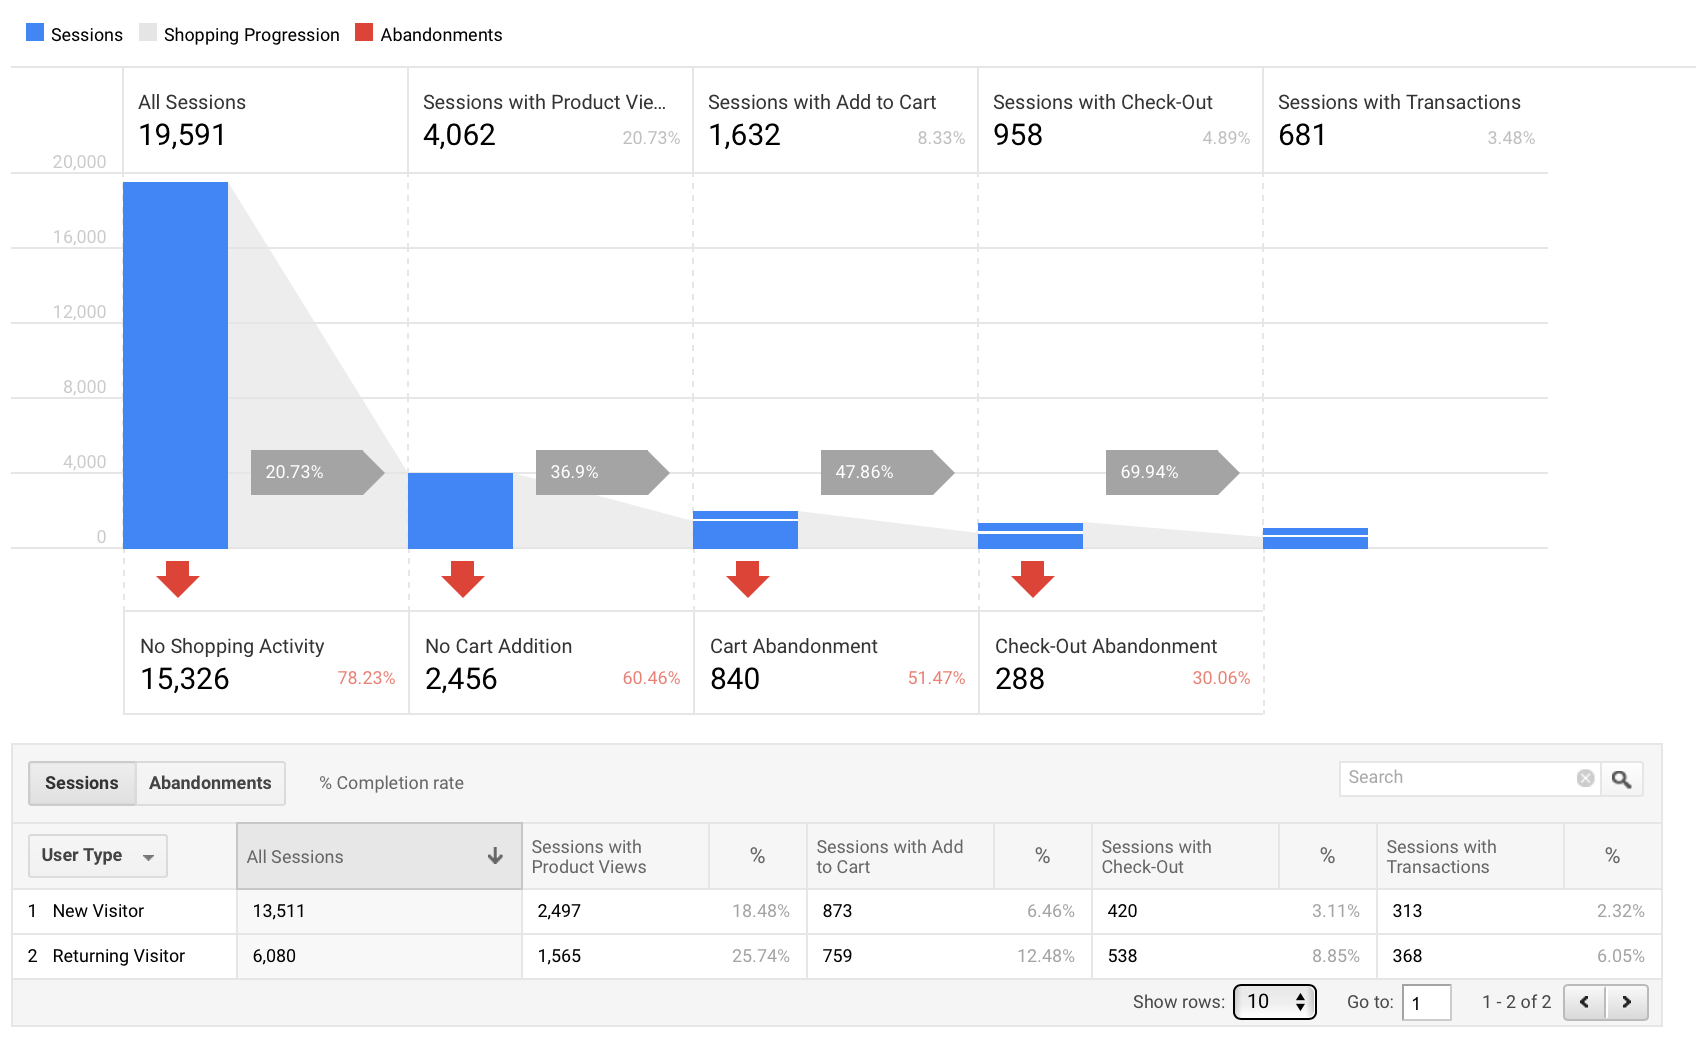
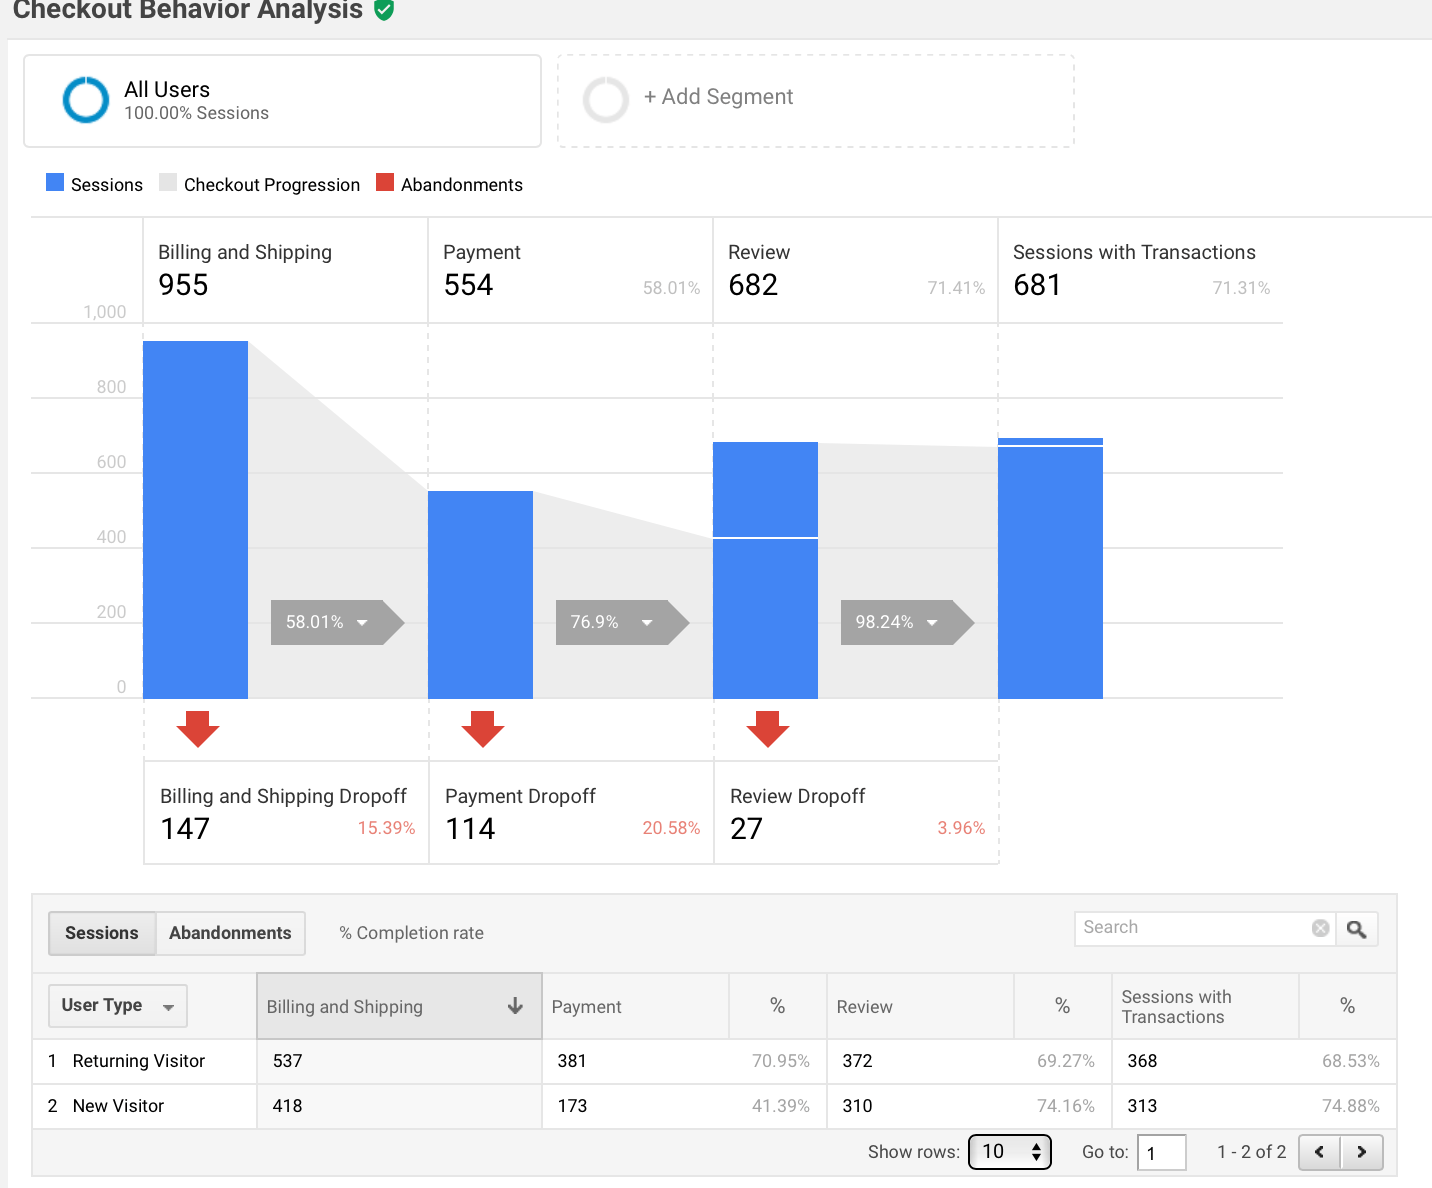
- The Checkout Behavior Analysis information will show you where users are dropping off during the checkout process. This can help you to determine why abandoned carts and non-completed transactions are occurring.
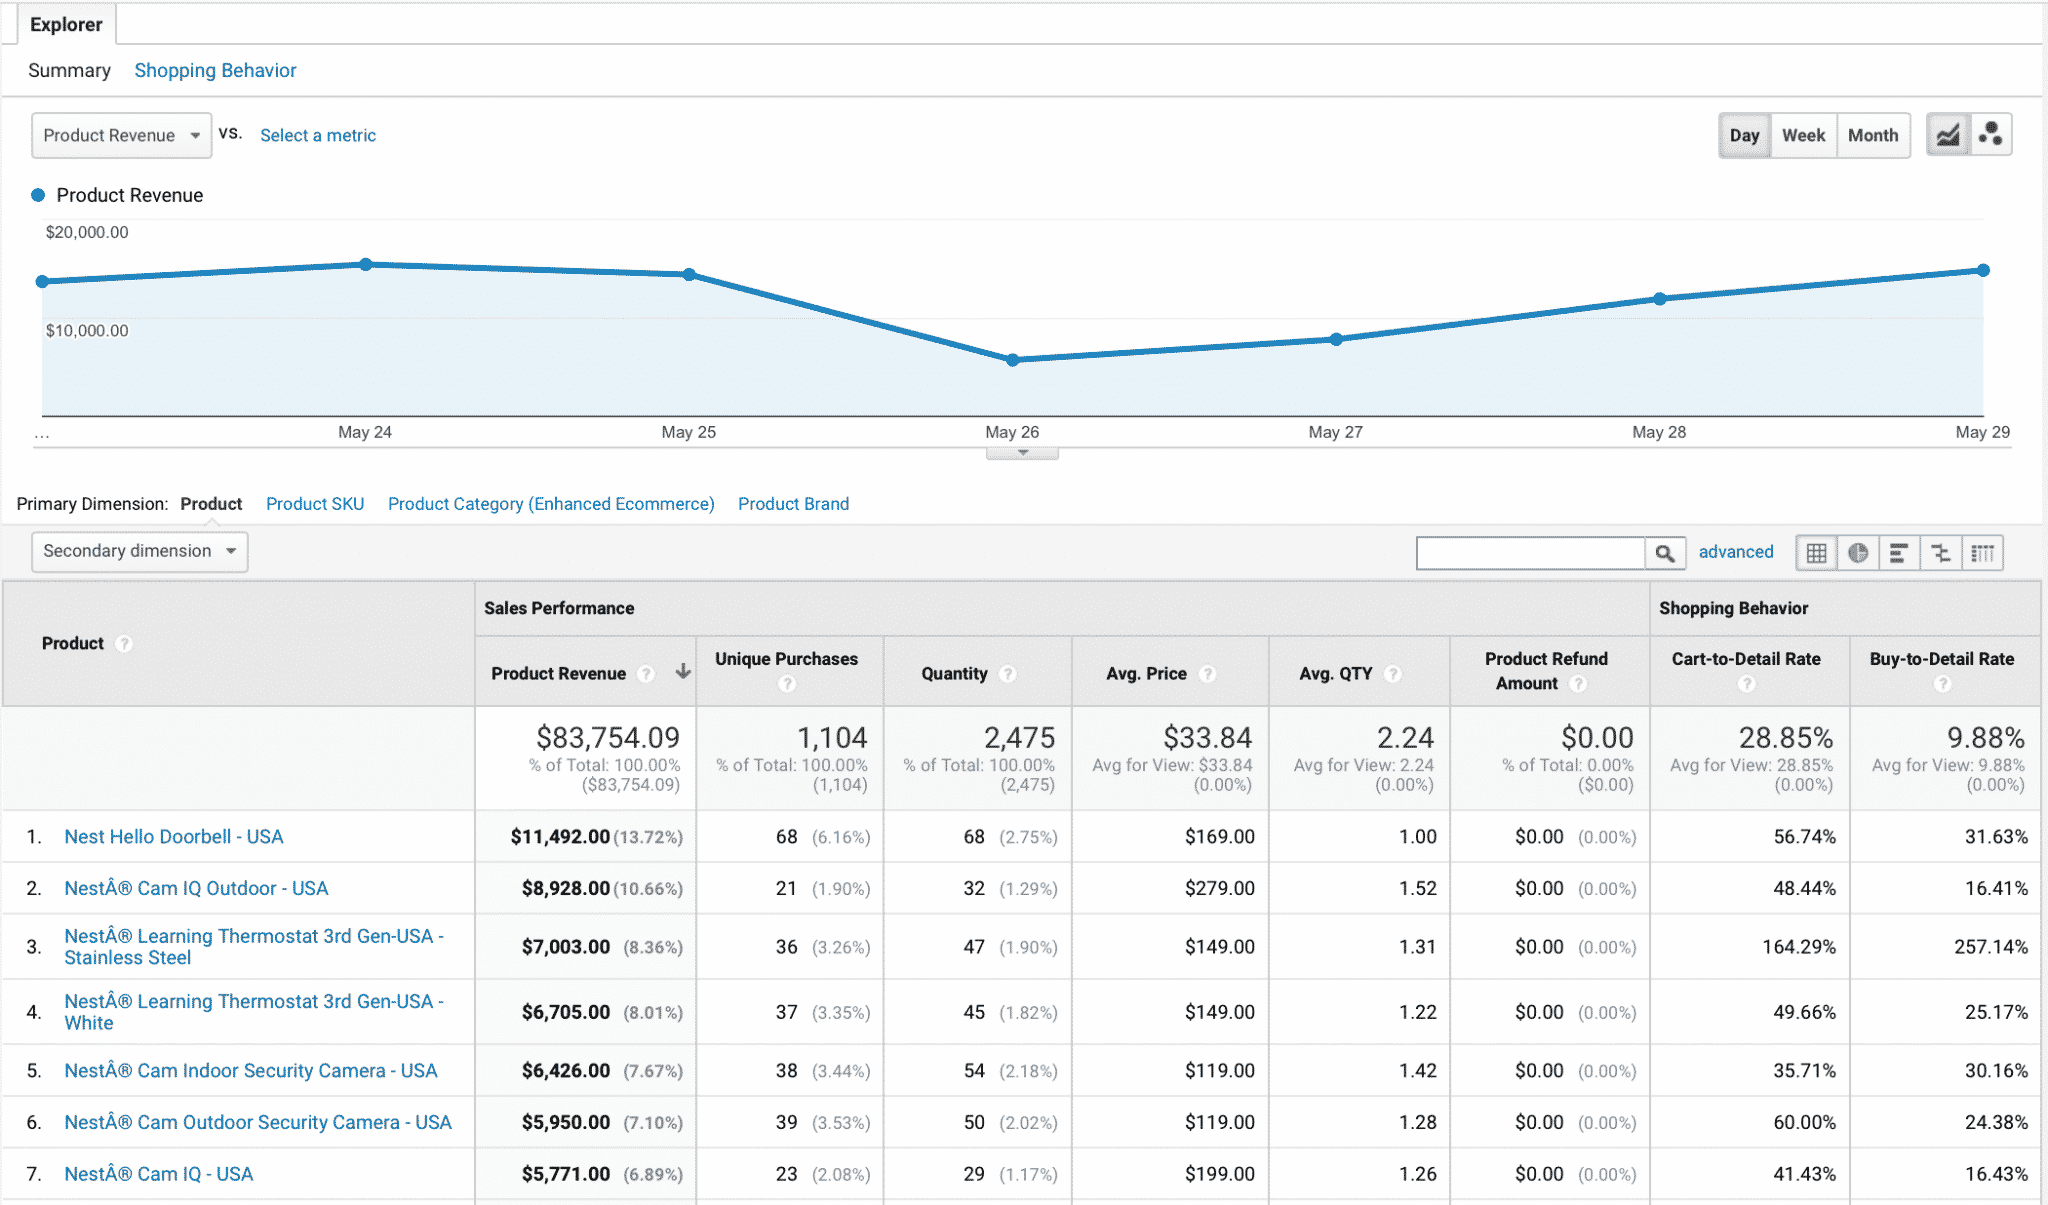
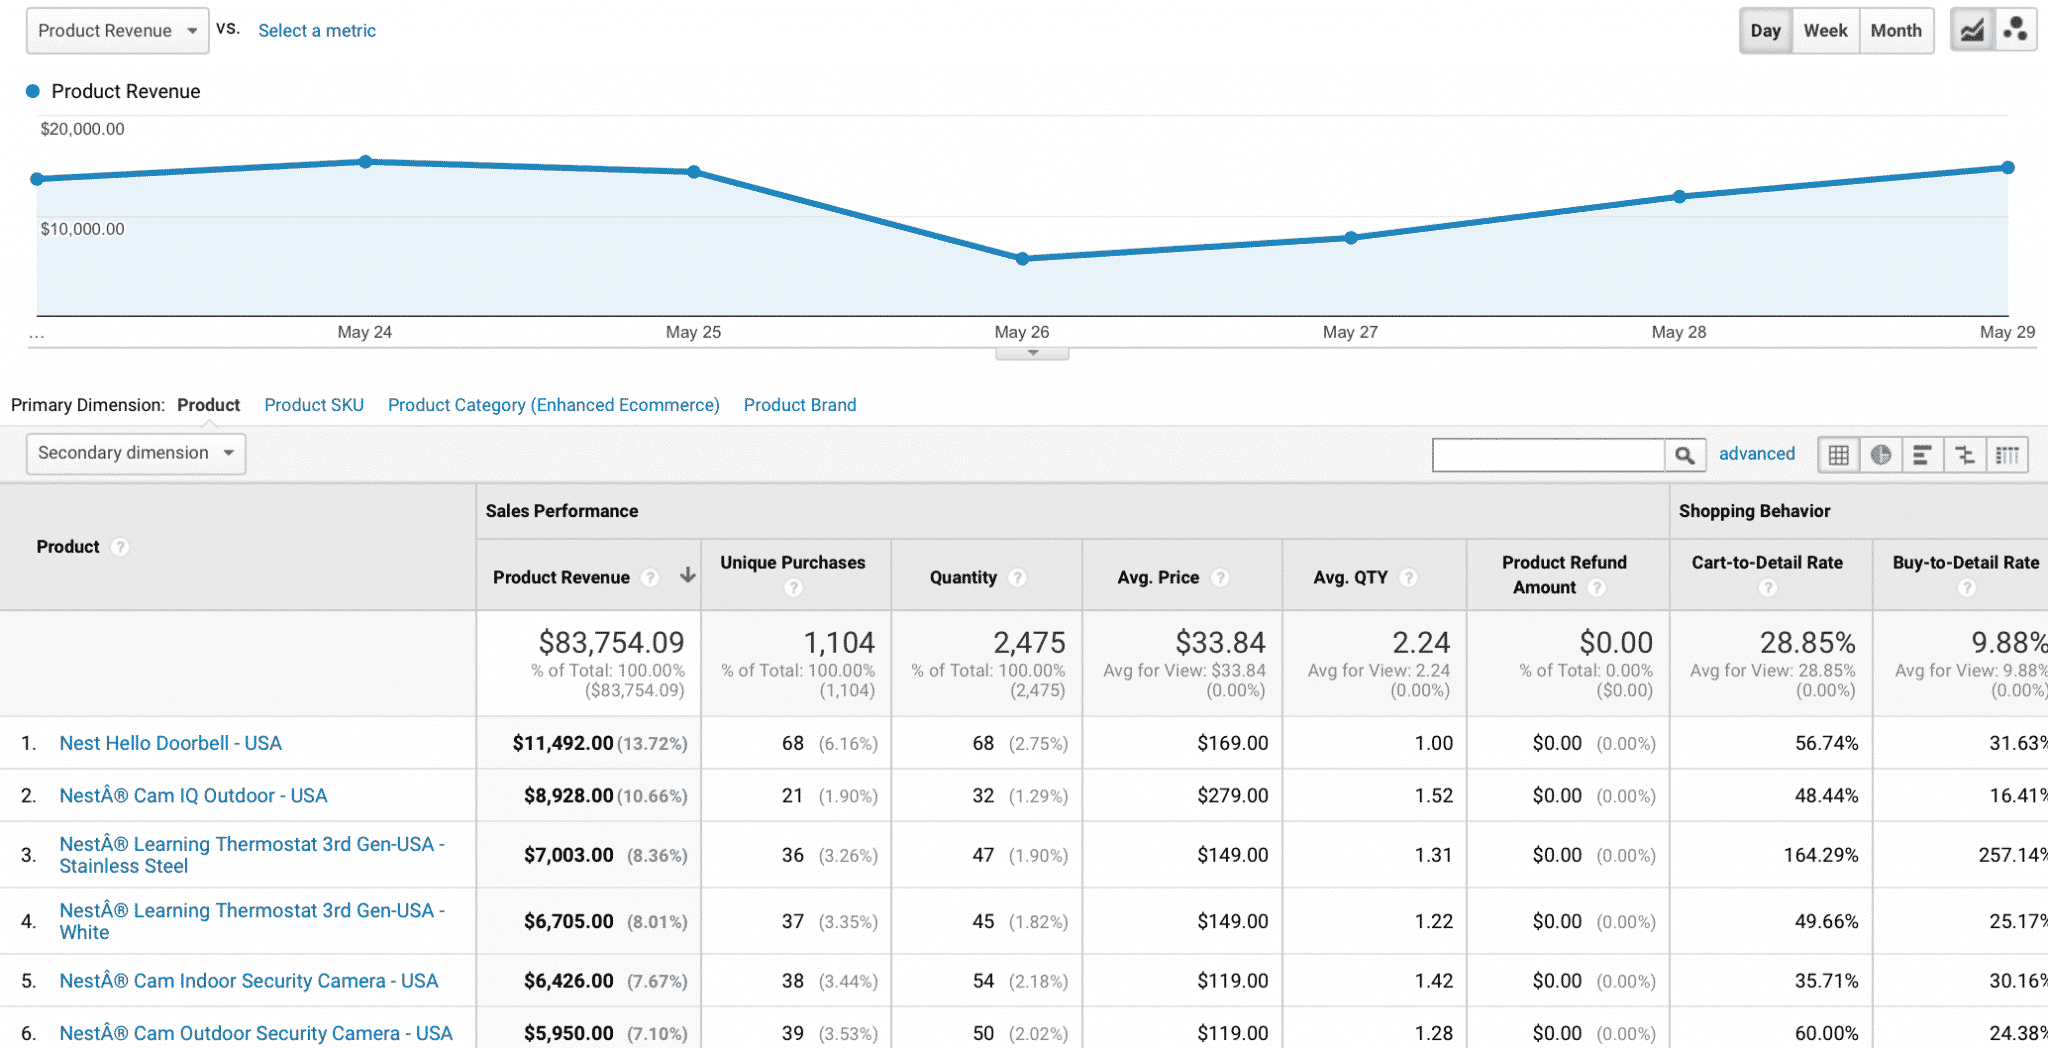
- The Product Performance tab is the holy grail for ecommerce businesses. It shows you how much each revenue each product has generated, the number of unique purchases and so much more.
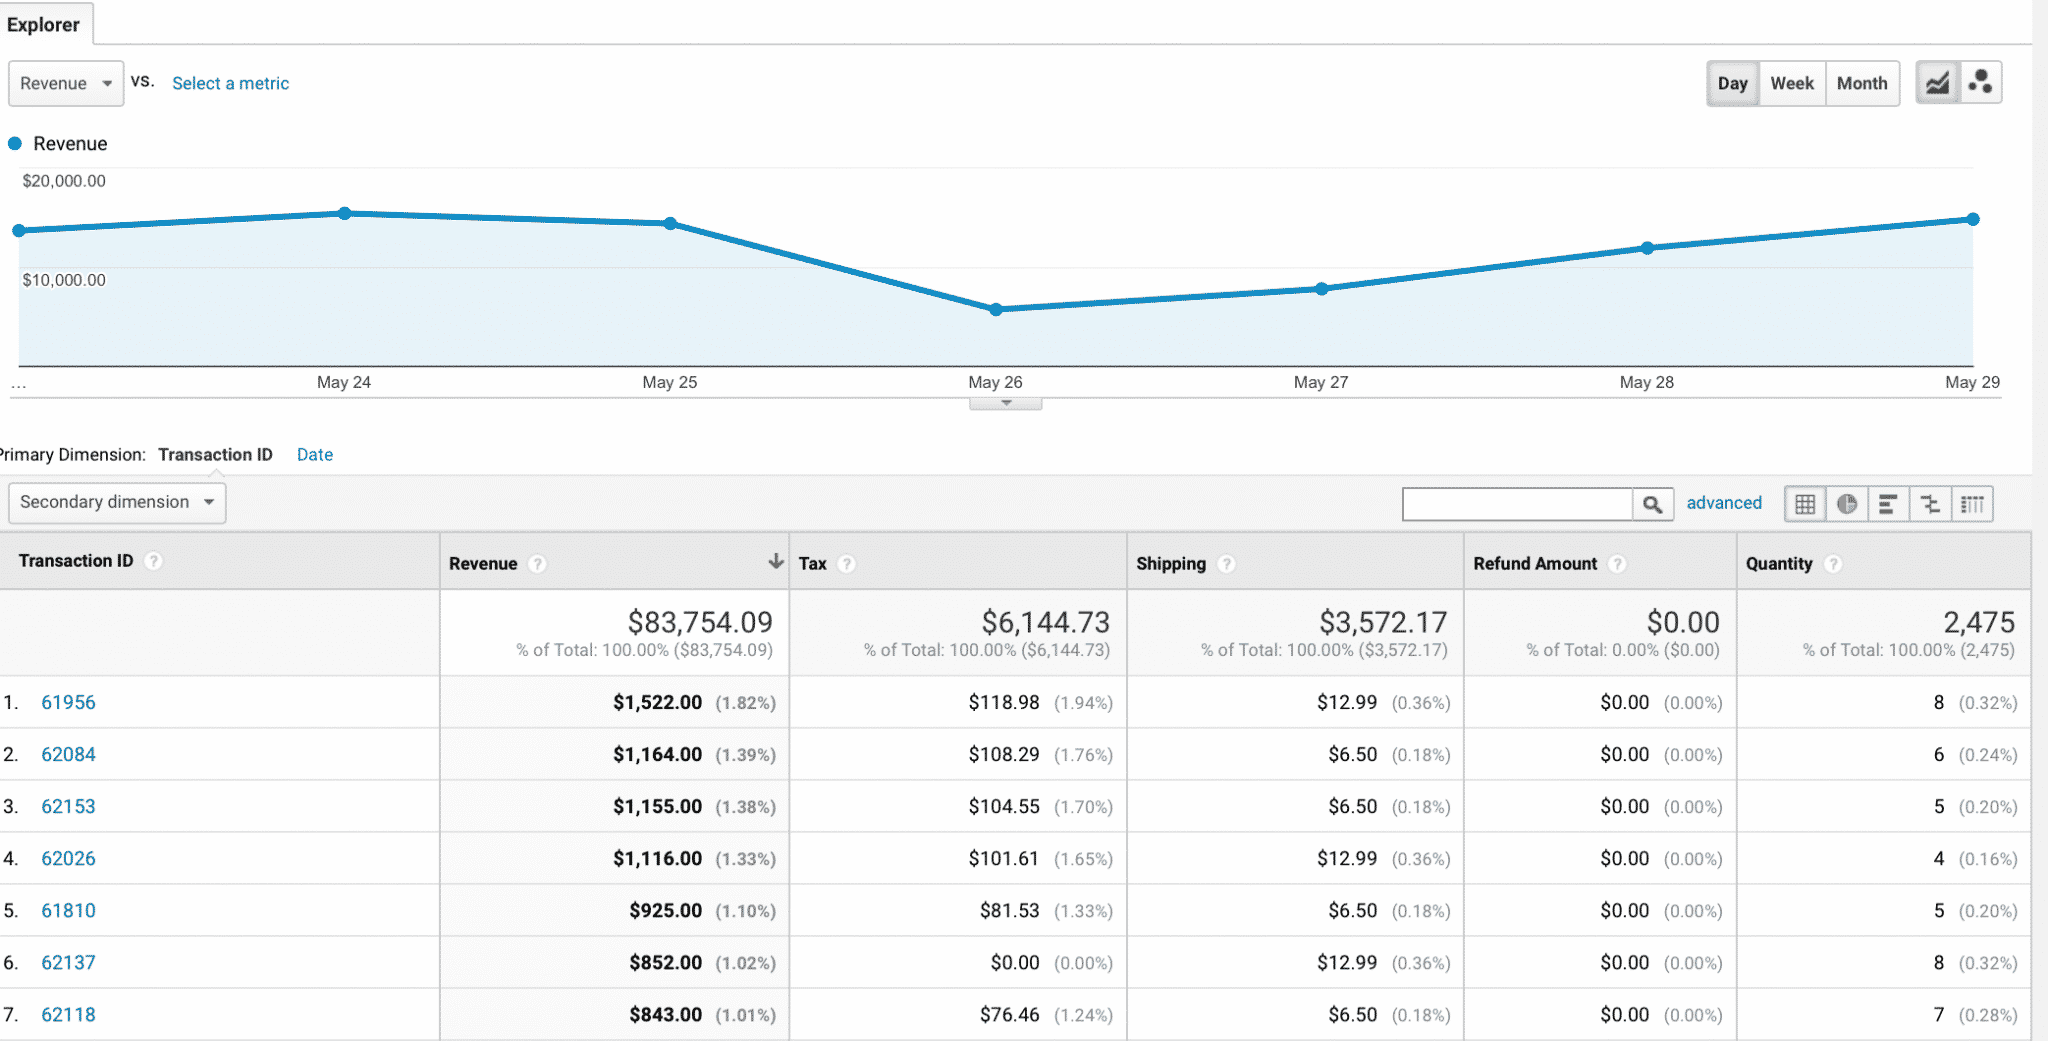
- The Sales Performance tab shows you sales and transactional information for individual product orders.
- Product List Performance gives you in-depth information on how each individual product or product set is performing.

How to Set Up Ecommerce Tracking
Now that you know what Google Analytics ecommerce tracking can do, it’s easier to see why it’s worth the time investment of setting it up. Don’t worry, this is easier than you’d think and we’ll take you step by step through the process right now.
Install Google Analytics
If you haven’t ever used Google Analytics for your business before, installing Google Analytics is the first step. If you already have it up and running, go ahead and skip to the next section.
Sign-up here. You’ll be asked to fill out basic information about your site and then you’ll be given an individual, unique tracking pixel. Highlight the entire snippet of code and copy it.
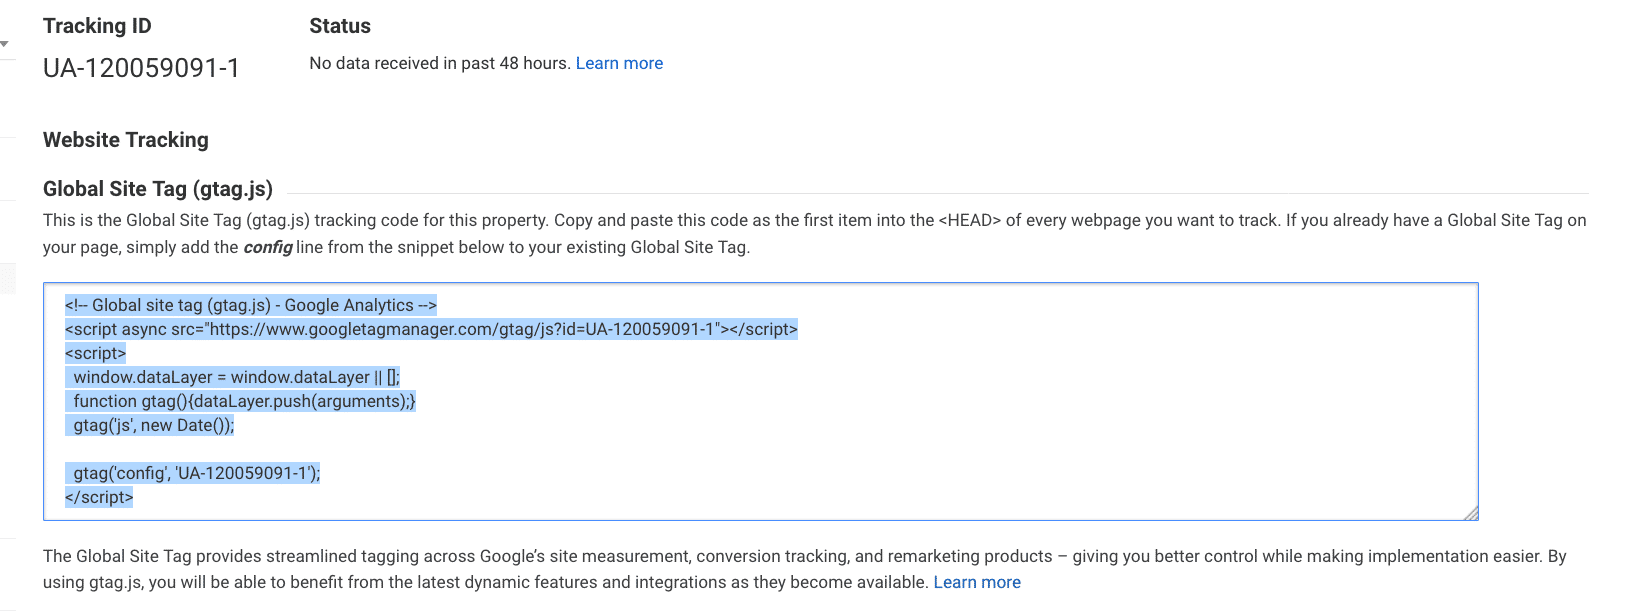
The easiest way to install Google Analytics on the site is use a plugin like Insert Headers and Footers for WordPress. This allows you to just place the code directly into the plugin and it’ll show up on every page of your site automatically so you can track it accurately.

Have a Shopify store instead? Installation is maybe even easier. Go to your Store, then navigate to Online Store, and then Preferences. You’ll see a box where you can paste your Google Analytics tag instantly.
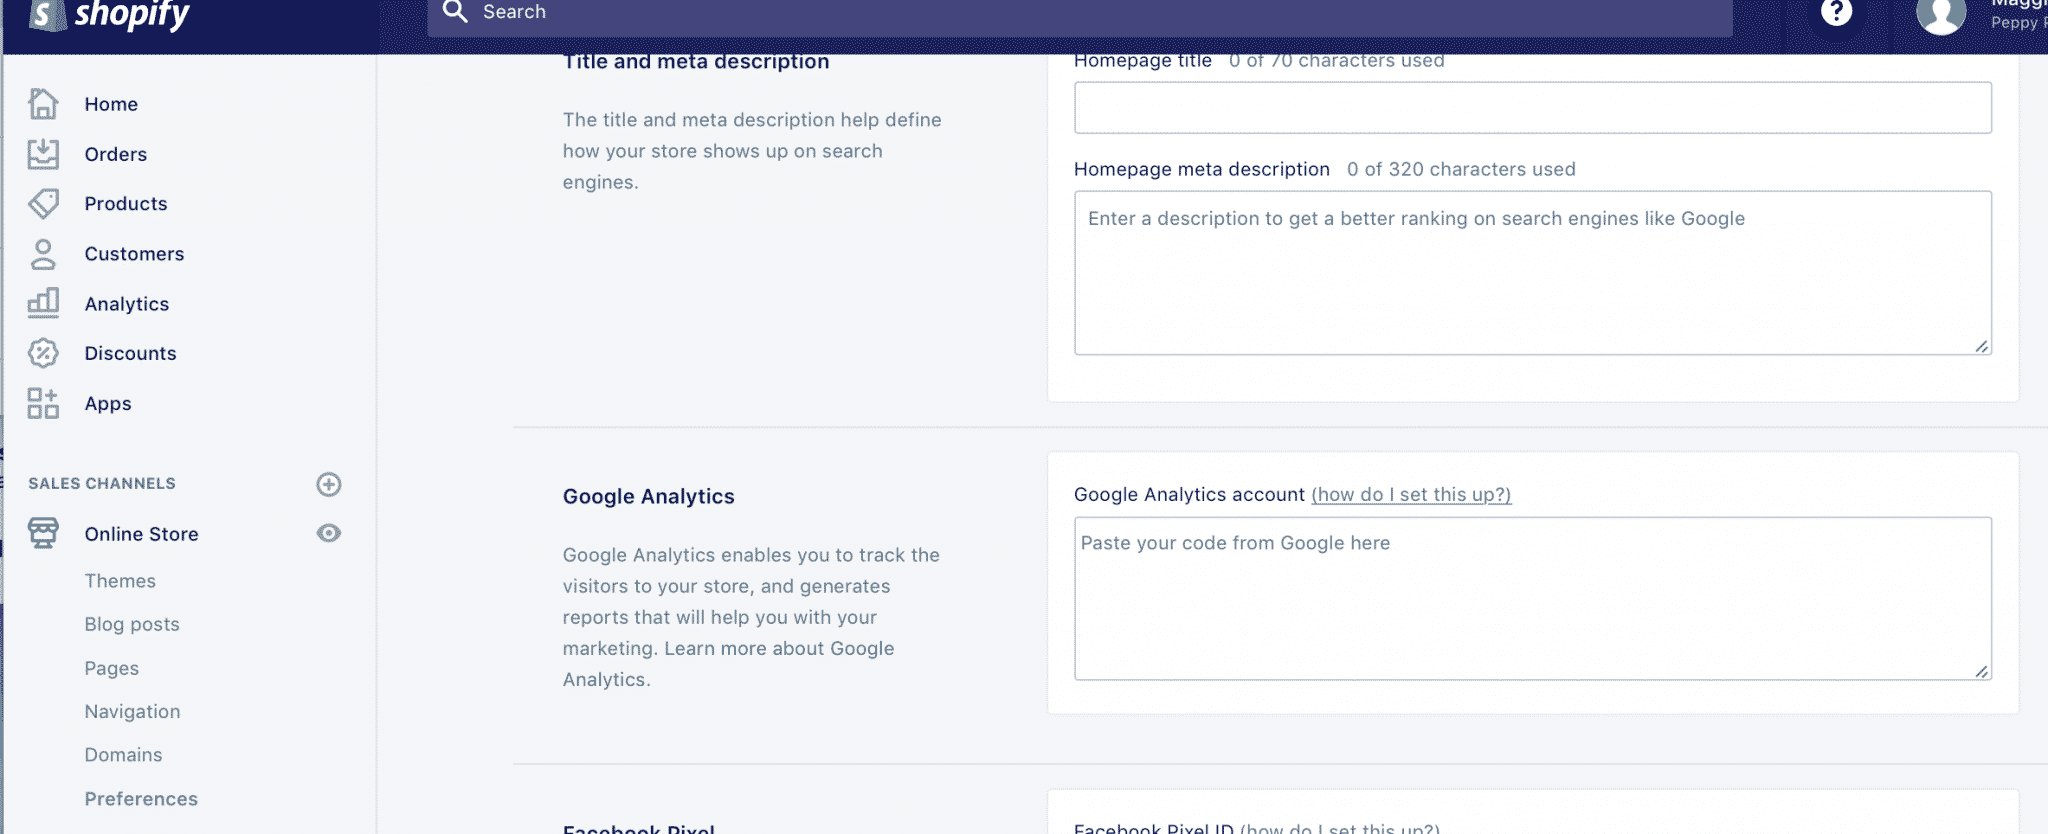
When using Shopify, you’ll see an option to enable “Enhanced ecommerce”. This gives you more data about customer behavior, so go ahead and enable it.

Enable Ecommerce Tracking
After the pixel is installed, head back to Google Analytics, and go all the way to the bottom of the left hand navigation bar where you’ll see the Admin panel. Once there, find “Ecommerce Settings” under “All Web Site Data”.
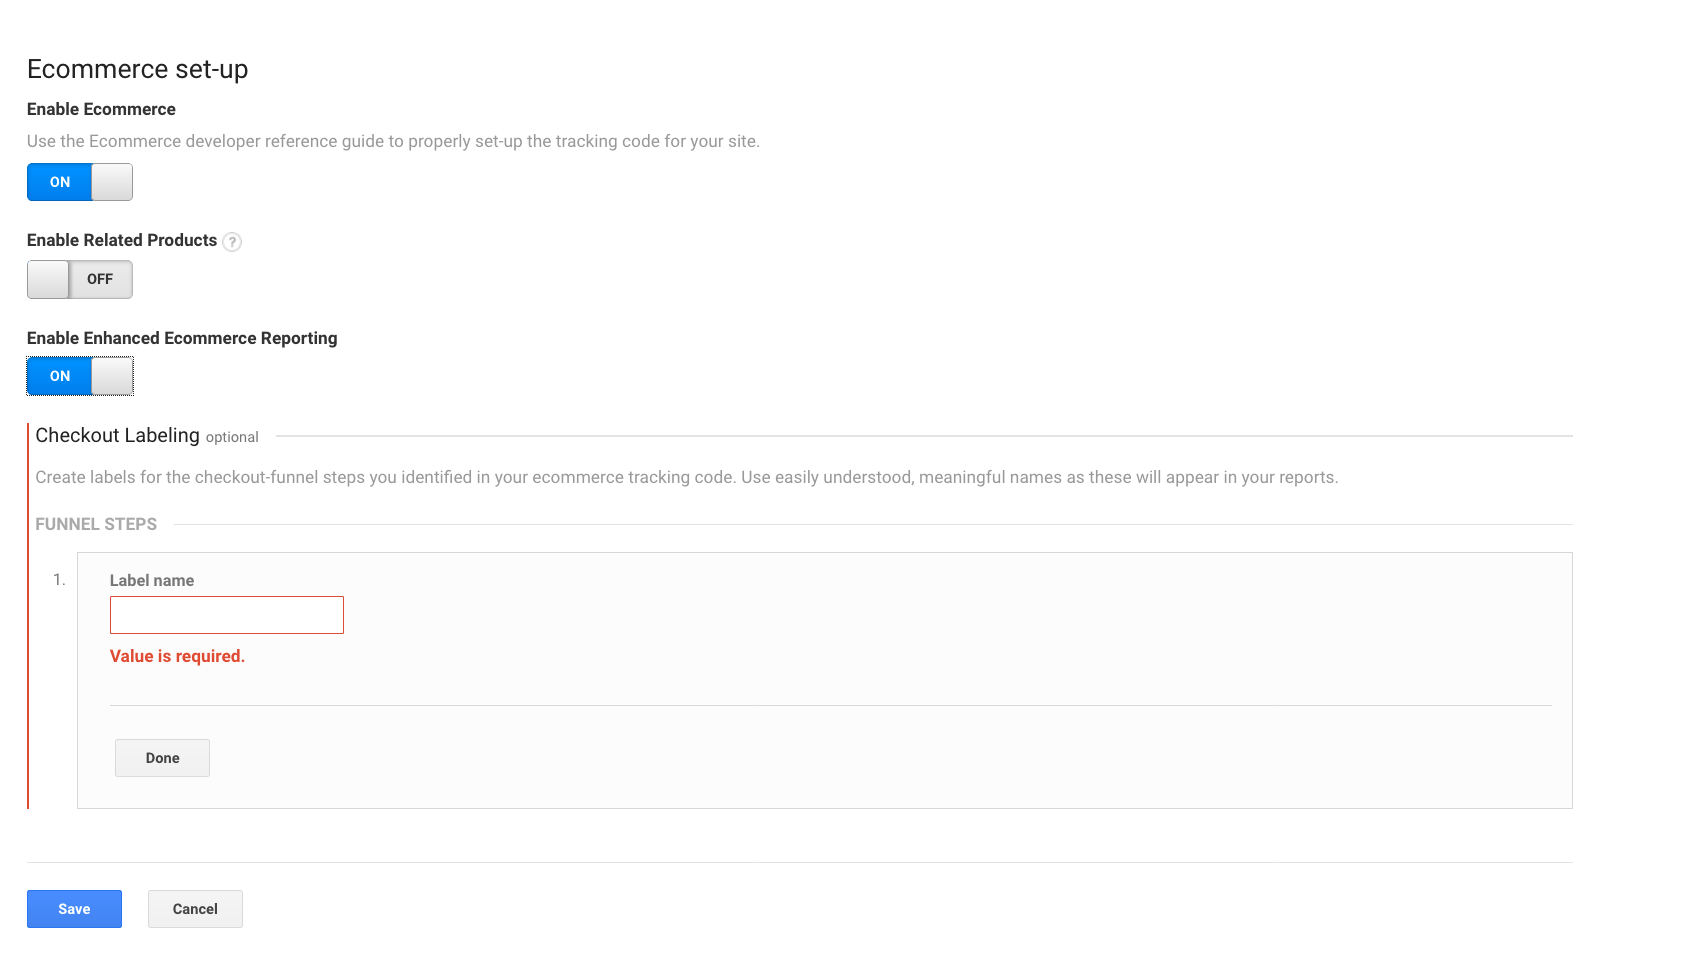
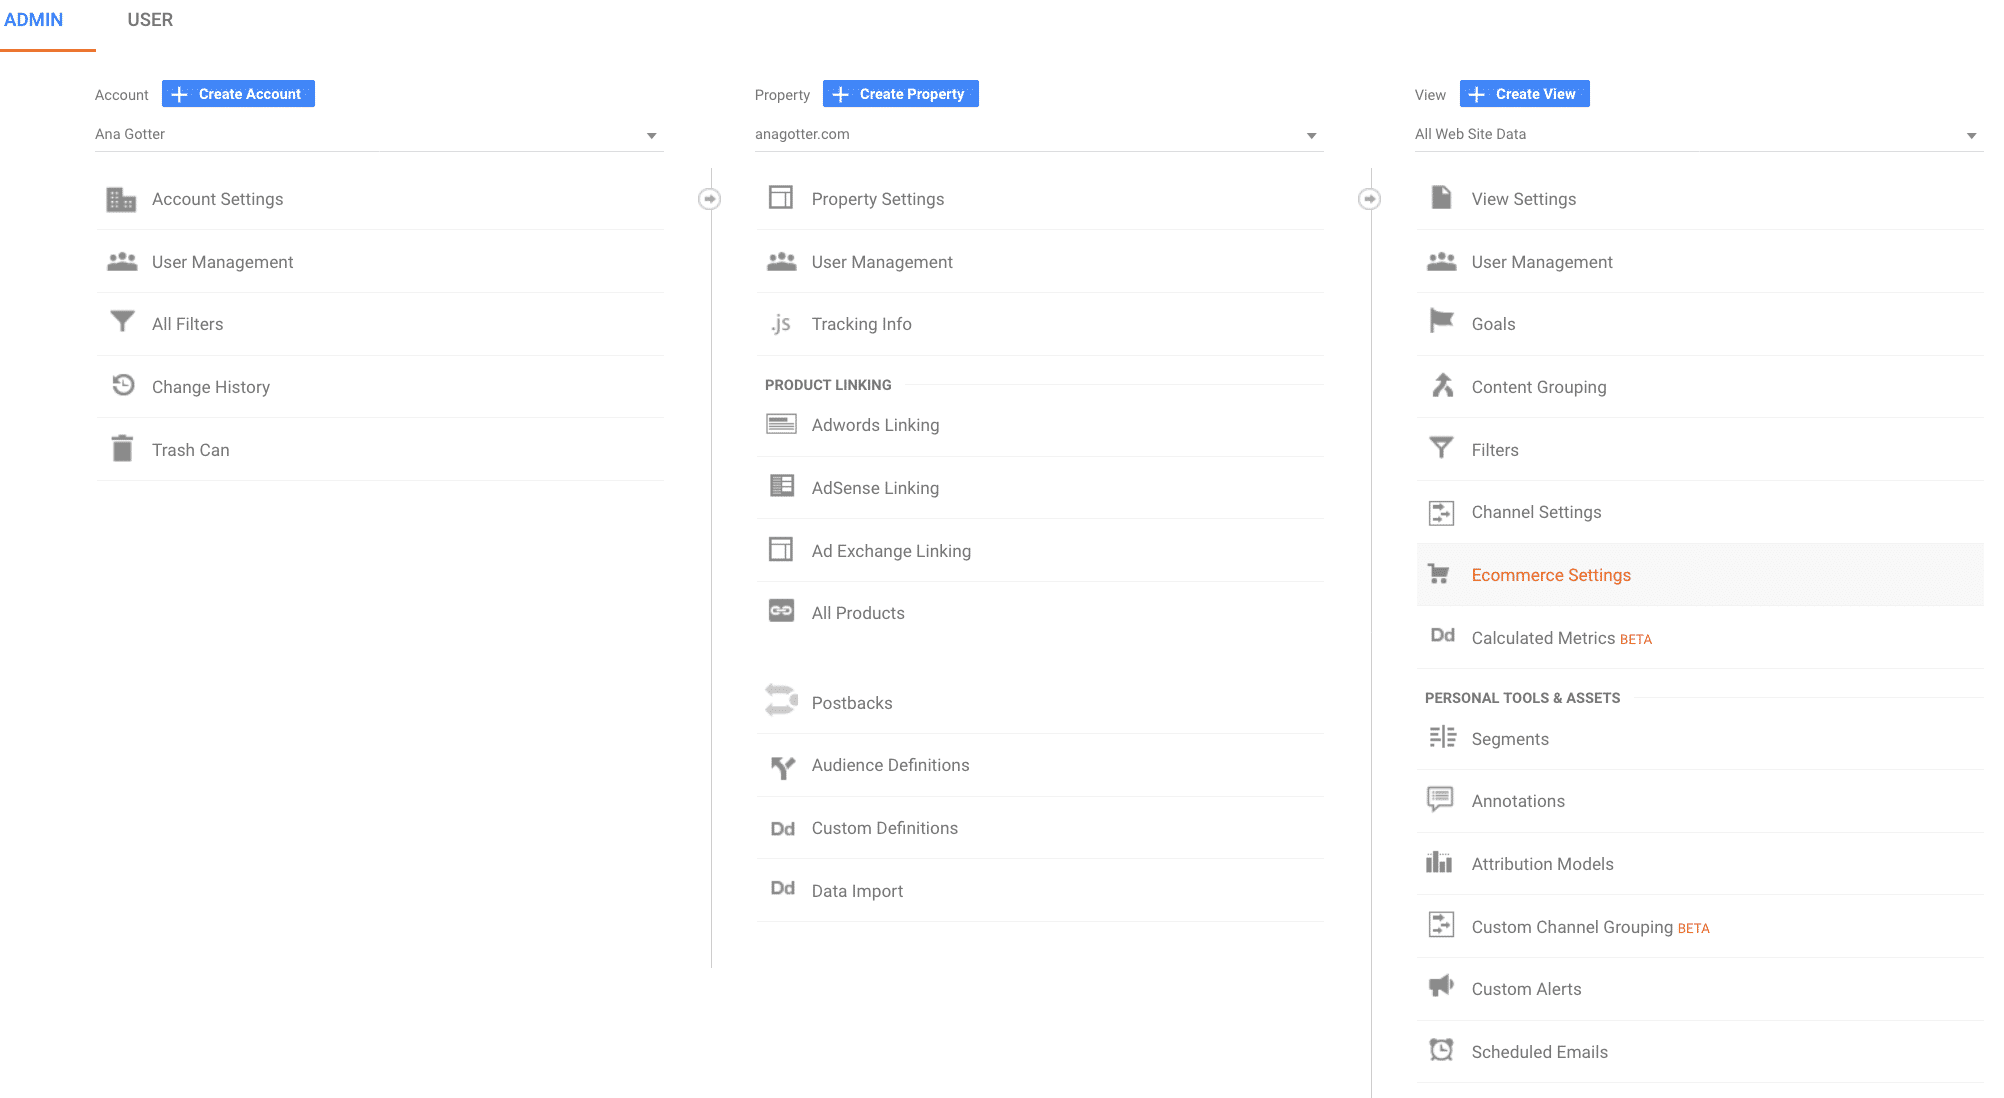 Next, just click the “On” switch in order to turn on Ecommerce tracking. You can also turn on more advanced features, like Related Products or Enhanced Ecommerce Reporting.
Add the Ecommerce Tag to the Code
Finally, with Google Analytics for ecommerce enabled, you’ll be able to add an additional snippet of code to your already-installed pixel to be able to track sales, adds to cart, and more.
This is the code you’ll add to the pixel:
ga(‘require’, ‘ecommerce’, ‘ecommerce.js’);
You need to replace ga(‘create’ , ‘UA-your id’, ‘auto’) in order for it to work. You can see more about this here.
If you’re using a third party Shopping Cart (not Shopify), you’ll need to set up cross-domain tracking. This will involve using the same tracking pixel on both sites, allowing you to track checkouts all the way through. You can see Google’s guide on how to do this here.
Test
After your tracking is all set up, go ahead and run a test transaction to see if it shows up and to ensure that everything is working correctly.
Note that moving forward, test transactions can throw off your overall reporting, causing discrepancies between your shopping cart analytics and Google Analytics. Keep this in mind and account for it appropriately.
Conclusion
Google Analytics for ecommerce will naturally look a little different than Google Analytics for restaurants, service providers, and other types of businesses. The focus is more on revenue, transactions, and how website usage is driving sales in measurable, concrete ways.
While setting up the ecommerce tracking side of things does take time, it gives you so much valuable, actionable information you can use to improve your site to drive more sales.
What do you think? Do you use Google Analytics for ecommerce? Which tracking features do you find most helpful? Share your thoughts and questions in the comments below!


