Facebook Ads Guide for Beginners: How to Rock Your First Campaign
by Ana Gotter • February 13, 2018
Facebook Ads is an exceptional platform, but a lot of small businesses and brands find it to be intimidating. I don’t blame them. The first time I looked at Power Editor, I wondered what the heck I’d gotten myself into!
At first, the more research I did, the more I felt overwhelmed by the platform. There were just so many options to choose from and so many experts proclaiming that their growth hack strategy was the one to use.
A few campaigns in, however, I was able to get the hang of it. Now, after managing several hundred campaigns on Facebook Ads over the past two years, I’m ready to teach you.
Facebook Ads does have a lot of options, but once you’re familiar with the platform they don’t seem quite so overwhelming. In this Facebook Ads guide for beginners, I’m going to show you everything you need to know to have an incredible first campaign.
Why Facebook Ads?
There are a lot of good reasons to invest both time and money into Facebook Ads. All those options they offer, while overwhelming, also offer immense customization and creative control over your ads.
Want to target vegan parents of young children near Soho? Want to target these individuals but only if they’re already connected to your Page or business? You can actually do both. The targeting and retargeting options available through Facebook Ads are exceptional.
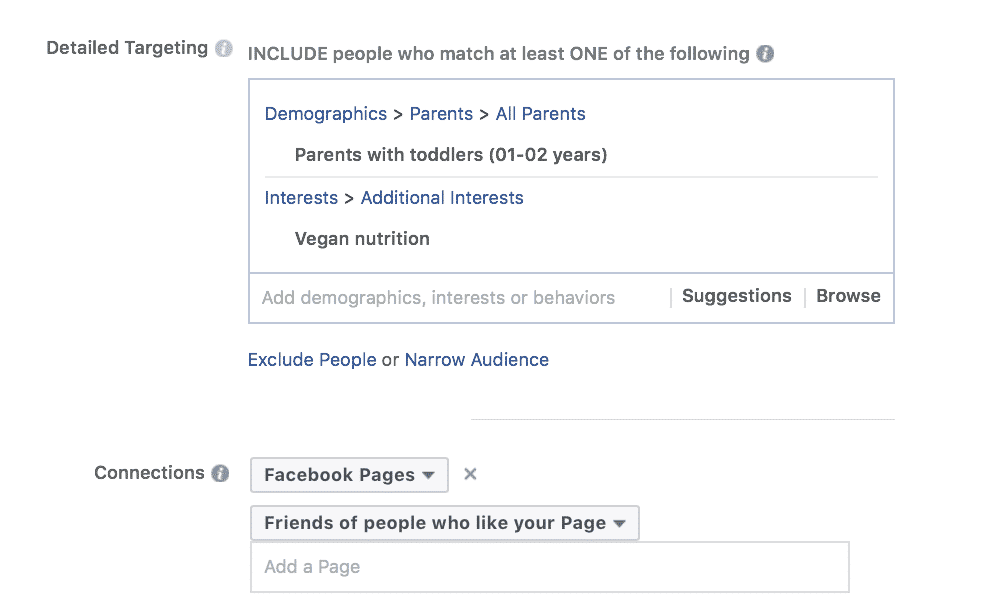
Facebook Ads are also connected to Instagram Ads. You can run both in a single campaign, connecting you to audiences on both platforms. Since the biggest goal of Facebook Ads is to put your content in front of users—without waiting for them to come find youthis is a great advantage.
And while some people worry about the cost of Facebook Ads, it’s still pretty affordable compared to some alternatives, including Google AdWords. This is particularly true when your ad campaigns are given a high relevance score, which means Facebook believes your ad is a good fit for your target audience, and they’ll lower your CPC.
Facebook Ads Guide
Creating high-converting Facebook Ads isn’t actually as difficult as it sounds. Because many brands and small businesses prefer Facebook’s Ads Manager to the more intricate Power Editor, we’re going to use the Ads Manager’s Create an Ad process for this Facebook Ads guide.
1. Develop Your Strategy First
Before you even get started looking at the Ads Manager, you need to have a strategy in place. Without this, you absolutely will get dazzled by all the options and you’ll end up creating an ad campaign that doesn’t actually target anyone useful because you’re creating an ad for no one in particular.
For each campaign that you’re going to create, you need to ask yourself:
- What product or services am I specifically promoting?
- Who am I targeting?
- Will they be a cold audience or a warm audience?
- How will they use the product?
- What is their pain point, and what objections will they have?
- Which stage of the funnel are they in exactly?
- What is the goal of the campaign?
- Do I want leads, brand awareness, site traffic, sales, or something else?
If you don’t have a strategy with a goal of what you want to accomplish, you won’t be able to create strong ads. Develop your game plan first.
2. Choose Your Objective
The very first thing you’ll do when creating your campaign is to choose your objective. It’s important to choose the right one, because Facebook will optimize ad placements based on your objective. In some cases, the right objective can lower your CPC and improve your results.
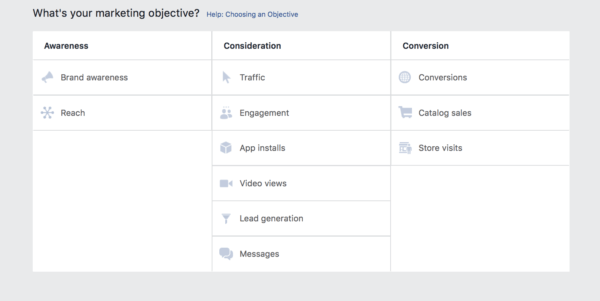
You can choose from the following objectives:
- Brand awareness
- Reach
- Traffic
- Engagement
- App installs
- Video views
- Lead generation
- Messages
- Conversions
- Catalogue Sales
- Store Visits
You want to select an objective that most cohesively aligns with your underlying goals. If, for example, you’re running a video campaign that’s designed to drive sales, choose the “conversions” option instead of the “video views” choice. Sure, you do want video views, but not at the expense of more conversions.
That being said, split testing objectives never hurts. I once ran a video ad campaign and it cost less for equal results to run it as an engagement campaign instead of a video view ad.
3. Target Your Audience
You should start creating your ad campaign with a strong idea of who you want to target—now’s your chance to flesh that out.
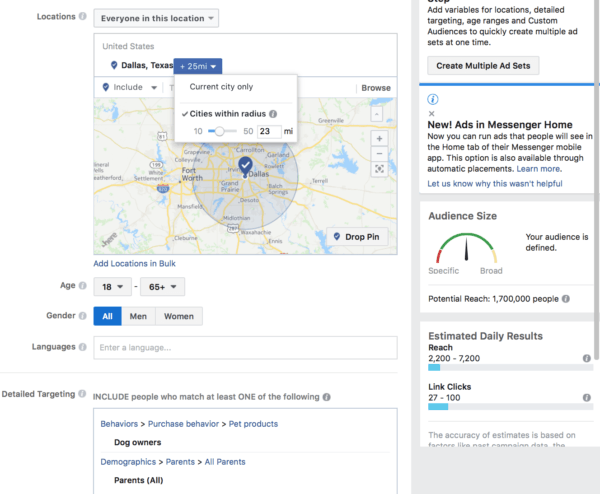
You can use:
- Custom audiences, which target specific users from your email list, or users who have taken certain actions on your site, your Facebook, or your Instagram’s business profile.
- Lookalike audiences, which replicate qualities from your custom audience
- Demographic targeting
- Location targeting
- Interest/behavior targeting
- Connection targeting, which determines if you want your ads to be shown to users who are or are not connected with your brand
4. Choose Where You Want Your Ad To Be Displayed
Next, at the ad set level, you’ll be choosing what placements, apps, and devices you want your ad to be shown on. You can choose mobile only, desktop only or both desktop and mobile. You’ll also have multiple options on Facebook, several on Instagram, and the audience network.
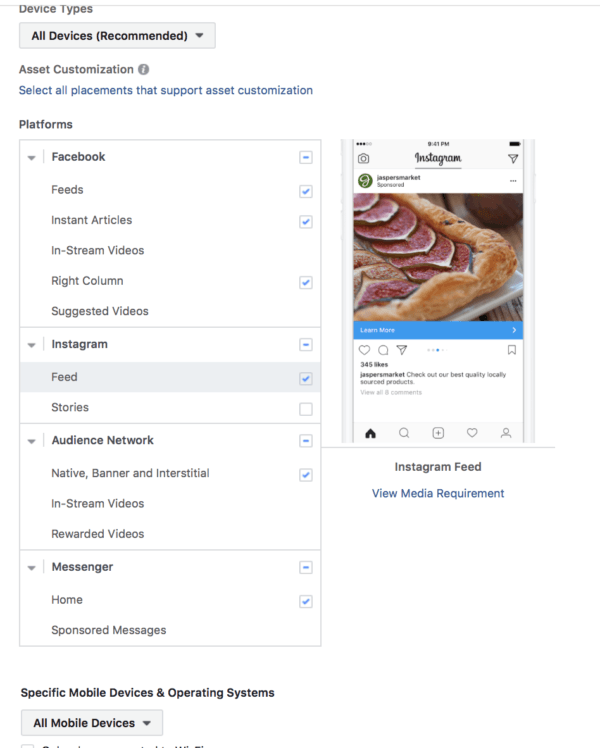
You can run ads with almost all placement options selected (unless you choose to run an Instagram Story Ad, in which case you can only use that placement), or you can disable or enable only certain ones. You can read an extensive resource on ad placements and their pros and cons here.
5. Set Your Budget
In the next section, you’ll be able to choose your budget, schedule your ads, and select an optimization method. You can choose a lifetime budget or a daily budget and you can either have your ads run indefinitely or be scheduled to start and end on certain dates. You can even choose to use dayparting, which allows you to run your ads only at certain times or on certain days of the week.
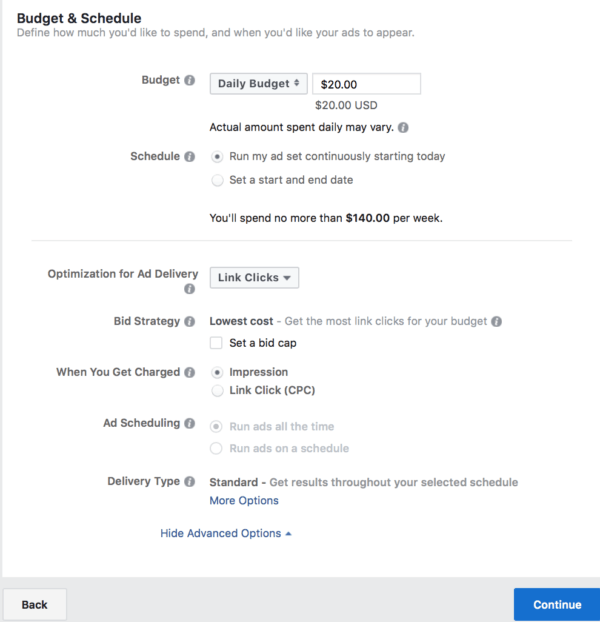
At this stage, you can also choose if you want to optimize your ads. For those who are wary of this, Facebook automatically has things set up for you and I’d only recommend going in and manually updating them if you’re familiar with the platform and have reason for doing so.
That being said, you can choose to change what you’re bidding on (like link clicks or impressions), if you want to spend your ad budget as quickly as possible or spread it out over time, and if you want to set a cap on your bids.
6. Choose Your Ad Format
There are several incredible ad formats on Facebook. You can choose from:
- Single image ads
- Video ads
- Carousel ads, which allow you to show several videos and/or pictures
- Canvas ads
- Collections, which open up to be a full-screen mobile experience.
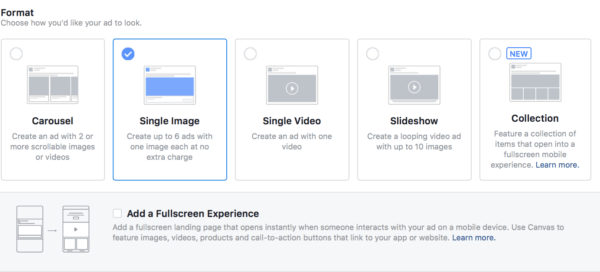
Each ad type as it’s own unique benefits, but video ads and carousel ads (with or without video) typically have some of the highest engagement and CTR rates.
7. Don’t Forget the Details
At the very bottom of the creative section, there’s a lot of small details that are easy to miss. These include multiple sections where you can put copy, along with things like CTAs and URL descriptions.
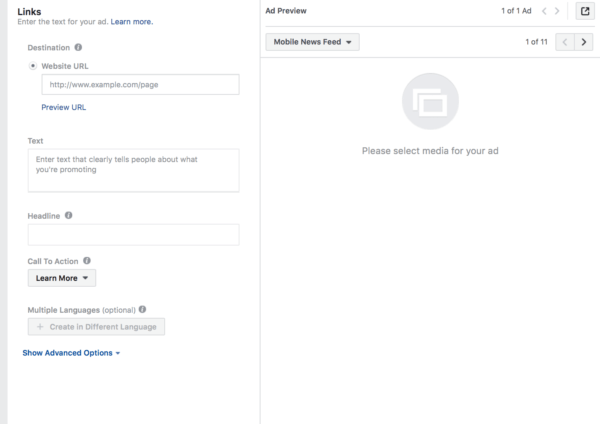
Take advantage of every single one of them. The CTA button will help drive conversions, and using the right copy in the right places will make a world of difference on your campaigns.
8. Monitor Your Ads Carefully
After you’ve started your campaigns, monitor them carefully. Some campaigns may start to see increases in CPC after the frequency gets too high and others may start out at a significantly higher CPC than you’d expect. Others may just not be performing the way you’d like.

Facebook’s Ads Manager will show you the details of all of your active campaigns. Watch the CPC, frequency, relevance scores, and number of actions taken particularly carefully. These are the most crucial metrics.
What If I Want to Split Test?
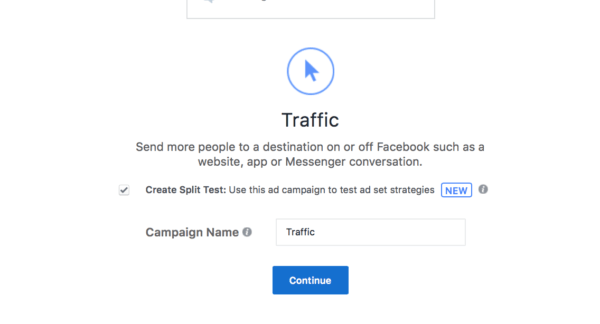
Facebook has a split testing tool. While it’s not perfect and it does have a few limitations, it’s pretty good. It works well when you want to split test ad strategies, but you’ll have to test the creative aspects of your ad manually.
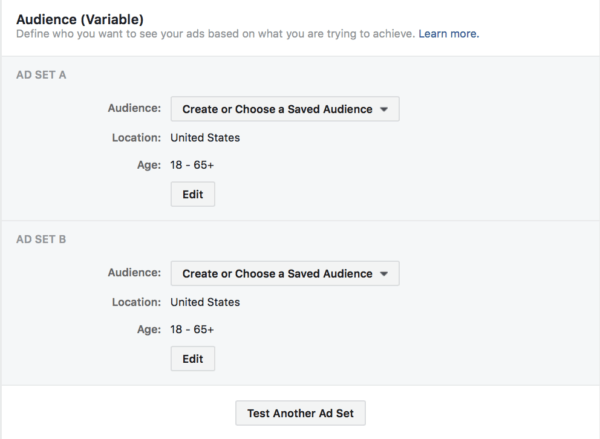
Still, if you want to split test your audience, ad delivery, or ad placements, Facebook does make it easy to do so. Once you’ve chosen your objective, you can click the “split test” box.
At the ad set level, you’ll select what you want to split test.
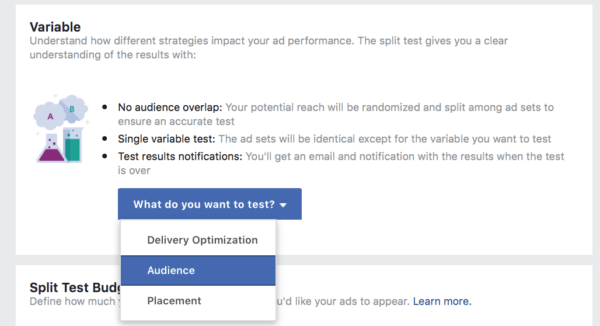
After you’ve chosen what you want to split test, you’ll see the option to create your A & B criteria.
If you’ve got a big budget and want to really aggressively split test your ad campaigns, I’d recommend using third-party tool AdEspresso.
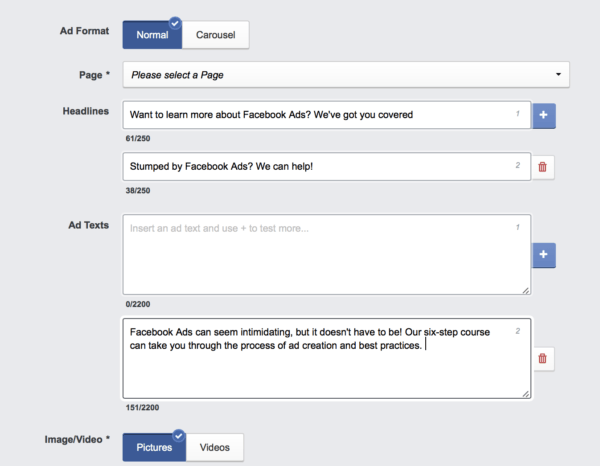
You can create ads right from within the tool and it lets you enter in multiple headlines, descriptions, and images and they’ll mix and match them up for you.
Final Thoughts
Facebook Ads has a lot of options to choose from, but once you’re familiar with the system, that will work to your advantage instead of your detriment. As long as you have a plan before going in, the campaign creation process will be a lot easier, and you’ll create much stronger ads as a result.
By the way, if you’d like some help creating or managing your Facebook Ads campaigns, let me know here or in the comments. I’d love to help.
What do you think of this Facebook Ads guide? Do you use Facebook Ads for your business? What questions do you have about the platform? Share your thoughts and questions in the comments below!


