How to Set Up/Install the Meta Pixel on Your Site in 2025
by Chad de Lisle

If you’re new to the Meta Pixel, welcome to a wonderful data-collecting tool that can help you to drive more successful ad campaigns on Facebook! This little piece of code can have an enormous impact on your targeting and ad budget.
It’s easy to set up and can help you track Facebook ad-driven activity on your website so you can gain insights, see key metrics and identify audiences to target.
In this article, we will show you:
- What is Meta Pixel?
- What Meta Pixel Does
- How to Create Your (Facebook) Meta Pixel
- How to Install Your Meta Pixel on Your Website
- How to Check if Your Meta Pixel is Working
- How to Set Up Meta Pixel in Facebook
- How to Track Conversions Using FB Meta Pixel Events
- How to Make the Most of Facebook’s Meta Pixel
NOTE: Throughout this guide, we’ll be using “Meta Pixel” and “Facebook Pixel” interchangeably since this is the new iteration of Facebook’s Pixel and we don’t want any confusion surrounding the Pixel in question.
What is Meta Pixel?
Meta Pixel (formerly called Facebook Pixel) is a snippet of JavaScript code that, when created and installed on your FB Ads manager account and website, can help you track your customers’ journey between Facebook, Instagram and your website. If you’ve been wondering what the Facebook Pixel ID is, that little piece of code is it.
It is referred to as your Facebook Pixel, your Facebook Pixel ID, your Meta Pixel or your Pixel ID.
It is true that you can see some basic metrics in Google Analytics about the website traffic coming from social media. However, Meta Pixel offers far more in-depth insights about audiences, specifically, and how you can target them most effectively. If you haven’t set it up yet, don’t worry! We will show you everything you need to do to get your FB Meta Pixel installed and how to get the most out of it.
NOTE: You can only create up to 100 Pixels in your Meta Business Manager account. Be careful when creating your Pixels so you don’t have the wrong ones in the wrong places and you keep track of how many you use.
What Does the Meta Pixel Do?
So it’s a piece of code…but what does the Meta Pixel do? Simply put, it tracks activity on your website as it relates to users who also use Facebook and/or Instagram. This can add a whole platform of data to your targeting arsenal, providing a more complete picture of your customers’ journey and where potential gaps may exist .
Meta Pixel gathers information using Facebook cookies. This is invaluable data that can help you match up visitors to your site with those you should be targeting on FB. You can gather metrics that show how the consumer’s journey progresses so you can initiate targeting and retargeting campaigns when needed, with the right audiences. The ability to make your sales funnel connected between your website and social media accounts is awesome!
The Meta Pixel automatically tracks:
- URLs and domains visited
- Devices used
- Predefined conversions
You can also use other functions of Meta Pixel to set up custom audiences, Advantage+ Catalog Ads, and custom conversions for tracking.
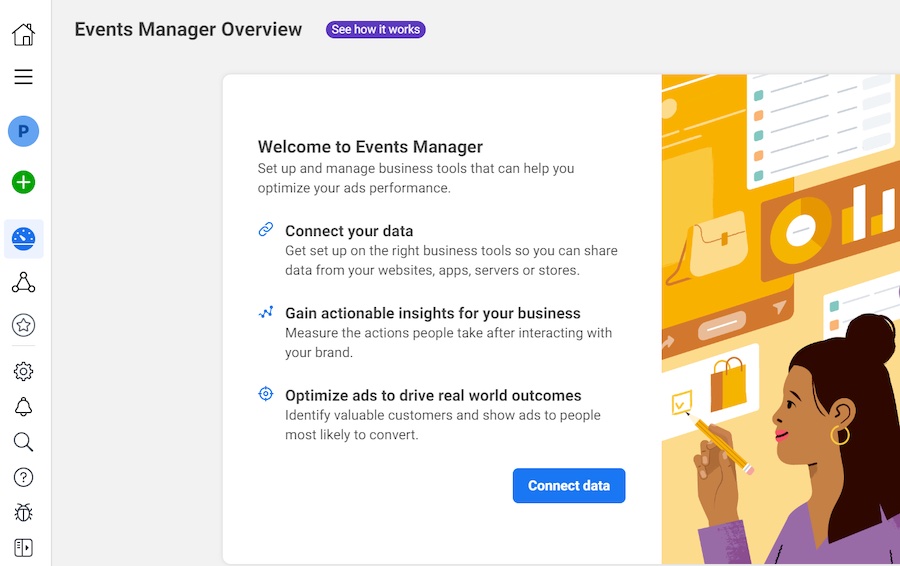
How to Create a (Facebook) Meta Pixel in 2025
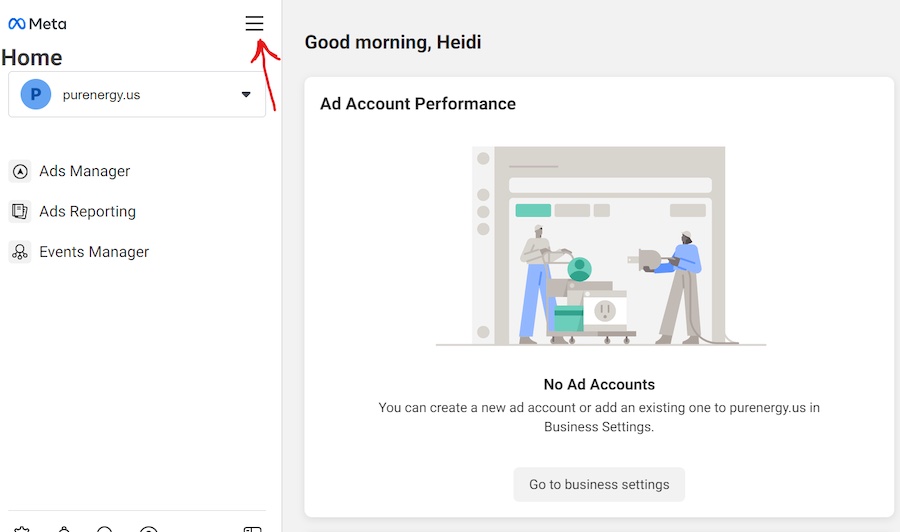
The first step to getting the most from your Meta Pixel is to create one! Easy peasy. Start by finding your Pixel’s base code. Go to your Meta Business Suite (formerly known as Facebook Business Suite or Ads Manager). From there:
1. Click on the “All Tools” hamburger button.
2. Click on Events Manager.
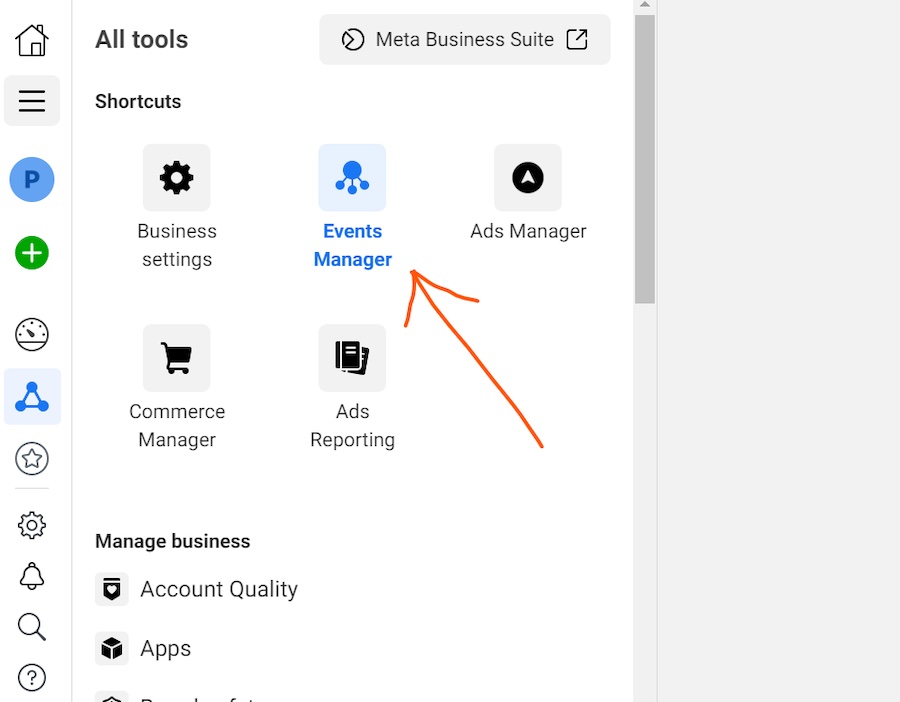
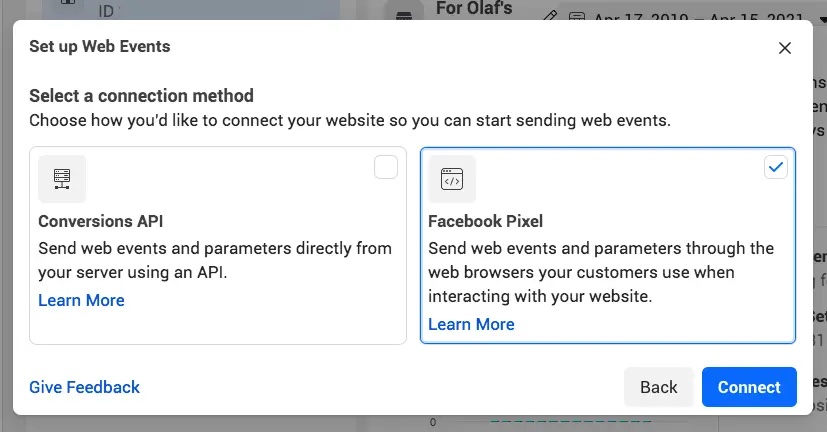
3. Click the green plus button or simply the Connect data button and select Web.
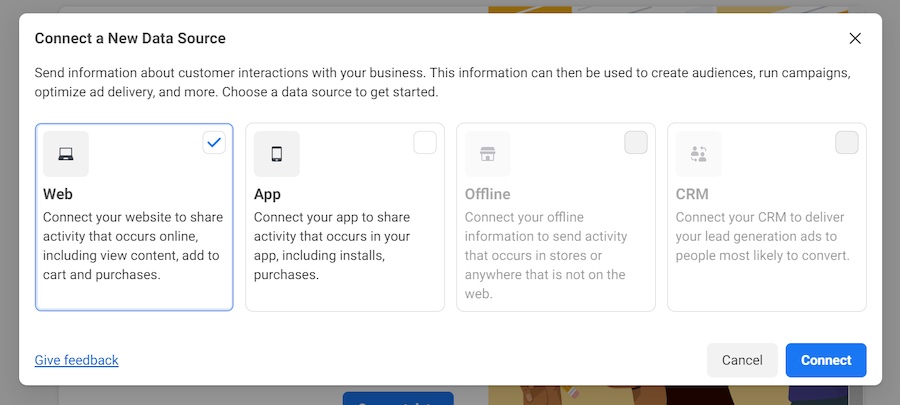
4. Then, select Facebook Pixel.
5. Create and enter your Pixel name. Choose a name that is business-focused rather than campaign-specific.
6. Enter your website URL to check for easy setup options.
7. Click Continue.
How to Install Your Facebook Meta Pixel On Your Site As of 2025
There are three basic ways to install a Facebook Pixel code on your website:
- Use one of FB’s many partner integrations (like WordPress, Wix, Shopify, Squarespace, etc).
- Manually enter the code on your site.
- Email your developer the code and instructions for installing.
For an easy Video Tutorial on Setting up a Facebook Pixel:
How to Manually Install (Facebook) Meta Pixel
1. Go to the Events Manager in your FB Business Suite.
2. Click the Data Sources icon on the left side of the page.
3. Select the Meta Pixel you want to set up.
4. Click Continue Pixel setup.
5. Select Meta Pixel and click Connect.
6. Select Install code manually.
7. Copy the pixel base code.
8. Find the header of your website or locate the header template in your CMS or web platform.
9. Paste the base code at the bottom of the header section, just above the closing head tag.
10. Click Continue.
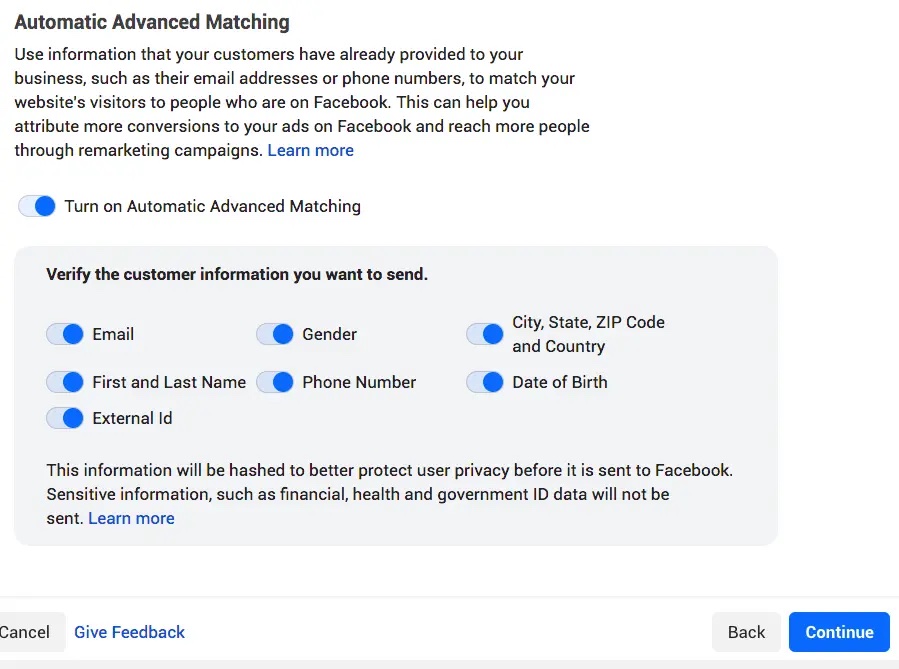
11. Make sure that at this stage, you opt to toggle on Automatic Advanced Matching so you can get data showing customers who are on FB and have visited your website. This can help you create larger custom audiences and track your sales funnel more accurately.
How to Install (FB) Meta Pixel Using a Partner Integration
Here is how to install Facebook Pixel on Shopify, WordPress, or using another of Facebook’s Partner Integrations*:
- Go to Events Manager.
- Click the Data sources icon on the left side of the page.
- Select the pixel you want to set up.
- Click Continue pixel setup.
- Click Use a partner.
- Select a partner from the list.
- Follow the onscreen setup instructions (there are also onscreen instructions for doing this straight from your Partner Integrations page under your Events Manager.)
How to Install (Facebook) Meta Pixel Manually on WordPress
1. Copy the Pixel code using the instructions above.
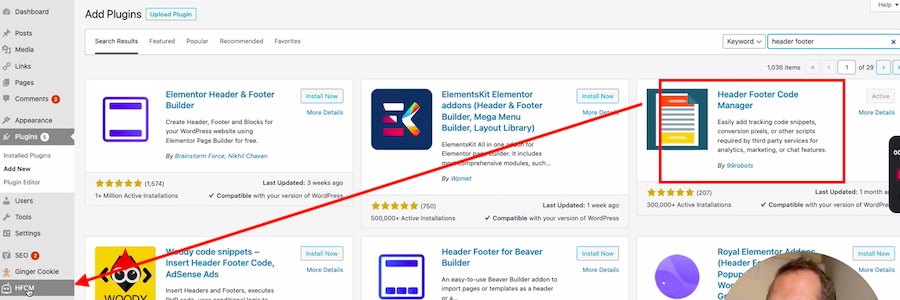
2. Download the plugin Header Footer Code Manager (HFCM).
3. Click on HFCM in the menu on the left.
4. Add the Pixel code snippet.
5. Name the snippet (*business rather than campaign-centric name).
6. The snippet type is HTML.
7. Select Site Wide.
8. Paste the code you copied from Facebook in the Snippet / Code section at the bottom.
9. Click on Save.
10. Pat yourself on the back–you did it!
How to Install Meta Pixel on Your Shopify Site
To install your Facebook Meta Pixel on your Shopify site, you can follow the instructions from the section above titled, How to Install FB Pixel Using a Partner Integration.
Alternatively, you can do it from within your Shopify account as long as you have created your Pixel within FB first (see instructions above). To do it this way, sign in to your Shopify Admin account and:
- Click on Settings > Apps and sales channels.
- From the Apps and sales channels page, click Facebook.
- Click Open sales channel.
- Click Settings.
- Click Data sharing settings.
- Under Customer data-sharing, click on Enable data-sharing toggle.
- Under Choose data-sharing level, select Standard, Enhanced, or Maximum.
- Select your pixel from the list.
- Click Confirm.
*If you don’t see your website platform in the Partner Integrations page, you will have to use one of the other two methods for installing your Meta Pixel.
How to Have Your Web Developer Install the Facebook Meta Pixel
If you need to have your IT guy or web developer handle installing the code, you can still request that through Facebook and even send the instructions from your Events Manager!
- On Facebook, go to your Events Manager.
- Click the Data sources tab on the left side of the page.
- Select the Meta Pixel you want to set up.
- Click Continue pixel setup.
- Click Email Instructions.
- Enter the recipient’s email address.
- Click Send at the bottom of the page.
How to Check if Your Meta Pixel is Working
You can test to see if your Pixel is working by installing the Google Chrome Extension, Meta Pixel Helper. Once you have that downloaded, go to the URL you created the Pixel for and click on the Pixel Helper Extension in the top right corner and cross-check to make sure the Pixel ID matches the one you created.
How to Set Up Meta Pixel in Facebook
Wait, the excitement isn’t over! Now that you have created your code and installed it on your website, you can continue to set up Facebook Pixel in your FB Business Suite or Ads Manager.
Meta Pixel set up goes beyond just having the code out there, collecting data. To get the most out of that data, you should have already opted in to “Automatic Advanced Matching.” This allows you to learn more about your audiences and gives you the ability to customize them.
Like Google Analytics, Pixel allows you to set up “events” that are triggered by certain parameters. These events can let you know how your ads are performing which, in turn, can help you make adjustments to improve your ROAS. Setting up events is simple–we’ll show you how!
Before you can add events in the Facebook Events Manager, you will need to verify your domain. You can do that by clicking on the “Verify Domain” button in Events Manager. This will send you to your Business Manager page. From there, Click “Add” and enter your core domain. It should give you a few options for how you would like to verify. Click on one and follow the instructions.
NOTE: It sometimes takes several hours for a domain to be verified. You might try checking back later or the next day.
What are Pixel Events?
Events can be the result of either paid advertising or organic reach. Events are what trigger conversions. Identifying or defining what constitutes a conversion allows you to track when those occur. There are three basic ways to do that with Meta Pixel and they all involve using/setting up events.
Pixel had predefined events that track things most people have an interest in. Those are called Standard Events. There are many standard events you can use by specifying which pages or transactions on your site you want to track. You can also set up Custom Events and Custom Conversions. Let’s start with events.
How to Track Conversions Using FB Meta Pixel Events
Would you believe there is something called Event Set Up Tool in Facebook? Pretty clever. It can be found under your Events Manager in your Business or Ads Manager. Using this tool and the standard events is easy and you don’t have to add any code to your site to do it!
In the Event Set Up Tool, select where on your website you would like to add events. It’s as simple as point-and-click. Once you’ve added an event(s), you can check that the event is populating back in your Events Manager. An easy event to test is a “page view.” If you simply go to your site that you have set up Meta Pixel on, it should trigger it to show up in your Events Manager. This also sets your Pixel status to “active.”
Standard Events
There are 17 standard events that FB defined due to the obvious interest most marketers have in them. You can add custom events and conversions, but check out what is already there and available for an easy “point-and-click” set up:
| Website Action | Description | Standard Event Code |
|---|---|---|
| Add payment info | The addition of customer payment information during a checkout process. For example, a person clicks on a button to save their billing information. | fbq(‘track’, ‘AddPaymentInfo’); |
| Add to cart | The addition of an item to a shopping cart or basket. For example, clicking an Add to Cart button on a website. | fbq(‘track’, ‘AddToCart’); |
| Add to wishlist | The addition of items to a wishlist. For example, clicking an Add to Wishlist button on a website. | fbq(‘track’, ‘AddToWishlist’); |
| Complete registration | A submission of information by a customer in exchange for a service provided by your business. For example, signing up for an email subscription. | fbq(‘track’, ‘CompleteRegistration’); |
| Contact | A telephone, SMS, email, chat or other type of contact between a customer and your business. | fbq(‘track’, ‘Contact’); |
| Customize product | The customization of products through a configuration tool or other application your business owns. | fbq(‘track’, ‘CustomizeProduct’); |
| Donate | The donation of funds to your organization or cause. | fbq(‘track’, ‘Donate’); |
| Find location | When a person finds one of your locations via web, with an intention to visit. For example, searching for a product and finding it at one of your local stores. | fbq(‘track’, ‘FindLocation’); |
| Initiate checkout | The start of a checkout process. For example, clicking a Checkout button. | fbq(‘track’, ‘InitiateCheckout’); |
| Lead | A submission of information by a customer with the understanding that they may be contacted at a later date by your business. For example, submitting a form or signing up for a trial. | fbq(‘track’, ‘Lead’); |
| Purchase | The completion of a purchase, usually signified by receiving order or purchase confirmation, or a transaction receipt. For example, landing on a Thank You or confirmation page. | fbq(‘track’, ‘Purchase’, {value: 0.00, currency: ‘USD’}); |
| Schedule | The booking of an appointment to visit one of your locations. | fbq(‘track’, ‘Schedule’); |
| Search | A search performed on your website, app or other property. For example, product or travel searches. | fbq(‘track’, ‘Search’); |
| Start trial | The start of a free trial of a product or service you offer. For example, trial subscription. | fbq(‘track’, ‘StartTrial’, {value: ‘0.00’, currency: ‘USD’, predicted_ltv: ‘0.00’}); |
| Submit application | The submission of an application for a product, service or program you offer. For example, a credit card, educational program or job. | fbq(‘track’, ‘SubmitApplication’); |
| Subscribe | The start of a paid subscription for a product or service you offer. | fbq(‘track’, ‘Subscribe’, {value: ‘0.00’, currency: ‘USD’, predicted_ltv: ‘0.00’}); |
| View content | A visit to a web page you care about. For example, a product or landing page. View content tells you if someone visits a web page’s URL, but not what they do or see on that web page. | fbq(‘track’, ‘ViewContent’); |
Source: Facebook
You can choose from any of these events to add to any of your web pages with a simple click of your mouse! This is an example of what it looks like when it is inserted into the code of your site:
But the beauty is that for these standard events, there is no coding necessary! The Page View event is written into the base code of your Pixel and tracks any time someone visits a page on your site that has the Pixel installed.
Step-by-step instructions on how to use the Facebook Event Setup Tool.
Custom Events
If you need something more or different than the ones included in Pixel’s standard events, you can add your own, using coding like what is pictured above. Sometimes, custom events can help you to create better custom audiences to target. Also, custom events support the use of optional parameters you can add to include details about the event you are creating.
More about custom events coding.
Custom Conversions
To create a custom conversion, go to your Events Manager and click on “Custom Conversions”. From there, you will select the Pixel that you want to use. There is a section for you to add a rule. A rule is a condition that must be met for a conversion to be counted. Sometimes, it means a URL was visited, sometimes you want to track form fills or email sign-ups. That is done by adding the URL to this rule section.
Before you can use that custom conversion as a tracking metric in a new ad, you need to go back to the Pixel in “Data Sources,” select the Pixel you are working with, and under “Settings,” select “Share with Ad Account.” When you click that, it will send you back to your Pixel. Then, you need to select “add asset,” then select the ad account you will be working with.
How to Structure Your Meta Ads in 2025
Meta ads have evolved a lot in the past year, and campaign structures that worked in 2023 or even early 2024 may not be giving you the same results today. That being said, you don’t need hacks or complicated setups to run profitable campaigns.
Here are the key areas to focus on:
Attribution Settings
The best default is still 7-day click attribution. This gives Meta enough time to track conversions, especially if you sell higher-ticket products or items with longer decision cycles. One-day click attribution can underreport, while view-through is usually unnecessary.
Signal Quality
Meta’s machine learning is only as good as the data you feed it. Make sure you:
- Run both Pixel and Conversions API (CAPI) together with deduplication.
- Keep your Purchase Event Match Quality in the 8–9 range. Missing identifiers weaken performance, even if your ads look great.
Targeting Approach
In 2025, broad targeting works best. That means keeping your filters simple—just age, gender, and location are often enough. Interest targeting is less relevant now since Meta’s algorithm is strong at finding the right audience on its own.
If you aren’t re-engaging customers, exclude buyers from the past 180 days.
Campaign Structure
Here’s a simple way to set up your campaigns:
- ABO (Ad Set Budget Optimization): Use this for testing new creative angles, product categories, or collections. Keep tests organized so results stay clear.
- ASC (Advantage+ Shopping Campaigns): Once you know which ads are working, move them here to scale. Focus only on your top performers and keep the same post IDs so you don’t lose social proof.
- Retargeting Campaigns (optional): If you have a large customer list or a higher average order value, you can run reactivation ads to past buyers. Use messaging tailored to returning customers, don’t just recycle your prospecting ads.
Creative Best Practices
- Upload ads in both 4:5 and 9:16 formats to cover all placements.
- Write clear, benefit-driven headlines instead of vague lifestyle copy.
- Use a consistent naming system for campaigns and ad sets, which makes management easier as your business grows.
The takeaway: Meta ads in 2025 reward simplicity and clean signals. If your cost per acquisition feels unstable or your ROAS is unpredictable, start with these best practices and let Meta’s optimization work for you.
Making the Most of Meta Pixel in 2025
Wow…that was A LOT of information! Now you are an expert at the Meta Pixel! Even if you need to reread this article, you should be able to:
- Create a Meta Pixel for your website.
- Install it on your site.
- Set it up on Facebook.
- Use it to track events that can offer valuable targeting insights for your marketing campaigns.
If you would like more help setting up your social media and marketing campaigns, give us a call. We have helped hundreds of businesses to make the most of their digital marketing tools like Meta Pixel and many others. It all starts with a conversation!