Build Better Landing Pages with Typekit and Google Fonts
by Andrew Maliwauki • July 7, 2015
If there’s one thing I love more than anything else as a designer, it’s having a massive collection of fonts at my disposal. At Disruptive Advertising, we design all of our landing pages with Unbounce, a dedicated platform for making functional and attractive landing pages that can easily be tested and swapped out to find the highest converting pages. While I love the Unbounce editor, there are times that I wish I had a little more choice when it comes to font selection. Luckily, Typekit and Google fonts allow me to expand my web design choices by enabling hundreds of unique fonts.
In this tutorial, I’ll be showing how to get web fonts to work with Unbounce, but these steps apply to most other web-building clients and services. This should help designers and marketers build better landing pages that convert more!
Getting Fonts With Typekit
If you don’t already have an Adobe Creative Cloud membership, you can create a free account in order to use Typekit, but be aware that you will only have a limited number of fonts at your disposal.
In order to use a web font on your website or landing page, you will need to create a “kit.” This can be found in the top-right area of the page under kits > + create new kit.
Once you have this window pulled up, you can label your page and enter in the web URL. It’s critical to note that if you are making a kit for a landing page on a subdomain you need to add an asterisk before the domain name in order for the font to sync properly. By using *.mywebsite.com, you allow fonts to be used for any subdomain such as try.mywebsite.com or get.mywebsite.com.
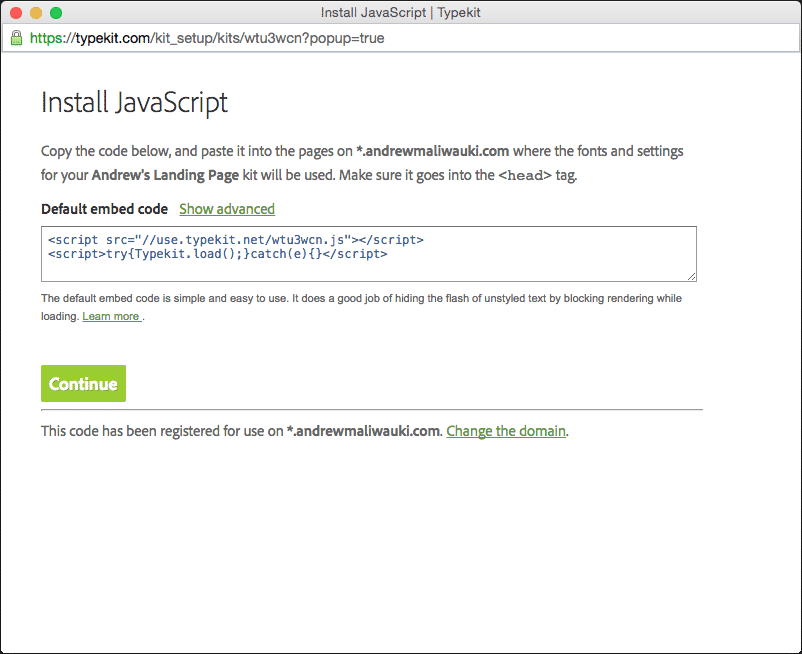
Once you’ve entered in this information you will be asked to install a JavaScript code in the <head> tag of your page. For Unbounce, this is as simple as opening the Javascripts tab at the bottom-left section of the page and pasting in the code.
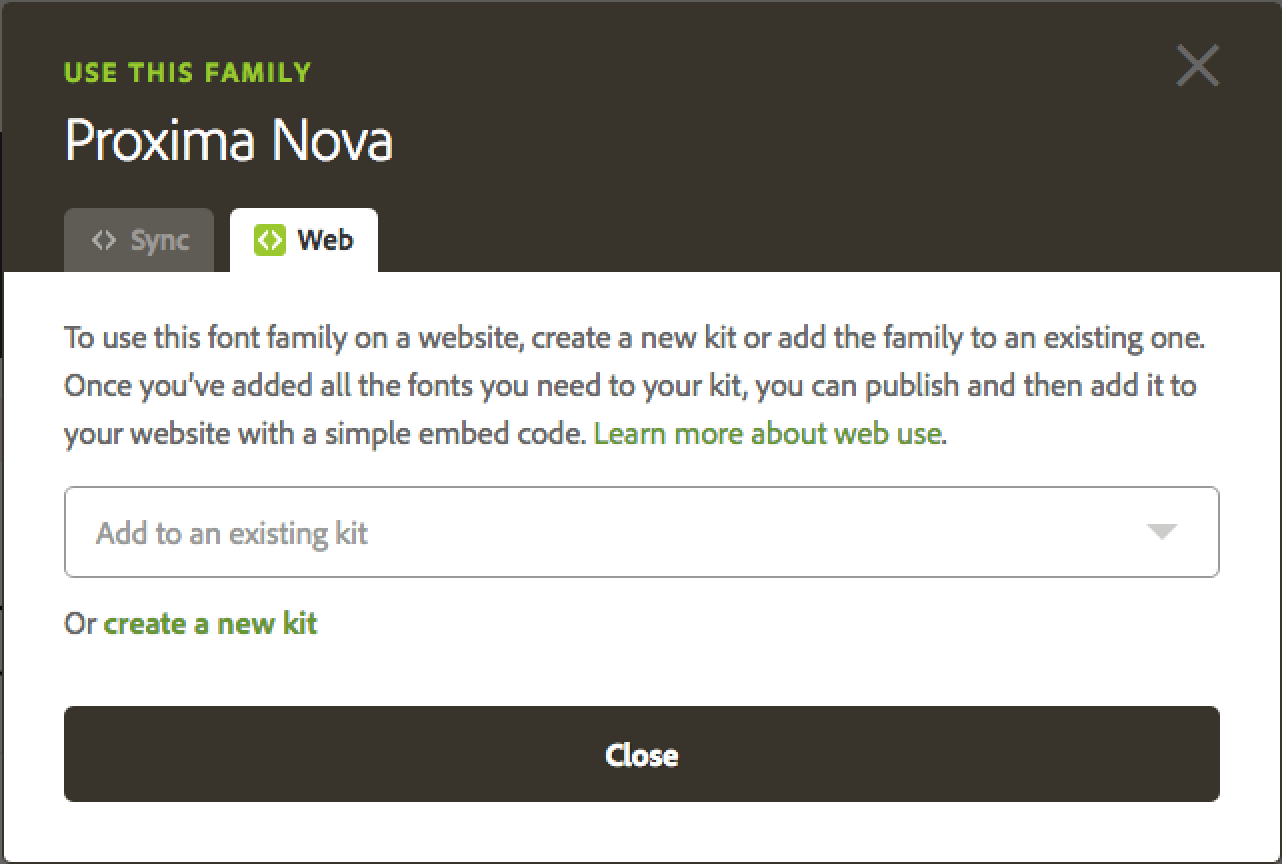
Next, select the font you want to use; for this example I will be using Proxima Nova. Once you have a font you want, click the button labeled +Use fonts and a small window will pop up. Click over to the Web tab and click the drop-down menu to add the font to your existing kit, or create a new kit if you haven’t already.
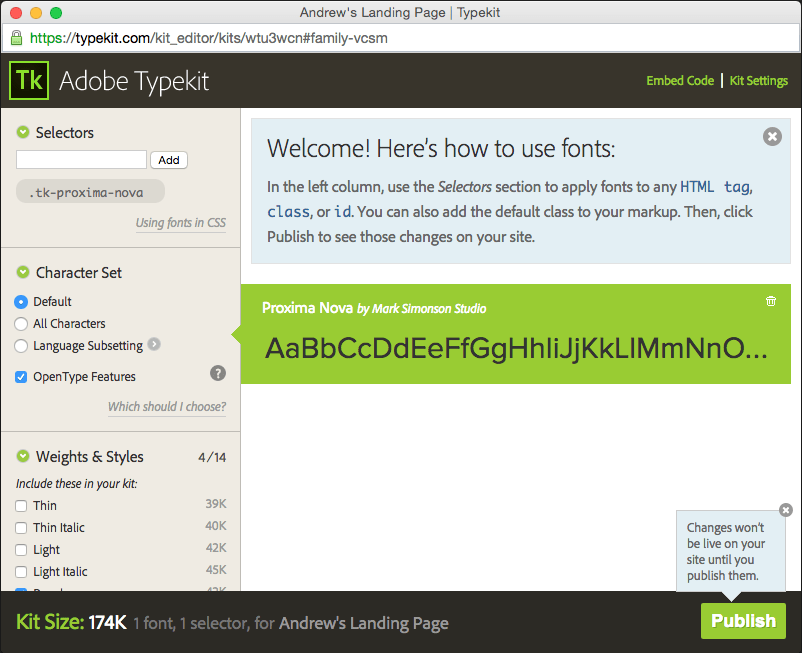
After selecting the kit you want, you will see a new window showing a wide array of font options. Before I do anything else I choose the weights and styles that I will be using on my page. As shown in the image, you can find these on the left-hand side of the window. Be aware that the more weights you select, the bigger the kit size will be, which will affect page loading time.
Once you’ve selected the appropriate amount of weights and styles, click the using fonts in CSS link in the top left section of the window and paste the code into the CSS of your page: (this will be different depending on which font you have selected, and be sure to include style tags before and after)
After this has been implemented, go ahead and publish your page and BOOM! you’re ready to start using your fancy new font! In order to use the typeface in Unbounce, make sure you are using the Heading 1 label for your fonts and you will see the Typekit font once you’ve taken your page live (unfortunately it won’t show up in the page preview mode).
Implementing Google Fonts
Implementing a Google Font is even easier than Typekit and in Unbounce you can view the font in preview mode without having to take the page live. On the downside, their selection of fonts is considerably more limited than Typekit. But at least it’s free!
Find the font you want by browsing the filters or just scrolling down until you see something you like. To start using a font, click on the Quick-use button next to the Add to Collection button. It looks like a box with an arrow inside.
As with Typekit, you should next select the appropriate weights and styles for your page. Google fonts has a handy gauge to show how long your page will take to load given your choices, so make sure you only select what you absolutely need.
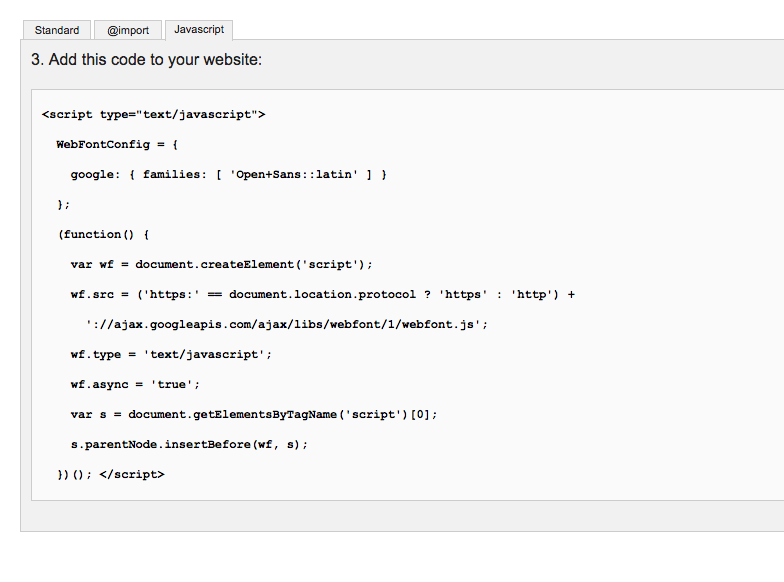
Next, add the corresponding Javascript code to your page by selecting the Javascript tab further down the page. Be sure to place this code in the <head> section in order for it to work properly!
For the CSS portion, use this following code to start off:
<style type="text/css">
h1 {
paste_font_webcode_here
}
</style>
After that, take the snippet of CSS code specific to your font and replace it over the placeholder “paste_font_webcode_here.” I used Open Sans for this example, which looks like this:
 Once you’ve added all of this into your Unbounce page or website, make sure that your page text is classified under “Heading 1” just like with Typekit. Of course, if you wanted to change it to h2 or h3, just make sure you make the appropriate edits to the CSS code. With that, your page should have Google Font integration up and running.
Hopefully these tutorials have been helpful in getting your landing pages set up with unique fonts. It has been my experience that a font can either make or break a page, and with the correct use of weights, you can rest assured that your typography hierarchy is clear and easy to understand for your viewers to get the most conversions possible. In the end, you’ll have better landing pages, more conversions, and better ROI from your design budget.
Still have questions or can’t seem to get it working? Let me know in the comments!

