8 Clever Ways to Save Time with AdWords Editor 12
by Casey Walrath • September 29, 2017
For years, PPC ninjas (and ninjas-in-training) have sung the praises of Google’s powerful AdWords companion program: the AdWords Editor. The editor, which allows you to download your AdWords account to let you work on it offline, remains the best and quickest option for making bulk changes, and for any changes where you need to double-check your work before taking it live.
But while the online AdWords interface has continued to improve every year, the Editor has been relatively stagnant with an ugly, outdated interface and in some cases weirdly limited features.
However, Google recently took steps to improve things by releasing AdWords Editor 12.1, which brings some useful new features and a significant interface overhaul. It’s still not the prettiest program you’ll see but compared to previous versions it’s downright gorgeous.
Note: This article was originally written when AdWords Editor 11.0 was released. It has since been updated to reflect changes in the AdWords Editor with the release of version 12.1.
More importantly, the AdWords Editor is still an incredibly powerful tool once you take time to learn it. In this post, I’ll give you the run down on some cool things about AdWords Editor 12.1 and how you can use them.
1. New Interface
The most immediately noticeable difference with AdWords Editor 12.1 is aesthetic. Prior to version 11.0, navigation was split between a tree-view campaign structure on the left side and various tabs on the top.
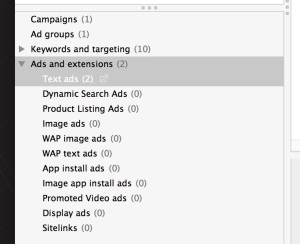
Now, most of the navigation has been consolidated to the left side, which sort-of, but not exactly, matches the online interface. In addition to the campaign-tree view, you can look at Campaigns, Ad Groups, Keywords, and Ads, along with Extensions and other targeting methods.
You can also edit Shared Library options like bid strategies and sitelinks—although not, unfortunately, shared keyword lists. It’s nice knowing that almost everything you need can be accessed somewhere on the left-side menu.
2. Multi-Select
Now, let’s talk about what AdWords Editor 12.1 can do. One of the Editor’s most useful features is Multi-Select. For example, let’s say your account has 10 campaigns, and you want to edit Ad Group bids in four of them.
With multi-select, you just Control + Click (Command + Click for Mac) those four campaigns on the tree menu, then click to your Ad Groups view below. You can also Control + Click in the tree view to highlight only specific ad groups.
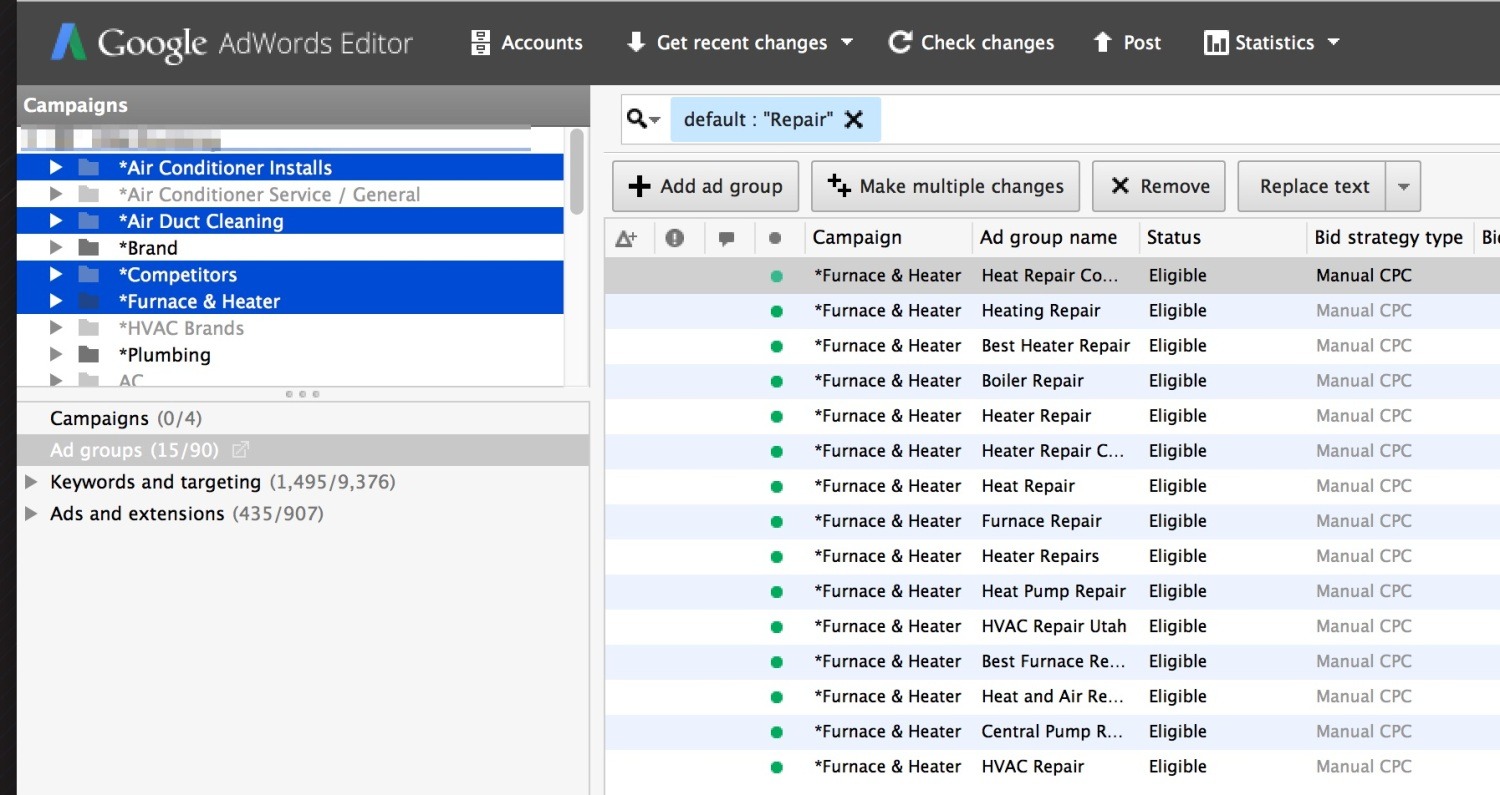
Four campaigns selected, Ad Groups tab highlighted, results filtered by the word “Repair.” Trust me, this is really neat for AdWords geeks.
This wasn’t possible in older AdWords Editor versions without tricky-to-setup filters. With Multi-Select, you can make changes to specific parts of your accounts without affecting others.
3. Edit Multiple Accounts at Once
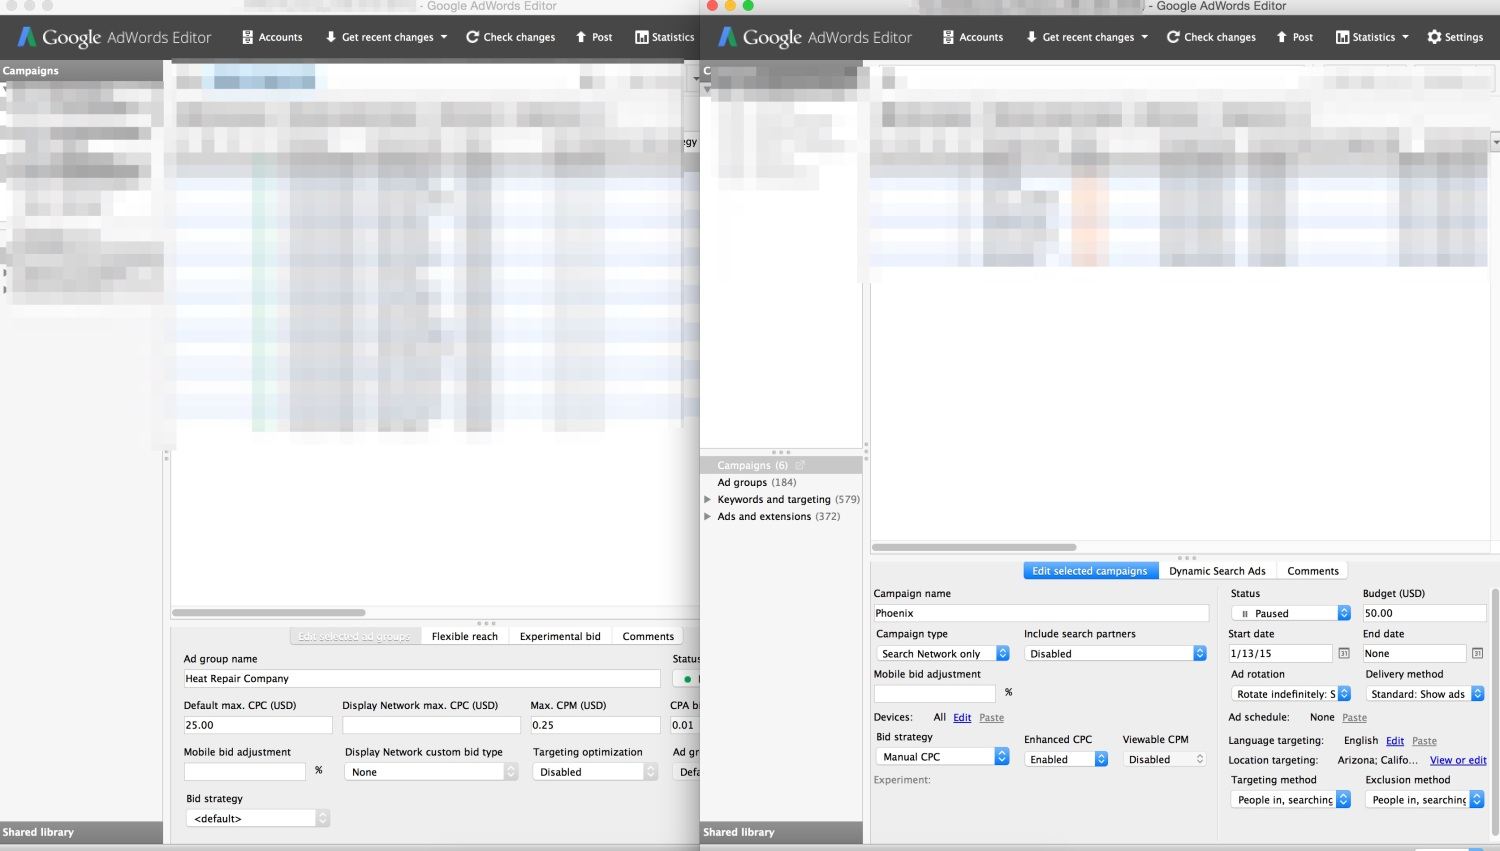
In previous versions of AdWords Editor, you actually couldn’t look at accounts side-by-side. Now, when you copy campaigns or settings between accounts you can look at them in separate windows, which makes it much easier to avoid mistakes and spot discrepancies.
This also means you can edit an account while another is downloading or posting changes.
4. Replace Text
Let’s talk about one of the most powerful AdWords Editor functions: Replace Text. Along with its companion tool, Append Text, Replace Text has been placed front center in the editor.
What makes the Replace function so cool? Here’s just one trick you can use for making bulk changes to ads:
[Tweet “Learn to make mass changes to your Google Adwords Account using the AdWords Editor Replace and Append Text tools”]
Say you have 500 ads that you need to update with a new offer—instead of 10% off, your product is now 15% off. Sounds like a pain, right? Not with the AdWords Editor!
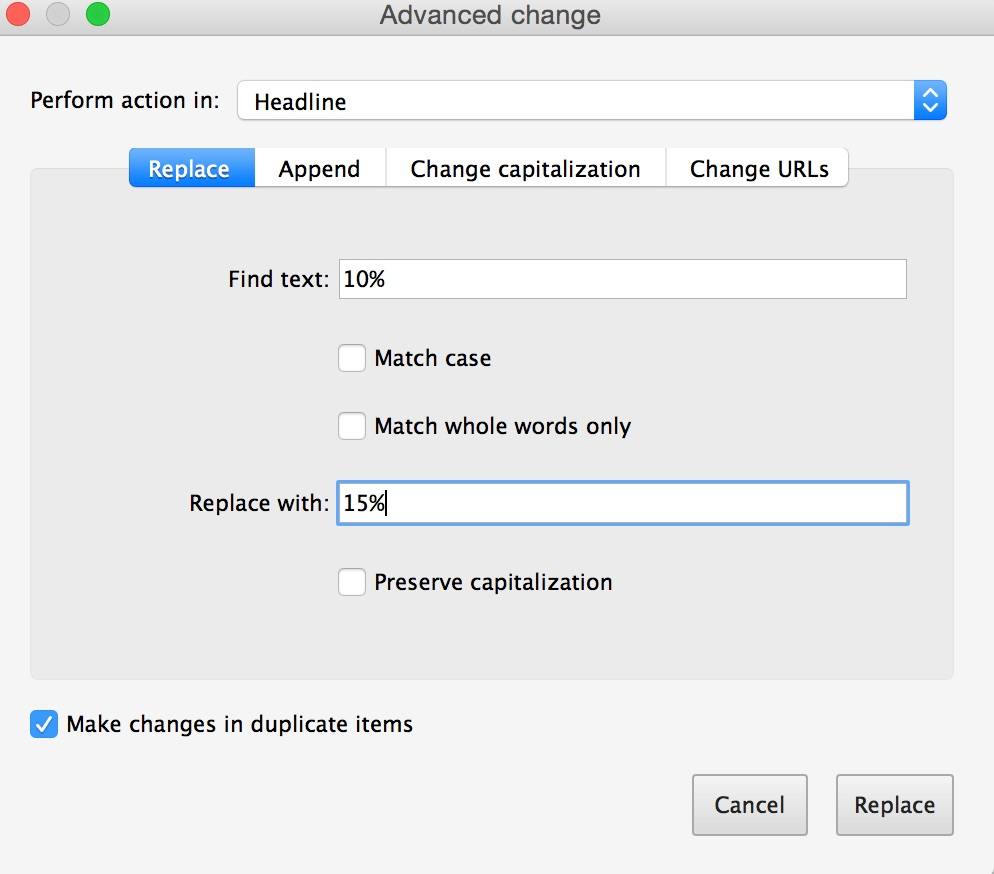
First, do a search for all ads with the text “10%”, then highlight all those ads and click Replace Text
Replace 10% with 15%—but let’s also say you don’t want to overwrite your old ads and lose their click data, so check Make Changes in Duplicate Items. This will create new duplicates of all the ads with the new offer.
Finally, just pause your old 10% ads and you’ve newly got updated ads with no fuss.
5. Append Text
Located right below Replace Text, Append Text lets you add text before or after any part of a keyword, ad group, or ad. For example, you can select multiple keywords and append a city name to bid on more localized terms.
Here’s an advanced Append Text trick: let’s say you’ve got 50 ad groups with one exact match keyword per ad group, and you want to expand that to include phrase match and broad match modified variants. Copying the keywords ad group by ad group, then adding the + symbols for broad match modified, would take forever.
Instead, highlight all your keywords and click Append Text.
First make our phrase match keywords: Type in some placeholder text (I always do “ZZZ”) and check Before Existing Text. Also check Make Changes in Duplicate Items
This will create 50 new keywords that looks like this
ZZZfirst keyword Exact Match
ZZZsecond keyword Exact Match
ZZZthird keyword Exact Match
Change those keywords to phrase match, then click Replace Text and just replace “ZZZ” with a blank line (and leave the Duplicate Items unchecked this time). Now you’ve got regular looking words with a new match type!
Finally, let’s get our broad match modified! Highlight your original exact match keywords again, and click Append Text. Append the + symbol in front and check Make Changes in Duplicate Items.
Now you’ve got a + before the new keywords, like this:
+first keyword Exact Match
+second keyword Exact Match
+third keyword Exact Match
Change them to broad match. Now we need another + before the second word, so click Replace Text and replace a single space with “ +” (that’s a space, then a plus sign). The end result is this:
+first +keyword Broad Mach
+second +keyword Broad Match
+third +keyword Broad Match
That might sound a little complicated, but once you’ve done it a few times it just take a minutes or two to create hundreds of new keywords!
6. Paste Ads
Sometimes, you’ve got a set of ads in one campaign that are working great that you want to try in a new campaign. However, writing all of those ads out again would be a huge pain.
Fortunately, the AdWords Editor comes to the rescue again!
All you have to do is go to the ad group with the existing ads you want to copy, select the ads and hit Ctrl + C/Command + C (or right click and choose “Copy”). Then, select the ad groups you want to paste your ads into and hit Ctrl + V/Command + V (or right click and choose “Paste into).
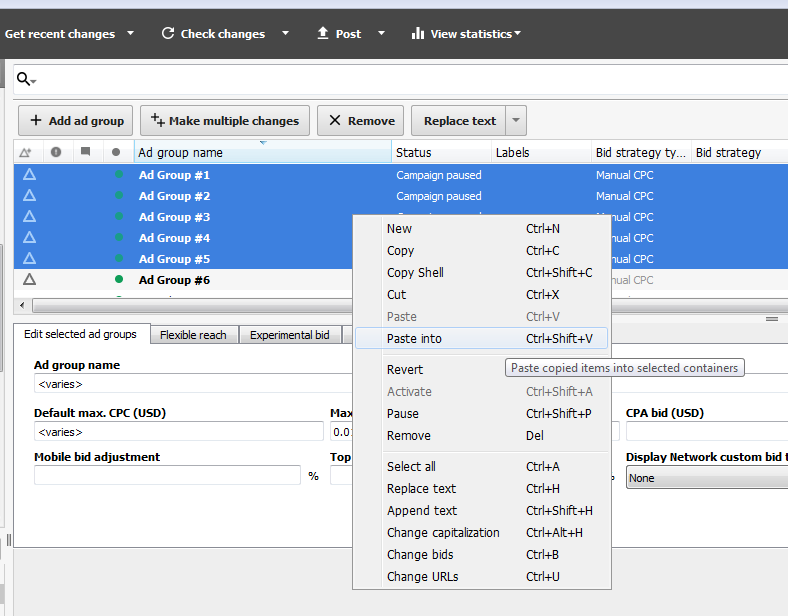
That’s it! Your ad groups should all have your proven ads in them now. You can go in and make any changes you’d like (change the final URL, for example), but you’ve just saved yourself hours of typing.
7. Copy Shell
On the other hand, sometimes you like your campaign settings (location, bid adjustments, audience lists, etc), but you want to try new keywords or ad copy. The good news is, AdWords Editor 12.1 makes this easy, too.
All you have to do is right click on the campaign with the settings you want to duplicate and choose “Copy shell”.
Hit Ctrl + V/Command + V or right click and select “Paste” to create a new campaign with the old campaign’s settings. Give your campaign a unique name and you should be good to go!
8. Custom Rules
One of the biggest changes with version 12.1 is the ability to create your own custom rules. If you’ve used the AdWords Editor before, you’ve probably seen that helpful (or annoying) yellow triangle pop up from time to time to warn you about potential problems.
Unless you’ve set up your own custom rules, that yellow triangle means you’ve violated one of the AdWords Editor’s standard 16 “best practices” rules:
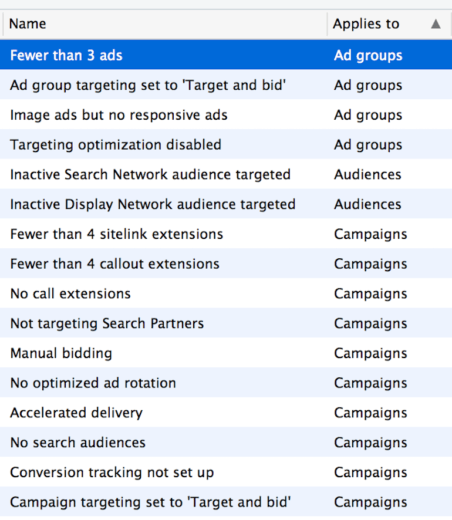
Obviously, you can still run campaigns that violate these rules, but your campaign or ad group will be flagged by that yellow triangle. It’s a nice feature, but wouldn’t it be nice if you could create your own rules to make sure that all of your campaigns follow account-specific best practices?
Well, now you can!
AdWords Editor 12.1 allows you to create your own custom rules that will flag elements of your account that don’t meet certain criteria. This can be a lifesaver, especially if you’re making bulk edits or making a lot of changes in a large, complex account.
To set up your own custom rules, simply click on the dropdown menu in the left sidebar pane and click the “Add Custom Rule” button in the panel that comes up.
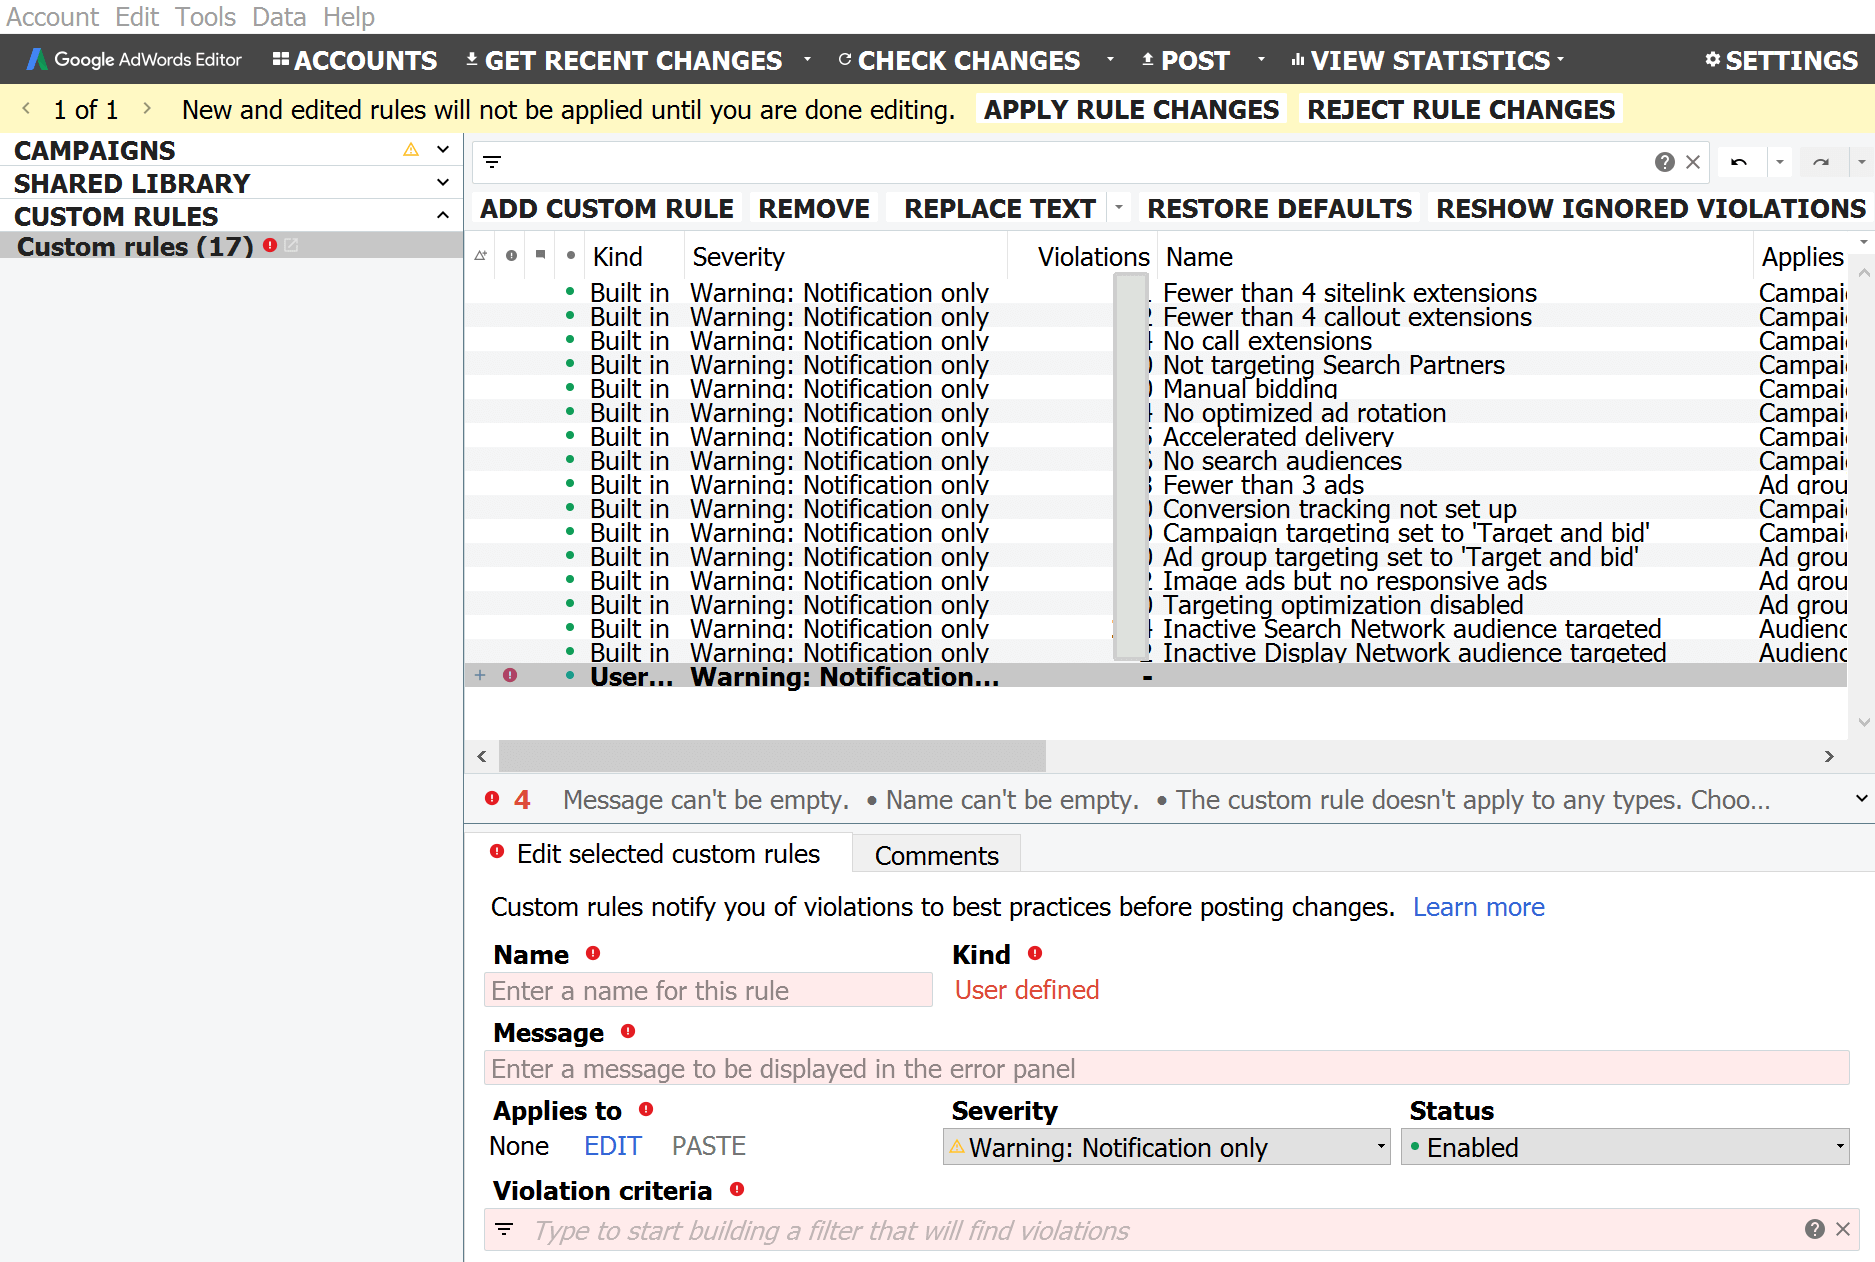
From there, all you have to do is enter a name for your rule, a message that will be displayed when the rule is violated and then build a filter for your rule. This filter can cover all sorts of things, from campaigns to audiences to ad groups and can be as specific (campaigns that meet certain criteria without keywords that meet additional criteria) as you’d like.
Easy enough, right?
Once you have your rules set up, you can check the Custom Rules panel to see if you have any rule violations in your account. Or, if you want to see which specific campaigns, ad groups, etc are violating your rules, you can click on the filters box at the top of the Editor and create a “Custom rules violation filter” that will show only account elements that violate a specific rule.
Conclusion
Hopefully this gets you started with using AdWords Editor 12.1 effectively. There’s so much more you can do with the editor that we haven’t touched on today, so post your own favorite tricks in the comments below!
What are some of your favorite things about the AdWords Editor? What do you wish Google would change about the AdWords Editor?


