Selling on Facebook: How to Set Up Your Facebook Shop
by Ana Gotter • September 22, 2018
There’s no denying that Facebook has a lot of selling power just as a marketing platform. One-third of users engage with brands regularly on-platform and one study found that 52% of users surveyed said they’d discovered a new retail product they were interested in buying on Facebook.
As Facebook has evolved over the years, so has its selling potential. In addition to using organic marketing and paid advertising to drive off-site sales effective methods of selling, you can also directly sell your products on Facebook.
In this post, we’re going to go over everything you need to know about selling on Facebook, including how to set up your Facebook Shop for success.
What is a Facebook Shop?
If you want to sell your products directly on Facebook without users having to leave the platform or app in any way, a Facebook shop may be for you. Some ecommerce businesses use this feature to promote products and services and increase sales, knowing that the extra exposure and added convenience factor can help them on both fronts.
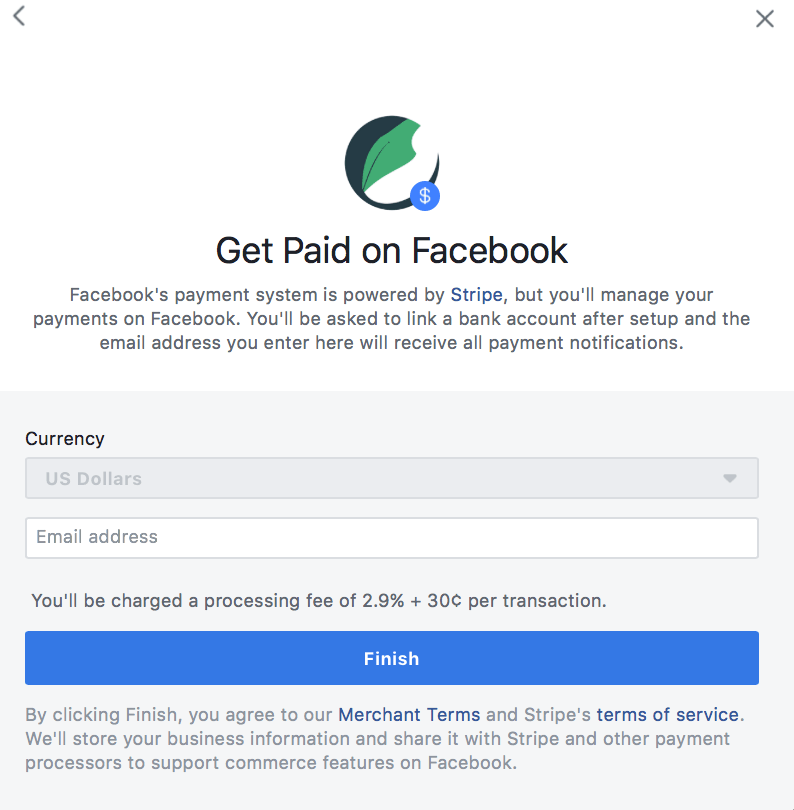
With Facebook Shops, you can sell directly through Facebook, even accepting credit cards through Stripe for a 2.9% + $.30 transactional fee. This is a fairly standard credit card fee when it’s processed through payment providers like PayPal or Stripe, for what it’s worth.
Selling on Facebook
Setting up a Facebook shop is something that can be done even if you don’t have any social media marketing experience and it’s much easier than setting up an independent shop online in many instances.
Ready to start selling directly on Facebook? Let’s go step by step through the process.
Enabling a Facebook Shop Tab
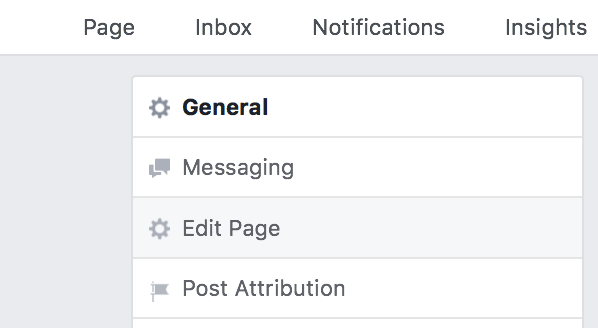
If you don’t already have a Shop Tab on your Facebook, head to your Page’s Settings.
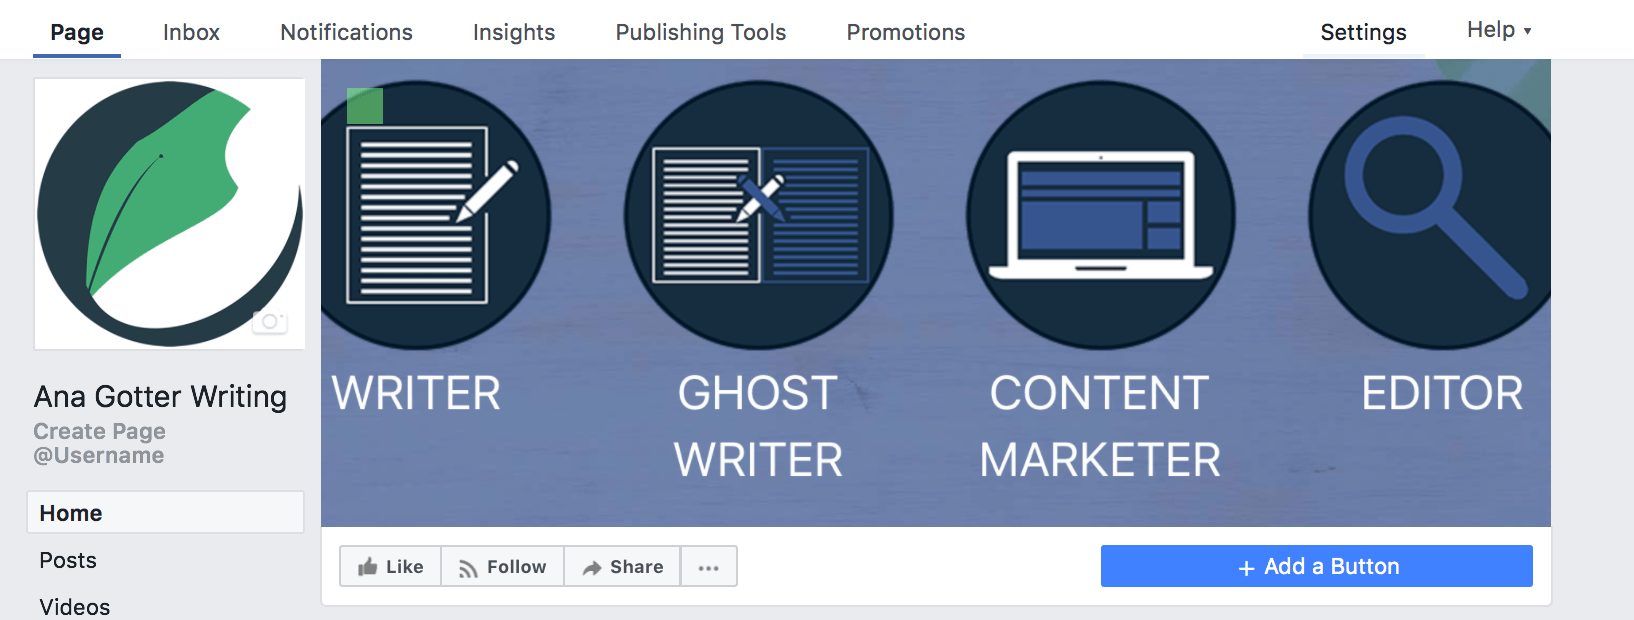
Then, head to “Edit Page.”
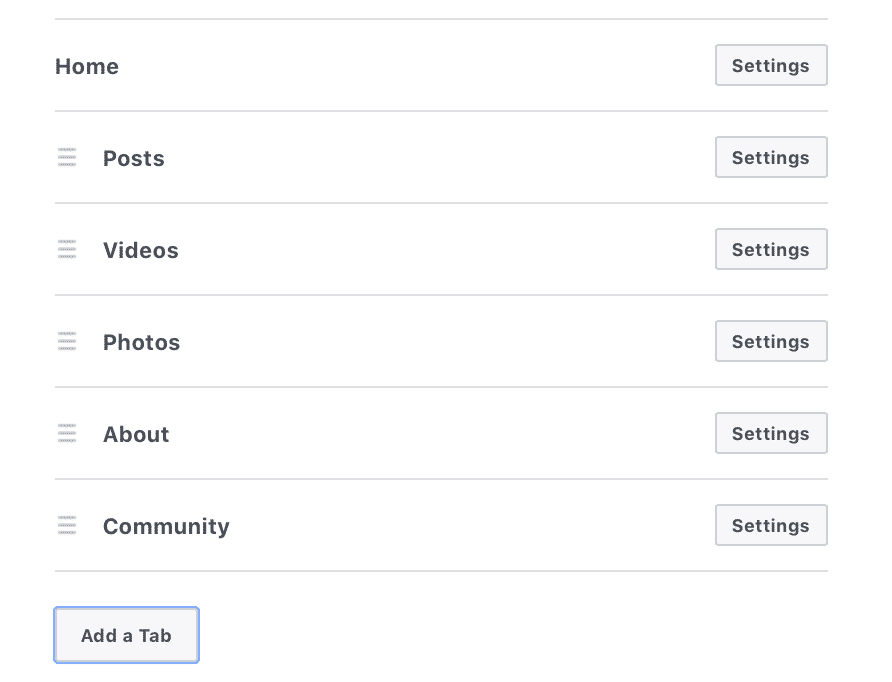
When you scroll down on this page, you’ll see the option to “Add a tab.”
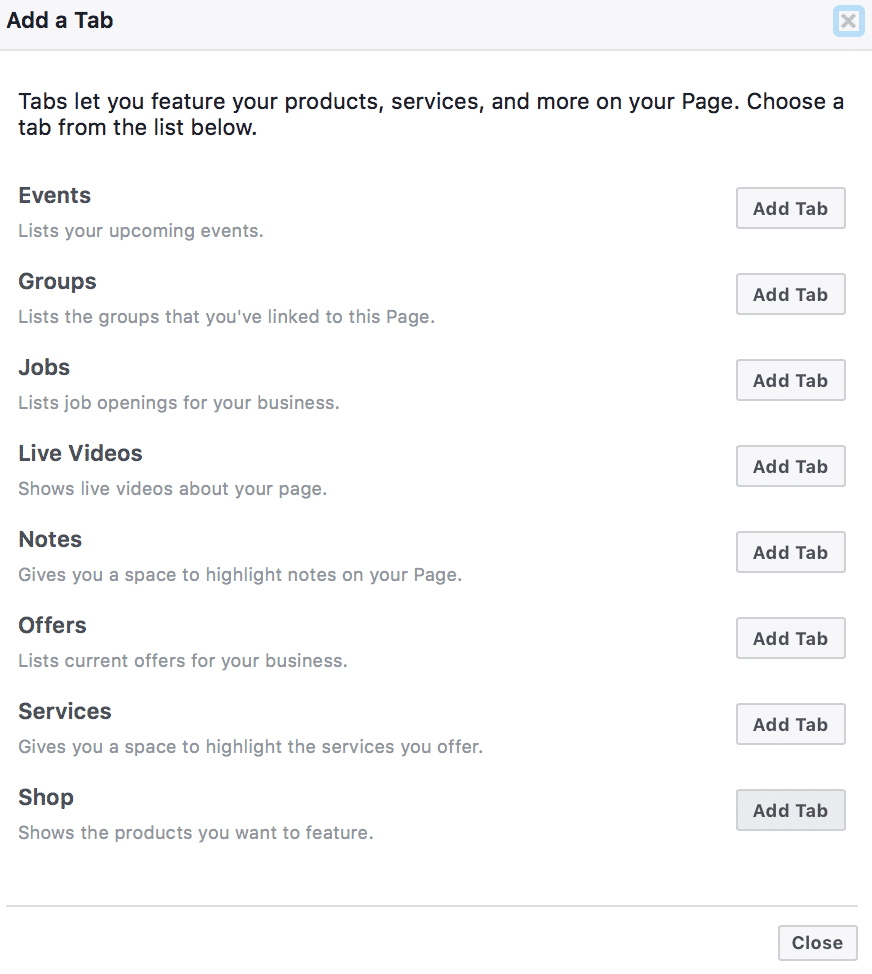
 Locate the Shop tab and click “Add Tab.” It will immediately be added to your Facebook Page and be available for you to customize.
If you want to make sure that your Shop gets plenty of attention on Facebook, I highly recommend reorganizing the side navigation bars on your Page so that the Shop tab is towards the very top.
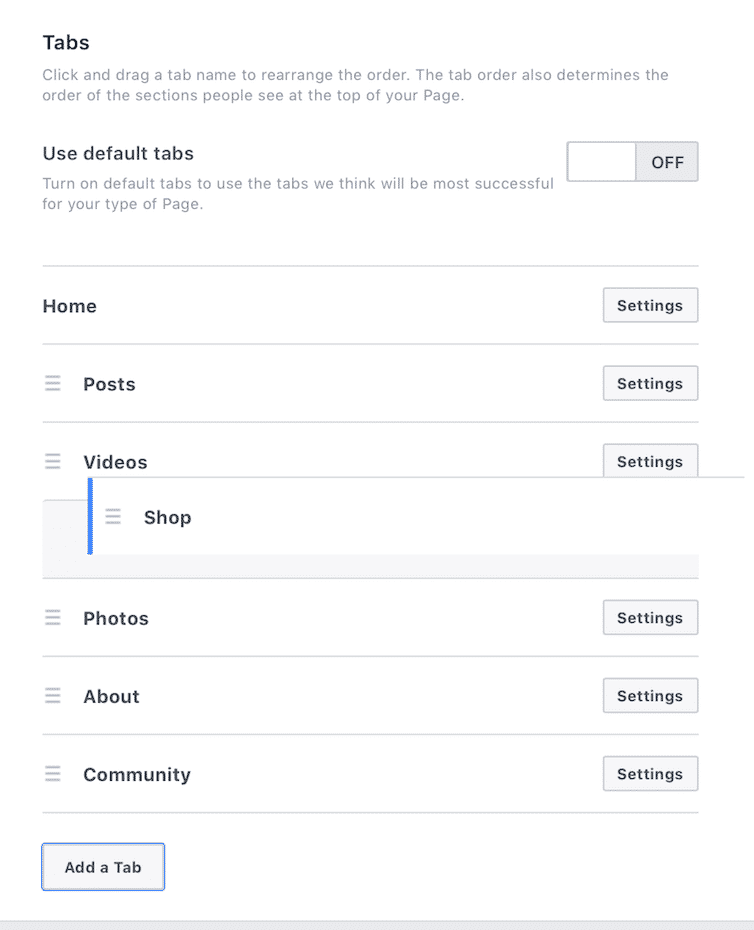
To do this, click and hold on the tab and drag it to the position you’d like it to be.
Setting Up Your Shop
Navigate back to your Page, and click on the Shop tab. You’ll immediately be prompted to set up your Facebook Shop.
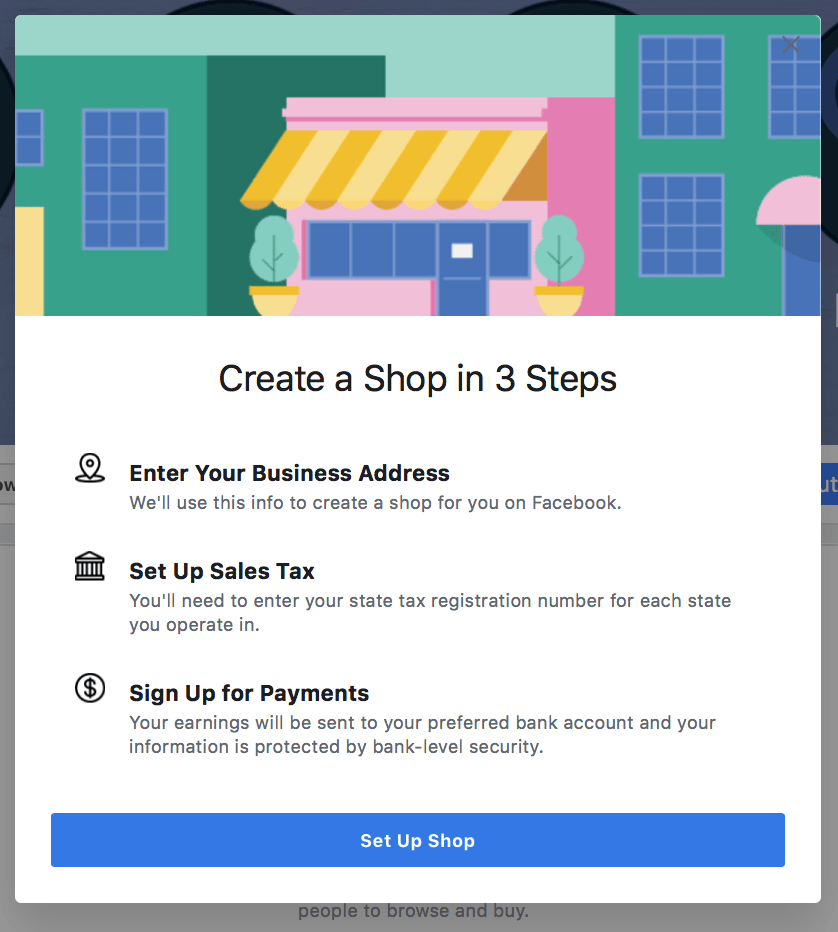
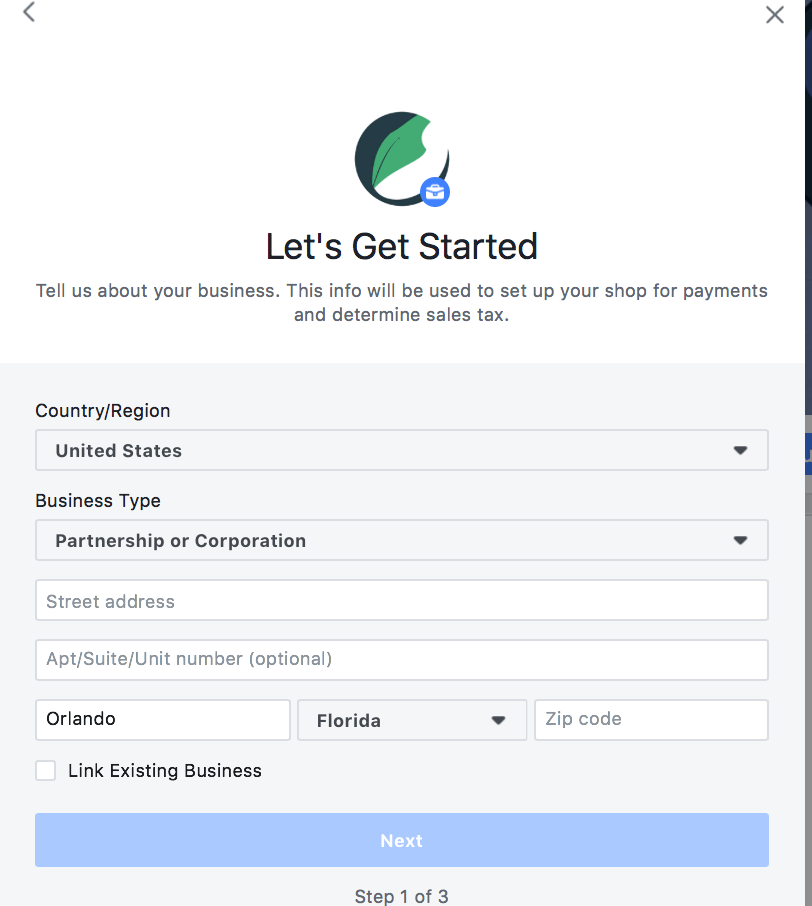
First, you’ll need to enter in your business’s address and incorporation status.
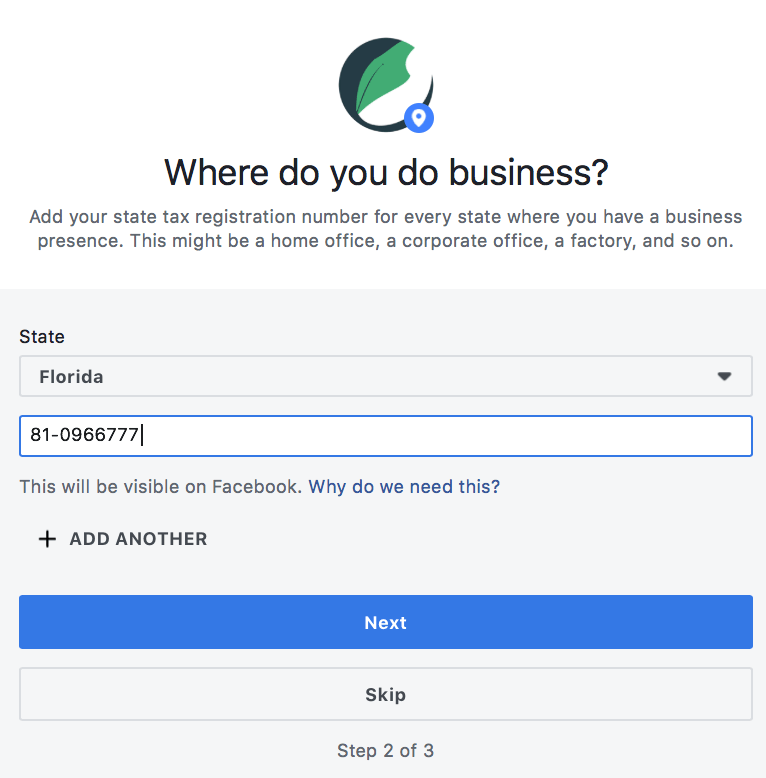
Next, you’ll be asked the state your business operates in and your tax registration number. Note that this will be visible on Facebook because you’re officially doing business there.
Finally, enter in your email address and choose your currency if relevant.
Facebook will prompt you to finish setting up payment later.
Start Waiting
Up until now, every part of Shop creation was instantaneous. Actually having your Shop go live, however, isn’t quite so immediate. You’ll see a notification that your Shop is pending review, which may take up to 48 hours.
Be patient, and as long as you’re following Facebook’s terms of service and not trying to sell anything illegal or be misleading, you should be okay.

Swamped with work and need to take a break at this point, but don’t want your Shop to go live when it’s empty? Don’t sweat it. Even once the waiting period is over, your Shop won’t be visible to users until you’ve added products to it.
Define Your Shop
Fortunately, there’s plenty to do while you’re waiting and you can use this time to make your Shop shine.
One of the most important things you can do is explain what you’re selling on Facebook. You have 200 characters to define your Shop and detail it to potential customers, so make the most of it.

Remember to:
- Offer value propositions and explain why you’re the best. Are your shirts made with organic cotton, or is the pottery made from women artisans pulling themselves out of poverty? Hit your big selling points hard up front.
- Define your brand. Remember that by having your Shop on Facebook, users don’t need to navigate to your site to purchase. This is both a pro and a con, because your site has a ton of great information about your brand and products you’ve deliberately placed there.
- Consider putting return information here. Do you offer free returns or fast shipping? If you have any room leftover, consider adding it to the description to entice users to continue browsing.
Adding Products to Your Shop
There’s a lot of complexity with what you can do when adding products to your Facebook Shop. This is a huge benefit, as it makes selling more automated and flexible and it gives buyers all the information they need.
First, you’ll add photos or videos of your product. I recommend choosing an image for the first picture users will see, but adding additional photos or videos to provide more information can be particularly effective.
You’ll also add the product title, its price, a description and how many you have in your inventory.
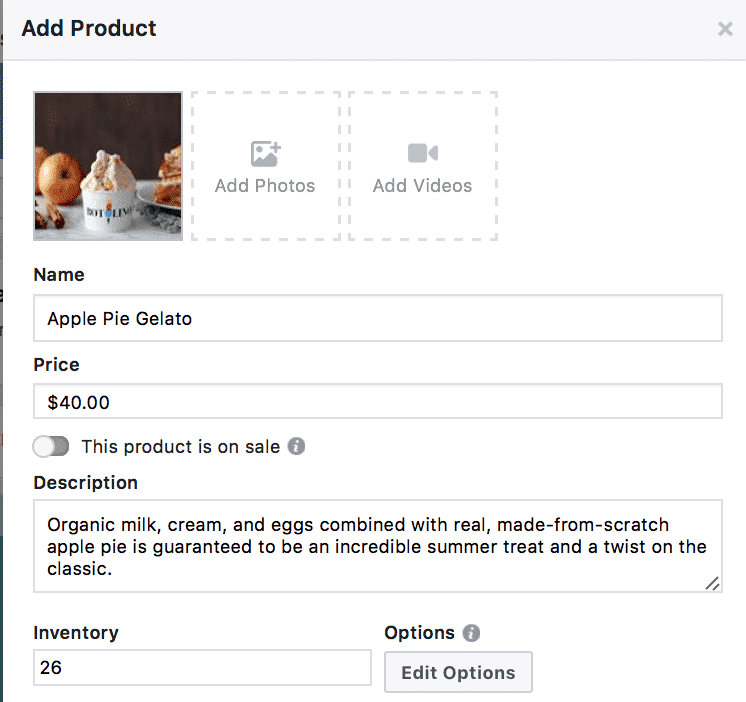
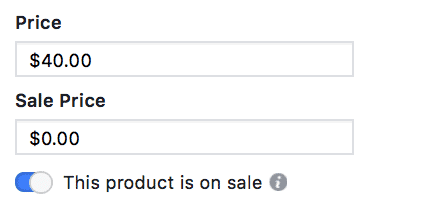
If you want to put any products on sale, you can click the “This product is on sale” tab and enter in a sales price. Users will be able to see both and know they’re getting a deal.
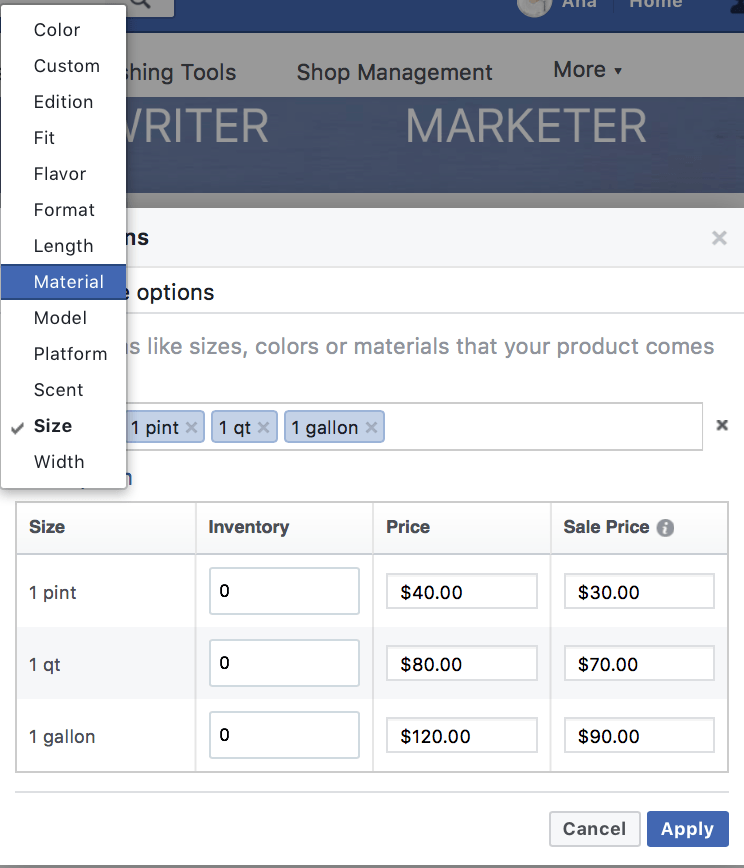
If a single product has multiple variations, like different flavors, sizes, colors or more, you can add those options to your Facebook shop. You can even customize their individual pricing, including sales pricing, and how many of each you have in your inventory.
Next, you’ll choose Shipping options. You can choose to add any of the following options, but note that you’ll need to ship any orders within 3 days from the date the order was placed.
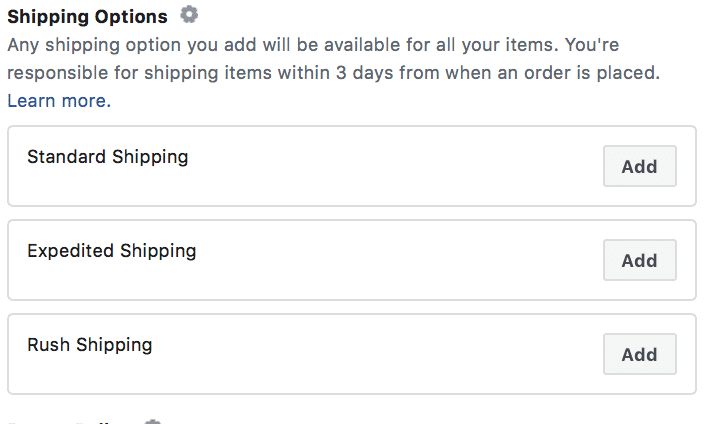
Adjust your Shipping options, adding a price for each along with expected shipment times.

Finally, you need to add a return policy.

Facebook’s default is that all purchases are return-eligible within 30 business days, but you can create a custom time frame of your choice.
Create Collections
Like Shopify, Facebook lets you group similar products into collections. You do this manually, so you can choose to group together products in a variety of ways, including:
- products that are similar in nature (women’s clothes vs. children’s clothes vs. men’s clothes)
- certain products that fall within certain price thresholds (best deals under $19.99!)
- products that have a common theme (get ready for summer!)
- featured products (those you most want to push, or your highest-selling products)
To add a collection, you’ll name it, choose whether it’s public or private it and then add products to it.
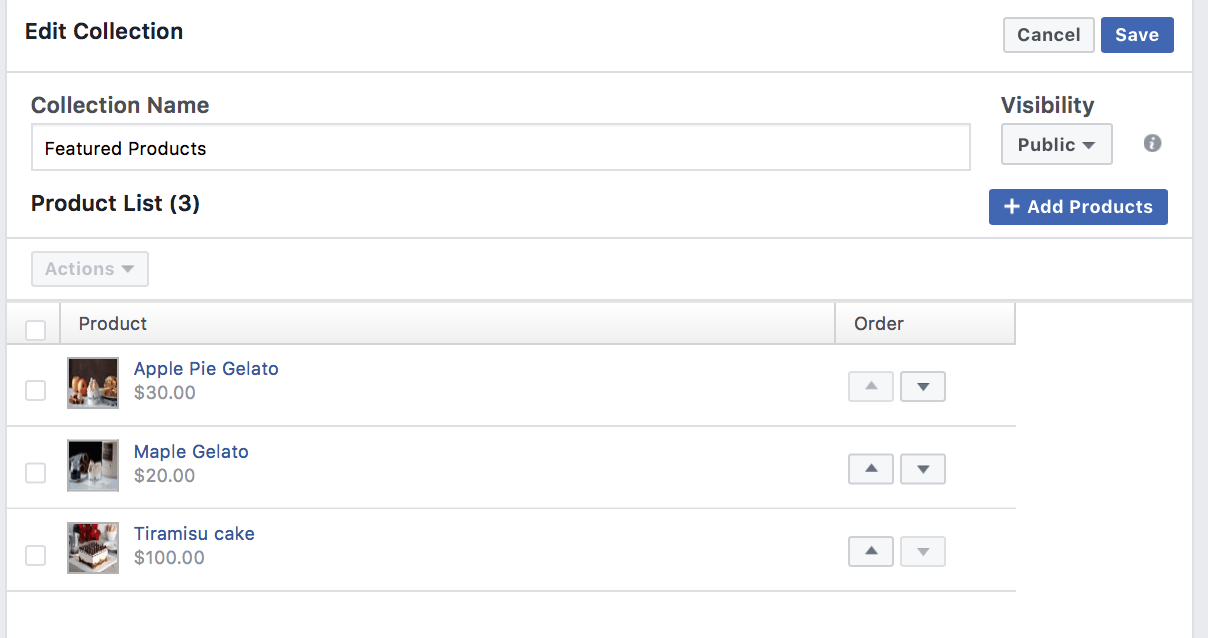
You can reorder the products to put your featured items at maximum visibility.
Easy Promotion: Tagging Products
A great way to drive traffic to your Facebook Shop and promote your products is to tag your products in images and videos. You can even do this on your cover photo to give them maximum visibility.
The example we’ll use here is the cover photo. Click to view it and then you’ll notice a “Tag Products” option to the right.
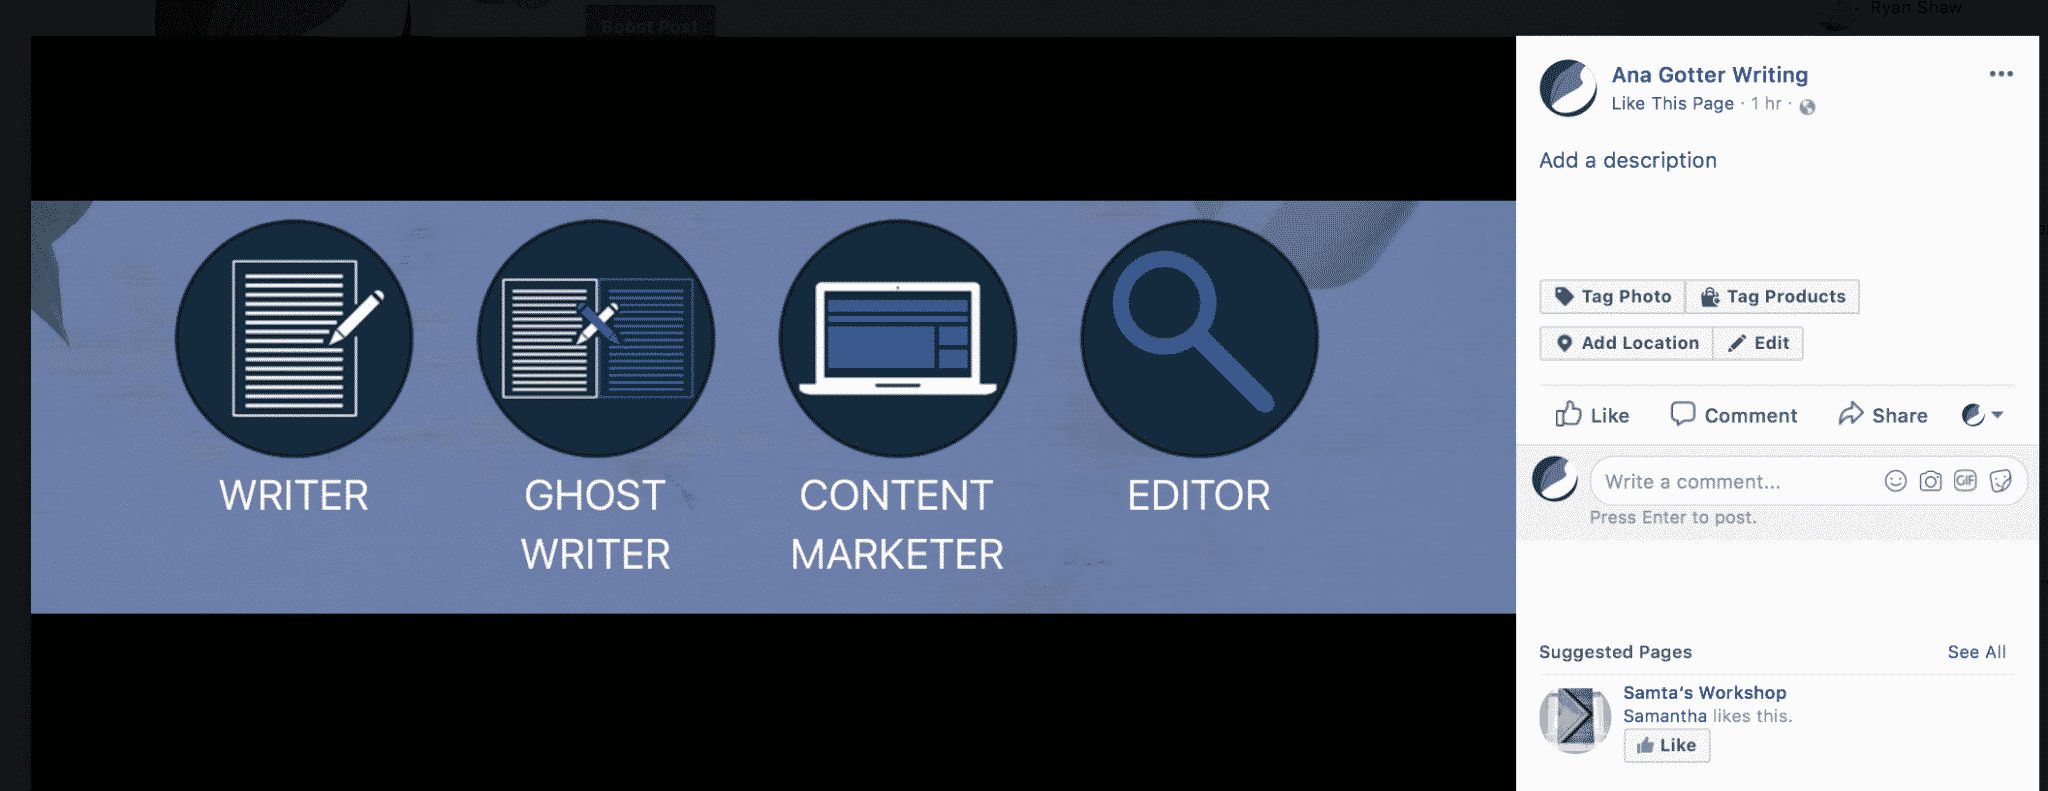
Once you do this, click on the product or area of the photo that you’d like to tag and search for the correct product. Select it. You can add multiple products and click “done tagging” once finished.
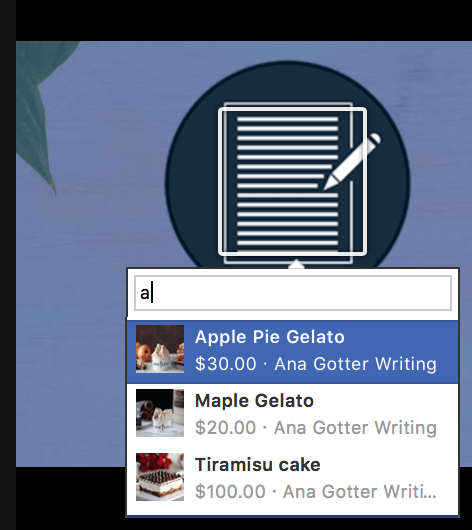
After you do this, users will see the product name, image and price when their mouse hovers over the individual product tagged. They can click on it to be taken to the full product listing.
Should I Use a Facebook Store?
There are plenty of good reasons to add a Shop to your Facebook. Any additional digital storefront, after all, gives customers one more place to buy, and being able to purchase conveniently on-site is a plus.
Since it also gives you the ability to tag products in images and videos, selling on Facebook can also help with product promotion.
There are some downsides, however.
Your full website is often capable of adding better context to you, your brand, and your products. It’s set up with specific funnels in place, and you likely have other features up and running like visible reviews, automated product recommendations and opt-in boxes. These are all designed to help you nurture relationships and sell more.
By selling on Facebook, you risk losing those benefits, which could ultimately decrease purchase value. Watch your sales carefully and keep an eye out for decreased purchase value or decreases in add-on purchases.
Final Thoughts
There are a lot of ways to sell on Facebook and that now includes literally selling on Facebook through a virtual, on-platform storefront. Whether you’re using the storefront to promote your products and increase site traffic or to sell directly from Facebook, it’s a good option that most ecommerce businesses could consider and test for themselves.
If you notice that purchase value seems to be going down on Facebook Shop sales when compared to site sales, consider pausing the store or having it clearly reroute to your website. A Facebook Shop should add convenience for your customers and give you another avenue of selling, but it’s not worth it if it’s costing you sales or profit in the process.
What do you think? Do you use Facebook Shops to sell on Facebook? Which method of Facebook selling is most effective for your ecommerce business? Share your thoughts and questions in the comments below!

