5 Easy Unbounce Codes to Upgrade Your Landing Page
by Sarah Rodriguez


At Disruptive Advertising, we love using Unbounce to create fabulous landing pages. The right landing page can make a huge difference to your conversion rate and Unbounce is a fantastic platform for creating, testing and managing your landing pages.
Recently, we’ve covered a lot of different ways to create better looking and converting landing pages, such as:
- How to use the psychology of color to improve page performance.
- The effects of font and text size on conversion rate.
- How to optimize your page for mobile.
- The importance of message match.
- Easy tests you can use to improve your landing page conversion rate.
These are all well worth a read; but, if you’re ready to really get the most out of your landing page, here are 5 easy codes you can use to upgrade your landing page on Unbounce.
How to Add the Codes
Before we jump into the codes themselves, here’s how (and where) to add them. Once you’ve opened (or created) your landing page, you can access the Javascript manager by clicking on the “Javascripts” button in the bottom left-hand corner of the screen.
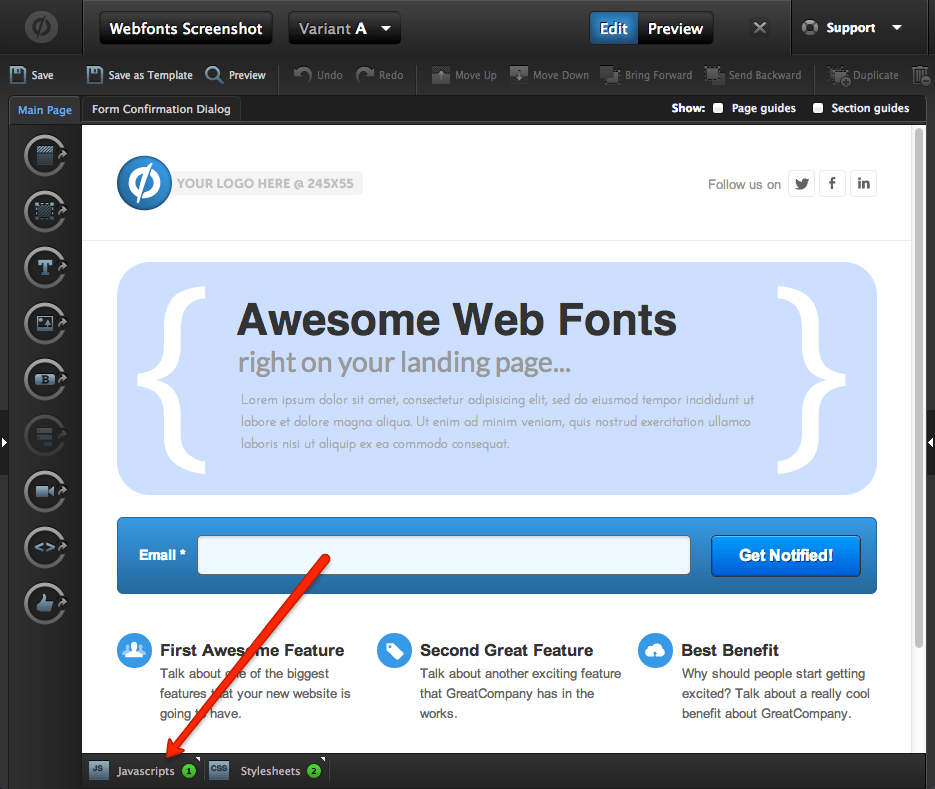
Clicking on the “Javascripts” button pulls up the following script editor.
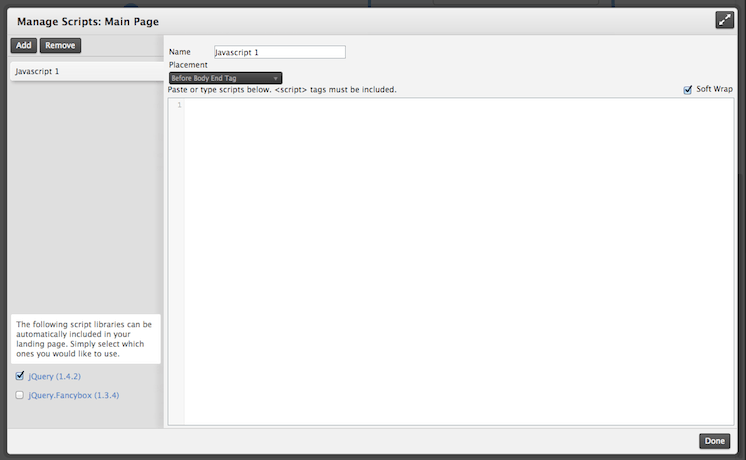
From there, you should be able to add or edit any of the following codes.
1. Favicon
We’re all familiar with the favicon, although you might not have known what it’s called. The favicon is the little brand icon on the tab in your web browser that tells you what site that tab is showing.
For example, here is a snapshot of Disruptive’s favicon:

A sharp-looking favicon is a good visual clue to your traffic that they are actually on your website. Here’s how to add it to your page.
- Click on “Javascripts” and then click “Add.”
- Paste this code:
<link rel="icon" type="image/x-icon" href="http://www.google.com/s2/favicons?domain=www.yourwebsitehere.com" /> - Set the placement to “Head“.
- Name your script “Favicon” or whatever else suits your fancy and will jog your memory.
- Fill in your website domain where the script says www.yourwebsitehere.com. For example, if I was doing this for Disruptive Advertising, the final code would read:
<link rel="icon" type="image/x-icon" href="http://www.google.com/s2/favicons?domain=www.disruptiveadvertising.com" /> - Save and publish!
The script will pull the favicon from your website (so you need have the appropriate favicon running on your actual website) and use it as the favicon for your landing page.
Voila! Your landing page looks like a respectable part of your regular site.
2. Smooth Scrolling
Ideally, paid traffic’s experience with your website should begin and end on your landing page. The more links you have on your landing page, the more opportunities you are giving your traffic to leave without converting.
That means some landing pages need to include a lot of content to help convince traffic to convert. You want to make your page as easy to navigate as possible, so it can sometimes be helpful to add a navigation bar (or a button, clickable text, etc.) with links that automatically smooth scroll a viewer down to the appropriate content.
Here’s how to add smooth scroll functionality to a navigation bar:
- Click on “Javascripts” and then click “Add”.
- Paste this code:
<script type="text/javascript"> lp.jQuery(function($) { // The speed of the scroll in milliseconds var speed = 1000; // Find links that are #anchors and scroll to them $('a[href^=#]').not('.lp-pom-form .lp-pom-button').unbind('click.smoothScroll').bind('click.smoothScroll', function(event) { event.preventDefault(); $('html, body').animate({ scrollTop: $( $(this).attr('href') ).offset().top }, speed); }); }); </script> - Set the placement to “Before Body End Tag“.
- Name your script “Smooth Scrolling”, “Frictionless Transitioning”, etc.
- Close the Javascript manager.
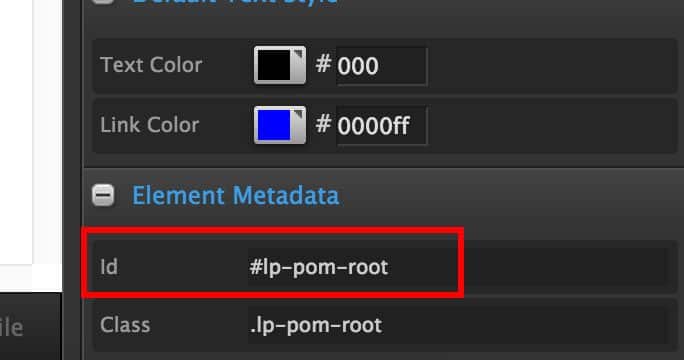
- In the main page Edit screen, find the navigation bar (button, clickable text, etc.) links you want to trigger the scroll and set the URL to the appropriate section ID tag, found on the bottom of the Unbounce properties tab (see image below.)
- Repeat for any other appropriate links, buttons, clickable text, etc.
- Save and publish!
3. The Scrolling Header
A scrolling header is a nice, subtle way to keep your branding elements in front of your paid traffic. Even if they don’t convert, they’ll at least remember your name!
Additionally, this is a great way to keep a call-to-action button or phone number in front of your audience regardless of where they are on your page. This also works great in combination with the smooth scrolling navigation bar we just discussed.
If you need an example of what a scrolling header looks like, just look at the black bar at the top of our site that keeps following you around as you read through this article. Our header always lets you know who we are and gives you quick access to the most important and relevant parts of our site.
To add a scrolling header to your landing page, follow these steps:
- Click on “Javascripts” and then click “Add”.
- Paste this code:
<script type="text/javascript"> // Fixed Header v1.1 // Replace ID below with your own box ID var boxToAppend = '#lp-pom-box-88'; var boxParent = $(boxToAppend).parent(); $(boxToAppend).clone().appendTo(boxParent).css({"position":"fixed", "left":"0", "top":"0", "width":"100%", "z-index":"899"}).children().remove(); $(boxToAppend).css({"position":"fixed", "left":"auto", "top":"0px", "width":"100%", "z-index":"999", "border-style":"none none none none", "border-width":"0px", "background":"none"}); </script> - Set the placement to “Before Body End Tag“
- Name your script “Scrolling Header” or something else to help identify it.
- Close the Javascript manager.
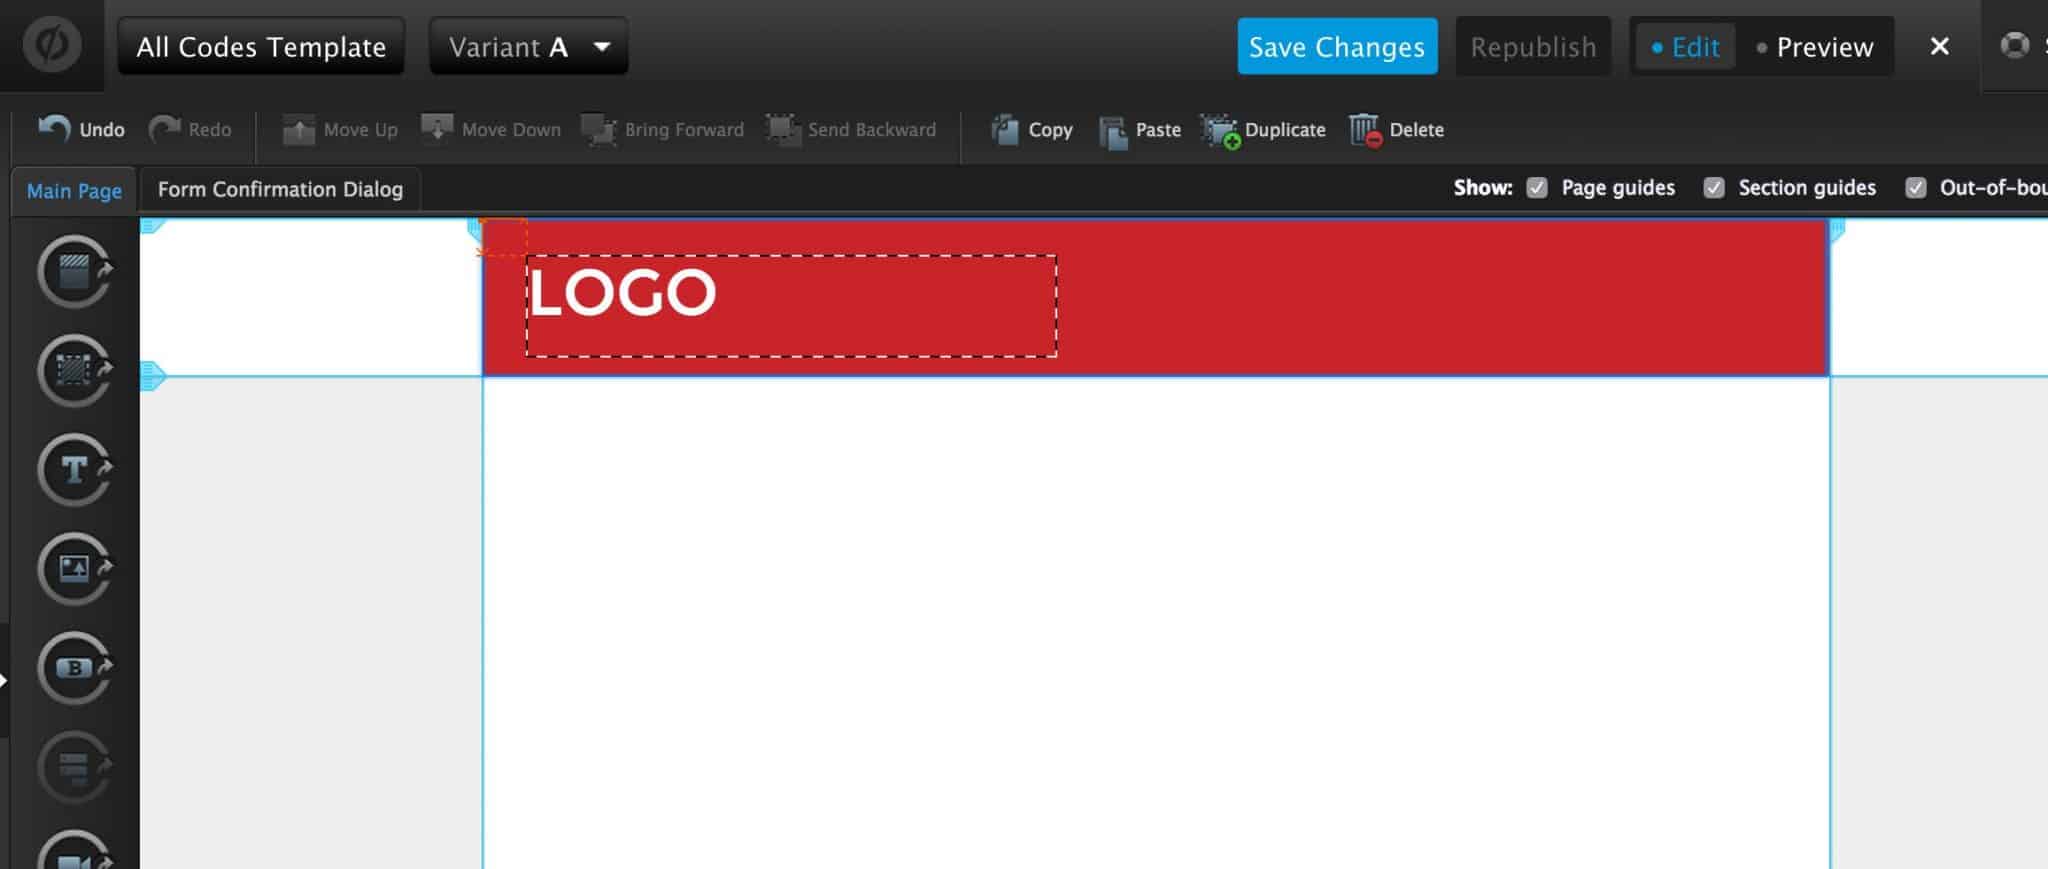
- Now insert a box the size you want your header to be into your Unbounce page and put all of the content on top of it (logo, phone number, etc.) that you want to be displayed on the header. Your box will only be the width of the page, but the code will make it stretch the full width of the screen.
- Copy the ID tag of the box.
- Click on “Javascripts” and open the “Scrolling Header” (or otherwise named) script you just created.
- Replace #lp-pom-box-88 with the box ID tag you just copied.
- Save and publish!
4. Hint Text
Hint text is great way to add a little polish to your forms and reduce the size of a form with a lot of form fields. In essence, hint text puts the label for the form field inside of the actual field, where it’s visible until someone actually starts typing.
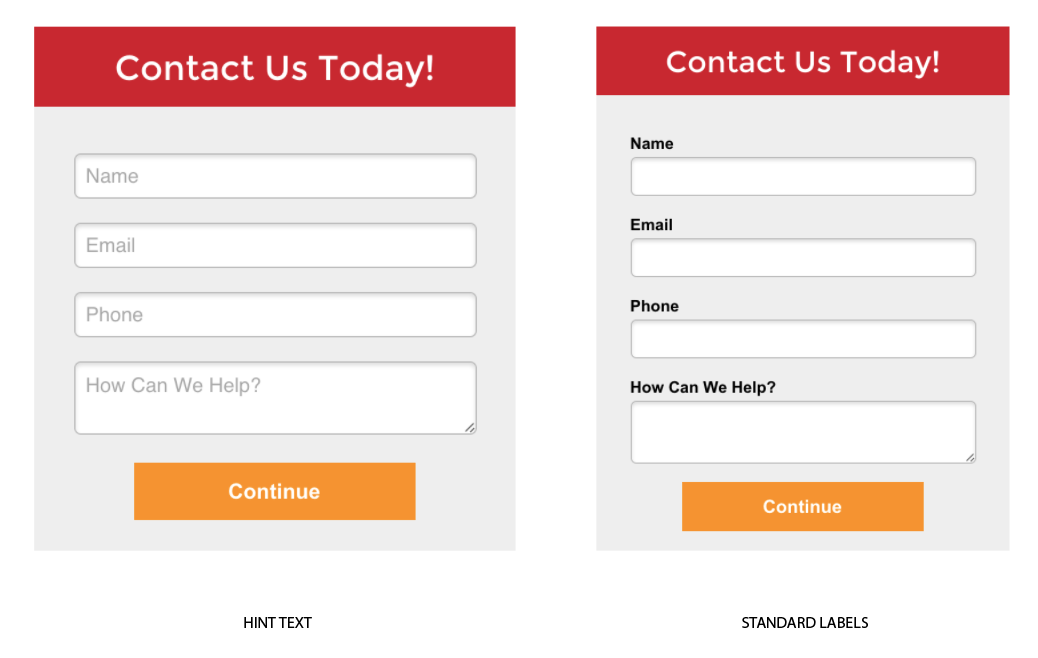
It’s a sharp and efficient way to put together a form, so it’s well worth learning how to set up. Here’s how:
-
- Click on “Javascripts” and then click “Add”.
- Paste this code:
<script type="text/javascript">

  lp.jQuery(function($) {

    // Define your placeholder texts here, corresponding to Unbounce's field names
    var placeholders = {
      "name": "Name",
      "phone": "Phone",
      "email": "Email"
    };

    // Sets the HTML5 placeholders
    for(var id in placeholders){$("#"+id).attr("placeholder",placeholders[id])}

    // Polyfill to add support for browsers like IE<=9
    if(document.createElement("input").placeholder===undefined){$("html").attr("data-placeholder-focus","false");$.getScript("//jamesallardice.github.io/Placeholders.js/assets/js/placeholders.jquery.min.js",function(){$(function(){var e=window.module.lp.form.data.validationRules;var t=window.module.lp.form.data.validationMessages;lp.jQuery.validator.addMethod("notEqual",function(e,t,n){return this.optional(t)||$(t).attr("data-placeholder-active")!=="true"||e!==n},function(e,n){return t[$(n).attr("id")].required});for(var n in placeholders){if($("#"+n).length){if(typeof t[n].required!=="undefined"){e[n].notEqual=placeholders[n]}else{e[n]={}}}}})})}

  });
</script>- Set the placement to “Before Body End Tag“
- Name your script “Hint Text” or some other helpful name.
- Close the Javascript manager.
- Go to your form and jot down each Field Name ID and its corresponding title.
- Click on “Javascripts” and open the “Hint Text” (or otherwise named) script you just created.
- Replace ‘name’: ‘Name’, ‘phone’: ‘Phone’, and ’email’: ‘Email’, with the Field Name IDs and corresponding titles you jotted down. You can find the Field ID inside the form builder here:
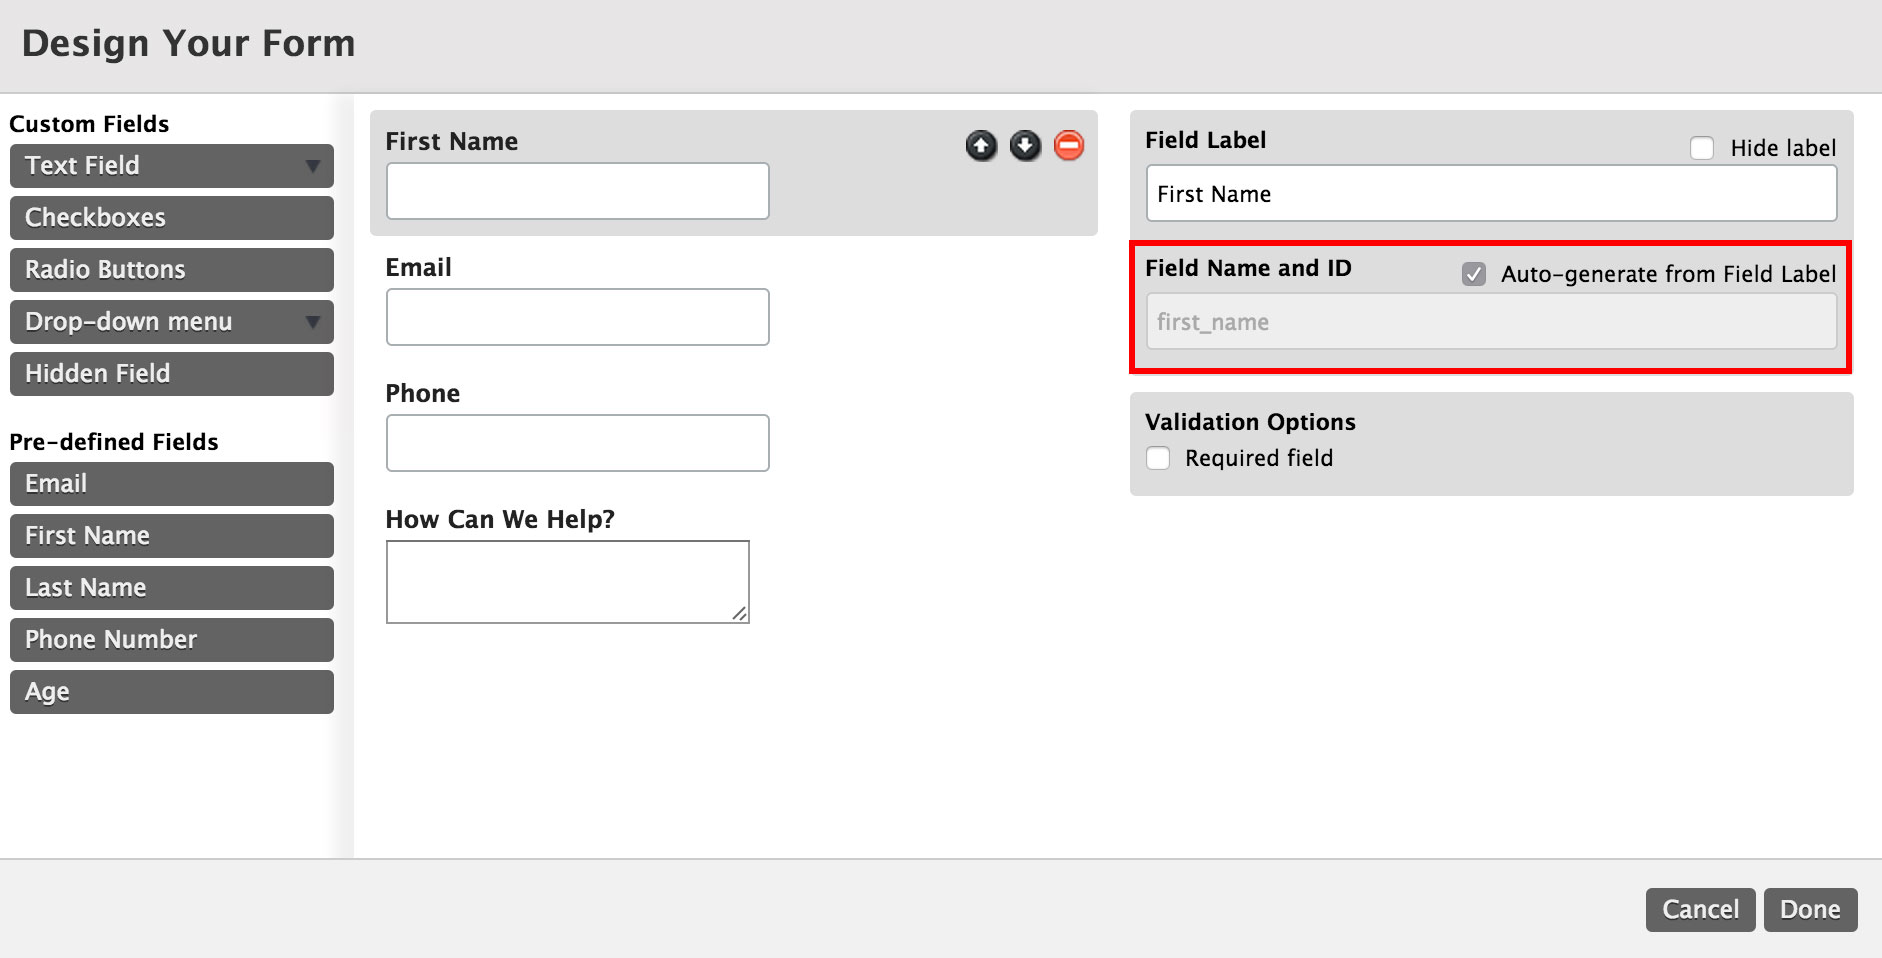
// Define your placeholder texts here, corresponding to Unbounce's field names
var placeholders = {
    'first_name': 'First Name',
    'last_name': 'Last Name',
};
Make sure you always have a comma after each Field Name ID line, including the last one! If you don’t, it’ll break the code and the hint text won’t show up.
- Close the Javascript manager.
- Go back to your form and make sure every label with the hint text has the “Hide label” box checked. This makes it so only the hint text shows up.
- Save and publish!
5. Lightbox
Last, but not least, we have the lightbox form. While lightboxes have gotten a lot of bad press, they also deliver great results. We’ve seen good results using them on landing pages for our clients, so I can personally vouch for their effectiveness.
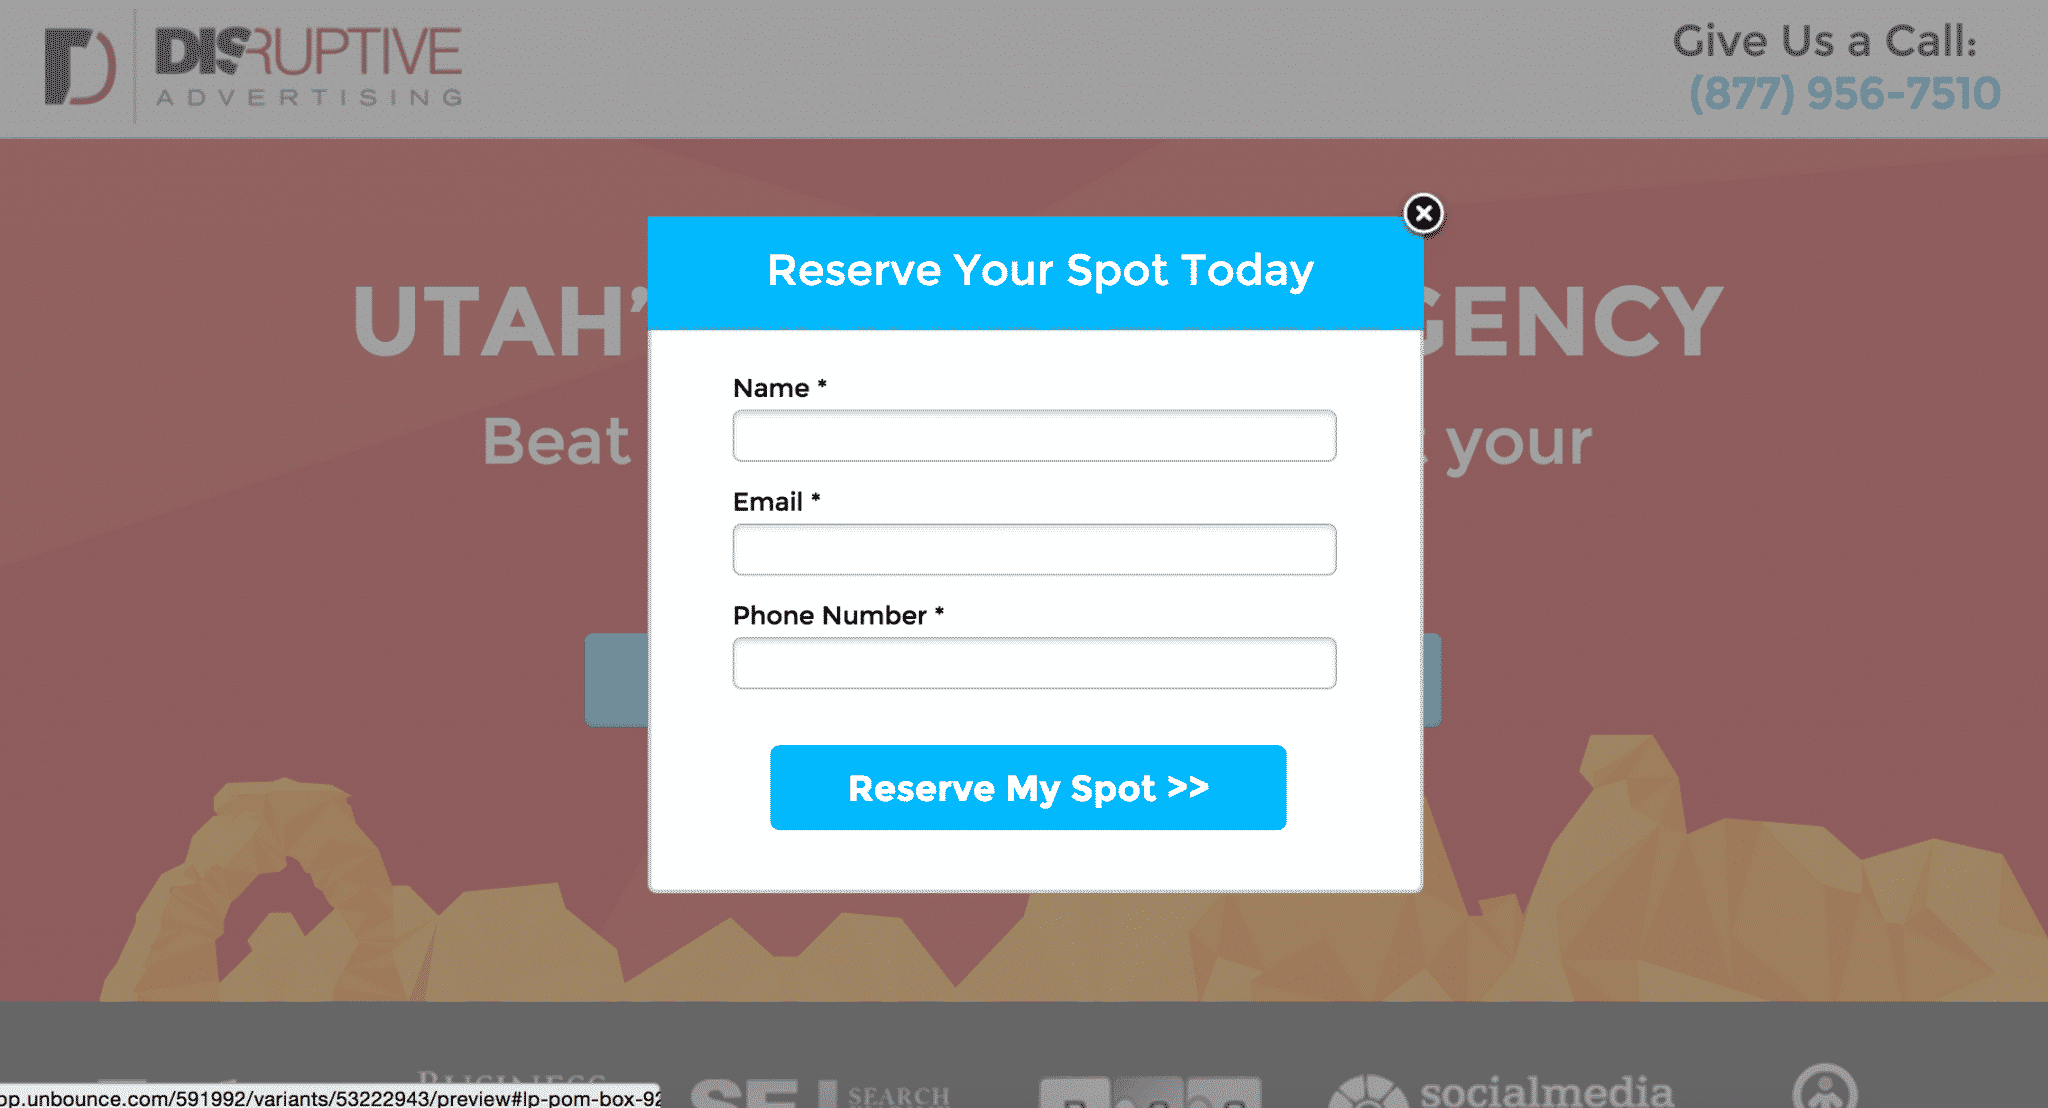
Adding them to your Unbounce landing page is well worth a try. It can boost your conversion rate and it looks pretty good, too.
Here’s how:
- Click on “Javascripts” and then click “Add”.
- Paste this code:
<script type="text/javascript"> // Form Lightbox v1.2 // set the ID of the box that contains your form var boxContainingForm = '#lp-pom-box-105'; // set the ID of the button that will trigger the form lightbox var buttonToTriggerForm = '#lp-pom-button-102'; document.write('<style type="text/css">'+boxContainingForm+"{display:none}</style>"),$(function(){function o(){1==lp.jQuery("form").valid()&&$.fancybox.close()}var n=$(boxContainingForm).width(),t=$(boxContainingForm).height(),a=$(boxContainingForm).css("border-top-width"),i=$(boxContainingForm).css("border-bottom-width"),r=$(boxContainingForm).css("border-left-width"),s=$(boxContainingForm).css("border-right-width"),e=$(boxContainingForm).css("border-top-left-radius"),b=parseFloat(a)+parseFloat(i),c=parseFloat(r)+parseFloat(s),l=parseFloat(e);n=parseFloat(n)+c,t=parseFloat(t)+b,l>0&&($("#fancybox-bg-w, #fancybox-bg-nw, #fancybox-bg-sw, #fancybox-bg-s, #fancybox-bg-se, #fancybox-bg-e, #fancybox-bg-ne, #fancybox-bg-n").css("display","none"),$("#fancybox-outer").css("background-color","transparent")),$(buttonToTriggerForm).attr("href",boxContainingForm),$(boxContainingForm).css({top:"0",left:"0"}),$(buttonToTriggerForm).fancybox({autoDimensions:!1,width:n,height:t,autoScale:!1,padding:0,margin:0,onStart:function(){$(boxContainingForm).css("display","table")},onComplete:function(){$(boxContainingForm).parent().css("display","table")},onClosed:function(){$(boxContainingForm).css("display","none")}}),$(boxContainingForm).addClass("lp-pom-root"),$(".lp-pom-form .lp-pom-button").click(function(){o()}),$(".lp-pom-form").keypress(function(n){13==n.which&&(n.preventDefault(),o())})}); </script> - Set the placement to “Head“
- Name your script “Lightbox” or “Conversion Machine” or something else that works for you.
- Close the Javascript manager.
- Create a box and anchor all of the appropriate content to it (anchor it to the box). For example, you can put a form or extra content on top of the box. It doesn’t actually matter where you put the box on the page. The script will keep it hidden until someone clicks the button. When that happens, the script will trigger the lightbox and center it on the page.
- Jot down the box’s ID Number.
- Create a button on your page that you want to trigger the lightbox.
- Jot down the button’s ID Number.
- Click on “Javascripts” and open the “Lightbox”, etc. script you just created.
- Change the text after var boxContainingForm = ‘ from #lp-pom-box-105 to the box ID Number you jotted down in Step 7.
- Change the text after var buttonToTriggerForm = ‘ from #lp-pom-button-102 to the button ID Number you jotted down in Step 9. If you want to have multiple buttons on the page trigger the lightbox, just add all the button ID Numbers inside the apostrophes and separate them with commas. For example:
// set the ID of the button that will trigger the form lightbox var buttonToTriggerForm = '#lp-pom-button-102,#lp-pom-button-103'; - Save and publish!
Conclusion
These 5 easy Unbounce landing page codes are great for improving your page’s conversion rate and user experience. They take a little extra effort to implement, but the results are well worth the work. For more ways to improve your landing pages, leave me a note in the comments or contact us!
Now it’s your turn. Are there any codes or other Unbounce landing page tricks you love to use?